rauschpt, Author at Rausch Physical Therapy & Wellness - Page 21 of 30

Blog

Client Spotlight: Samantha Gugliuzza


At just 12 years old, Samantha Gugliuzza is our youngest Client Spotlight to date. Sam is a serious soccer player with some big dreams, and Rausch PT will help get her there.

At Rausch Physical Therapy & Sports Performance, our goal is to not only help our patients get back to doing what they love, but to also help educate them on how to avoid future injuries so they can continue to do what they love for many years to come. Samantha Gugliuzza is the perfect example of this. Sam has been playing soccer since she was three, and she is currently in her seventh season playing with the acclaimed So Cal Blues Soccer Club. However, after developing Osgood-Schlatter disease, a childhood overuse injury that causes a painful lump below the kneecap, 12-year-old Sam was in dire need of physical therapy in order to continue playing the sport she loves.

Sam has been a patient at Rausch PT for more than a year now, and she says PT has not only helped her control the pain, but it has also taught her how to avoid future potentially-sidelining injuries.

“I believe that more young soccer players should come to physical therapy,” Sam said. “The physical therapists at Rausch PT can help you with any pain you may be having, but more importantly they help you to prevent future injuries by learning the proper way to warm up, cool down, stretch and work on your form to help you train and play smarter.”

Sam was paired up with DPT Lyndsay DeFilippo, “the Soccer PT” and a former soccer player herself. Together, Sam and Lyndsay have been working to gain strength and stability so Sam can continue to work toward her athletic goals while dealing with Osgood-Schlatter’s.

“As Lyndsay is a former soccer player, she understands the challenges and physical demands of the sport,” Sam said. “She has helped me physically and mentally by structuring a program to build strength in the areas of my body where I need it the most. My strength and stability have definitely increased (for example arch strength, hip strength.) Lyndsay’s words are always in my head reminding me to do a proper warm-up, to have proper form when striking a ball, and most importantly stretching after practice and games.”

It was actually Sam’s mom, Alex, who first discovered Rausch PT. Upon a friend’s recommendation, Alex came to PT while training for her first marathon. Alex says she went from not being able to run four miles without knee pain to running 26.2 pain-free.

“With the help of everyone at Rausch PT I was able to accomplish a goal I did not think was possible (running my first marathon in under four hours,) Alex said. “So I love that I can drop Sam off for physical therapy knowing she is in very capable hands. Over the years I have come to know almost all of the physical therapists and aides there, and it is such an energetic and inviting place to come. I trust them with not only myself, but my daughter as well.”

With the continued support of her family (and Rausch PT-family,) we know anything is possible for this soon-to-be teenage soccer star! Now that Sam is managing her knee pain and has incorporated a recovery program into her training, she is set up for soccer success in the future.

“My goal for soccer is to continue to play at a very high-level and intensity. My team will be playing in the Elite Clubs National League (ECNL) this year, which we are excited about. I also hope to play in high school (while achieving a high level of academics at the same time,) and I hope to eventually play at the college level.”

Good luck to Sam, and remember Rausch PT will always be here to help Get You There!

Three Easy Ways to Avoid Neck Pain While Cycling


Don’t let cycling be a pain in the neck. DPT Max Biessmann shares his three quick fixes for helping alleviate and prevent pain, aches and soreness in the upper back and neck while on your bike.

Three Easy Ways to Avoid Neck Pain While Cycling 1BY MAX BIESSMANN, DPT, RAUSCH PHYSICAL THERAPY
USAT LEVEL I COACH, ASCA LEVEL I COACH, USA SWIMMING COACH


Approximately 66 million Americans enjoy cycling for sport, and why wouldn’t they! It’s a great workout, social, and is perfect for cross training or for people with chronic injuries because of the reduced impact cycling has on the body. Unfortunately, many cyclists find themselves struggling with pain or discomfort, whether it’s the inability to get comfortable on the saddle or one of the most common complaints: neck/upper back pain and discomfort. Many people complain of pain ranging from soreness and aching, to numbness or tingling in their arms and hands, to sharp shooting pains in the neck and arms.

What Causes Neck Pain While Cycling

While cycling, your neck is in an extended position, doing its best to hold up your rather heavy head (the average head is 10 to 11 lbs.) Not only must your muscles do all the heavy lifting since the spine is unable to support the weight directly, but this also causes a closing down of the facet joints in your vertebrae. This constant closing can cause nerve irritation and excessive wear and tear on the joints.

As with anything you do, the longer you spend in a specific position, the more your body adapts to maintain that position. So, when you’re spending hours and hours per day hunched forward at your desk, in front of a laptop, looking at your phone, and on your bike, the more your body adapts to this position. This can cause the common posture dysfunction upper crossed syndrome, which is when your neck extenders (the muscles you use to look up) get short and tight, while the deep neck flexors (the muscles that tuck your chin down) get stretched out and relatively weakened.

Three Easy Ways to Avoid Neck Pain While Cycling

This combination of muscular imbalances and decreased nerve root space can lead to any combination of symptoms from chronic aching to shooting pains. Luckily, there are several very simple things you can do to decrease these symptoms if you already have them or prevent them from starting in the first place.

#1: Check how you’re riding your bike
Lawrence performing a Bike Right session at Rausch PT.The first thing to consider is how you’re riding your bike; a very small change here can have a big positive change. Are your arms always locked out at the elbows? Do you have a death grip on the bars? Are your shoulders hunched up and stuck in your ears? All of these can lead to cycling pain. Here are some quick fixes to make sure you’re riding your bike right:

  • Make sure your elbows are slightly bent in order to allow your arms to absorb vibrations and impacts from the road or trail.
  • Your hands should be snugly gripping the bars or hoods, but still staying relaxed in order to allow proper blood flow.
  • Shoulders should be relaxed and loose to help absorb shocks your elbows can’t absorb alone.
  • Make sure to look forward with your eyes as well as your neck in order to try and reduce some of the extension in your neck.
  • Check your helmet; it may be sitting too low on your forehead and obstructing your view causing you to look up more.

Remember, while cycling the only part of your body that should be working really hard is your legs; make sure you’re keeping your neck, shoulders and arms in a relaxed ready to go state. If you don’t feel you’re moving correctly on the bike, schedule a Bike Right session and have a physical therapist assess how you’re moving on your bike; having someone else watch you ride can help isolate the specific movement deviations and bad habits you may have developed over time.

#2: Work your body

To help prevent some of the adaptive muscle shortening and nerve compression from cycling, try these 10 simple exercises and stretches. These are also great exercises to do if you work at a desk a lot!

Stretches/Mobility:
  1. Pec Stretch: Stand in a doorway and put your arms out to either side and slowly lean forward until you feel a stretch through the front of your chest into your armpit. Play with the height of your arms above, at or below your shoulders to get the various fibers of the muscle. Do 2-3x for about 30 sec each.
  2. Upper Trap/Scalene: Sitting in a chair, grab the bottom of the chair and side-bend away from that side. Look up for a scalene stretch and look down for a upper trap stretch. Do 2-3x for about 30 sec each side.
  3. Neck Extensors: While sitting, gently pull the back of your head forward while gently pushing in on your chin till you feel a stretch just at the base of your skull. Don’t crank on this one, take it easy on your jaw, it should be a fairly gentle stretch. Do 2-3x for about 30 sec.
  4. Pec Release: Take a tennis or lacrosse ball and place it between your chest, near the front of your armpit, and the wall. Roll the ball around until you find any tender spots and spend about 10-20 sec massaging that area. Spend about 1 min on each side
  5. Upper Trap Release: Place a tennis or lacrosse ball in pillow case and lean against the ball and a wall anywhere between your shoulder blade and spine up through the base of your neck. Massage out any tender or sore spots for about 10-20 sec per area; spend approximately 1 min on each side
  6. Foam Roll Extensions: In order to take strain off of the joints of your neck make sure your upper back can move well. Lie across a foam roller on your back with your arms supporting your head and your hips on the ground and lean back to extend your upper back. Start about halfway up your back and continue up until just short of your neck. Do about 5 extensions at each spot moving the foam roller up about an inch each time.
  7. Towel Rotations: Wrap a small hand towel or pillowcase around the back of your neck, grab the ends with the opposite hands. Pull down to anchor the towel with one hand and pull the towel across your chin as you rotate your head, when you get to the end of your range add a little bit of overpressure from the towel to help stretch into the movement.
  8. Thread the needle: Begin in quadruped position (on hands and knees), place foam roll on the outside of one arm. Once there, reach with the arm furthest away from foam roll under the body to make contact on top of foam roll and roll through, rotating upper spine.


Strengthening:
  1. Chin Tucks: Begin by lying flat on your back with a soft pillow under your head. First gently press the back of your head into the pillow as you tuck your chin in, as if you’re making a double chin, hold for 10 seconds then relax, repeat 10-20 times. If this is easy practice against a wall while doing a wall sit.
  2. I’s, T’s and Y’s: Lying flat on your stomach, across a swiss ball or end of bed or couch, place your hands at your side (I) out to the side at shoulder height with thumbs up (T’s) or above your head and out to the side (Y’s). The focus of the movement is to move your shoulder blades not so much your arms, squeeze your shoulder blades together and squeeze for 10-15 seconds and relax, repeat 10-20x in each position. The Y’s will be the hardest so start with less reps here and advance as it becomes easier. While lying on your stomach focus on good posture through your entire spine all the way to the top of your head.


#3: Get a Bike Fit

If none of these “quick fixes” seem to help, it may be time to reassess your bike fit. First off, were you ever fit? If so, how long ago? Your body changes, so you should really get a bike fit every year or so.

There are many aspects of the bike fit that can affect how much strain and what kind of strain is being placed on your neck and upper back:

  • The most obvious is your handlebar height; the lower they are the more you have to look forward to see (looking at you, triathletes!)
  • The length of your bike, the distance between saddle to handlebar, can also affect how much you have to reach and how you carry your weight through your arms.
  • The width of your handlebars may be too wide or to narrow, which can make it difficult for your arms to rest or settle in a comfortable position.
  • Triathletes, look at both bullhorn and aerobar pad positions.
  • The angle of your hoods on a road bike might pitch the angle of your wrists and affect how you carry your weight through your arms.
  • The tilt of your saddle can cause you to be unbalanced between handlebars and saddle.


Nikki performing a Bike Fit at Rock N’ Road Cyclery Laguna NiguelBike fitting should be left to a professional fitter, as small changes in one area of the bike can have a huge effect on other parts of your body. A proper bike fit is a valuable service; these pros can make the necessary adjustments to your machine that will help with comfort, injuries and power output. You can google around for local bike shop that does Bike Fits, or if you’re in South Orange County check out Rausch PT’s tried and true favorites:


Conclusion

Don’t let neck pain stop you from enjoying the sport you love. By making a few quick adjustments and getting a professional bike fit, you can continue to ride hard and ride long for many years to come.


StaffHeadshot-MaxMax Biessmann, DPT is a licensed physical therapist at Rausch Physical Therapy & Sports Performance. He received his Doctorate of Physical Therapy degree at the University of St. Augustine, San Marcos in 2016 and started his career at Rausch PT. Max is passionate about helping people achieve their goals through physical therapy and innovative rehab technologies. As the Endurance Sports PT, Max says he’s lucky to be able to combine his professional coaching experience and PT knowledge to help his patients achieve their personal bests in sports and daily life.

Learn more about Max and our other physical therapists »


April 2017: Clinic Phone Updates


Last updated: April 21, 2017

On April 18, we discovered that our clinic phones, specifically the message recording system, have not been working properly. Upon receiving complaints of voicemails going unreturned, we had the phone system company look into the issue, and they informed us that periodically since January 1, voicemails have not been recording/saving due to an undetected system error. As frustrating as this is, now that we have identified the problem we are able to take the necessary steps to resolve it as quickly as possible! In the meantime:

If you are attempting to schedule, cancel or reschedule an appointment, or if you need to get in touch with us for any reason, please follow up with an email to info@rauschpt.net if you do not receive a call back within two hours.

(Please include your full name, phone number, and time you left a voicemail.)

We apologize for the inconvenience, and we sincerely appreciate your patience and understanding during this time. At Rausch Physical Therapy, patient care is our top priority. We value every person who trusts us with their care, and in our eyes, that starts from the moment you first call our office. You’re here to work hard, recover and get stronger; the last thing we want is to have you worry about something as simple as a phone call. We extend a sincere apology to anyone who has been effected by this phone messaging system error, and we appreciate everyone for their continued patience as we update our phone system over the next few weeks so we can provide you with the best patience experience possible here at Rausch PT.

Staff Spotlight: Max Biessmann

As “The Endurance PT” at Rausch Physical Therapy & Sports Performance, it makes sense that Max Biessmann’s favorite saying is, “Always remember to enjoy the journey, the destination will take care of itself.”

Max has been on some pretty epic journeys in his own life so far. From a summer spent in Germany as a college intern in a virus/stem cell laboratory (when he also competed in his first IRONMAN in Frankfurt) to now nine IRONMANs later and a doctor of physical therapy degree to boot, Max is proof that you’ll always wind up where you belong—if you can keep your head in the game.

Max’s first taste for physical therapy came while rehabbing a calf injury that was threatening to stop him from running the Frankfurt IRONMAN. The experience made Max the Microbiology Student more interested in human movement and sports performance, compelling him to take sports physiology and kinesiology courses. While unfortunately it was too late to switch his focus, Max never gave up on his dream to combine his love of science with sports. After graduating with a degree in microbiology, Max found success as a swim coach and worked part-time in a local bicycle/triathlon shop, all while taking classes in anatomy and physiology, until finally deciding that physical therapy school would be his ticket to the rewarding career he always dreamed of.

While he may have taken a winding course to get to his final destination here at Rausch PT, Max says every part of his journey has only helped to build his expertise. For instance, as a coach Max can see movement dysfunctions and correct them with cues, and as a physical therapist he has the skills to manually affect the tissues to improve and reduce the limitation causing the dysfunction. As a triathlete, Max has an appreciation of the highly repetitive nature of endurance sports and understands the mental struggle at the core of all these types of events; mix it all up, and you have a recipe for the perfect Endurance PT.

In fact, Max’s love for endurance sports started when he was very young. Max started swimming competitively at the age of five, and says he was immediately drawn toward the longer freestyle events. In high school he chose cross country over track, and in college he left the UC Davis swim team to pursue triathlon.

“I really enjoy the challenge of competing against yourself, and the mental challenge of endurance racing,” Max said. “Of course there’s always competition to race against others, but at the very heart and soul of endurance racing is the self-conflict within yourself between the physical and mental.”

With ten IRONMAN competitions and plenty of trail, road, and open swim races under his speedo, Max has definitely experienced his fair share of internal struggle. Like in 2009, at the Arizona IRONMAN, when Max was desperate to qualify for Kona, but mentally broke down in the run and gave up on a race he says still haunts him; or take his best, “guttiest” race, the 2014 Vineman, when Max landed in the med tent (after winning the race) 15 lbs. lighter and severely dehydrated in need of two liters of fluid.

Max after his win at Vineman 2014, severely dehydrated and 15 lbs. lighter, giving the thumbs up for pushing your limits!”As hard of a lesson as [Arizona] was, it’s had the most impact on my mental and tactical approach to racing and coaching,” Max said. “At 2014 Vineman, I proved to myself that I can power through anything.”

Currently, Max is gearing up to start his second season as a professional triathlete, however he says he’s even more excited to continue “coaching” his patients at Rausch PT.

“I’m excited to keep learning about the human body every day,” Max said. “I love combining the lessons I continue to learn from triathlon with my PT work—so I can become a better athlete, coach, and physical therapist. You have to always remember to enjoy the journey, the destination will take care of itself.”

The Four-Step (Dry) Swim Warm Up


While most triathletes focus on training for the run and bike portion of their race, it’s actually the swim that can make or break your day. A proper warm up is key to success—with or without being able to get into the water before your start.

The Four-Step (Dry) Swim Warm Up 2BY MAX BIESSMANN, DPT, RAUSCH PHYSICAL THERAPY
USAT LEVEL I COACH, ASCA LEVEL I COACH, USA SWIMMING COACH

It’s no secret that triathlon is a very difficult sport to find the time to train. Not only do you have to train a large volume to build the proper endurance, but you also have to find the time to train in three different disciplines.

Running and cycling share the most in common, as both are leg-driven sports and make up the majority of your race, and because of this, many triathletes will focus most of their time and effort into training for these two sports. However, I believe that it’s the swim portion of triathlon that’s the most important; a solid swim starts your day off right and sets you up for success for the rest of your event. As the saying goes, “You can’t win the race in the swim, but you can lose it.”

Beating the Rush

As the first of the three events on race day, the swim has an undoubtedly hectic beginning. Everyone is still fresh, nervous, and pumping with adrenaline, which makes for a fast and chaotic start to your day. Still, if you’re looking to place well or find the feet of the right person, it’s important to be able to handle this initial energy surge and settle into your pace after the first 300 to 500 meters.

A proper warm up is crucial to combatting this high-intensity rush so you can avoid overloading your body with lactic acid or excessively tapping into your anaerobic system, which is especially important since you’re about to do an activity with limited oxygen availability.

Fish Out of Water

Most events allow racers to get into the water before start time to warm up their arms and shoulders, get their wetsuit to “settle” onto the body, and acclimate to the water temp, which is especially helpful for those of us racing in So Cal in the cold  Pacific Ocean. However, there are several very popular races on the IRONMAN circuit, such as Oceanside 70.3 or St George 70.3, that make it challenging or near impossible to get into the water before the start of the race due to race logistics.

While you should do your best to always get in the water before a race, a “dry swim” warm up using theraband tubing is another great way to get your arms and shoulders ready for the load of the swim. If for whatever reason you can’t get in the water before your race start (or even for your weekly swim workout) this “Dry Swim” Warm Up will quickly activate the stabilizing muscles of the shoulder complex to prepare you to swim at your best.

Four Steps, 10 Exercises: The “Dry Swim” Warm Up

In order to complete this warm up you’ll need a relatively long (3 to 4 ft.) piece of surgical tubing or theraband. Light resistance (green or red theraband) is best, as you’re not trying to load up the muscles or increase strength; this is just get the muscles moving and warmed up. The key is to focus on the speed and quality of the movement.

Step 1 – Complete your usual warm up or pre-race routine
  • Start with your usual jog or dynamic stretch warm up to get your lower body and cardiovascular system ready, as these will carry you throughout the entire day.
  • Put on your wetsuit so you can check in the morning clothes bags and be ready to go at any point.
  • Don’t forget your body glide or lubricant for neck, underarms, etc.!


Speed Skaters

Step 2 – Get your shoulders ready to move

Begin with a few arm circles, forwards and backwards, both single and double arms. This is a great time to check and adjust the fit of your suit on the neck and shoulders. Make sure to move your whole shoulder complex, including the scapula. Focus on relaxed arms, generating the movement from the trunk and shoulders and preparing the joints for movement.

Then, go on to speed skaters. This involves bending at the waist and swing your arms side to side with a bit of thoracic spine rotation—another key point in being able to swim well. Speed skaters also help by adding a dynamic stretch to your pec muscles and anterior chest. Speed skaters can also be done standing, known as helicopters.

Do each stretch for about 15-30 seconds.

Step 3 – Waking up the shoulder stabilizers

Time to break out the theraband! A light-resistance piece of theraband or surgical tubing is all you need to wake up the muscles of the rotator cuff and scapular stabilizers and prepare your shoulder joint for the stresses that will be applied during the swim stroke.

Perform 20 to 30 reps or 30 seconds per exercise.

[one_half]

Internal/External rotations with arm at side

Start with your arm at your side with the elbow bent 90 degrees, then depress and squeeze the scapulas together. For external rotations, move your hand away from the body; for internal, move the hand towards the body.

[/one_half]
[one_half_last]

Rows

Standing facing the band with elbows bent about 90 degrees, squeeze the scapulas together and bring the elbows straight back. Make sure to keep the scapulas anchored and depressed the entire time.

[/one_half_last]
[one_half]

Flexion/Scaption Raises

Standing on the band, lift the band up to shoulder height with minimal hiking of the shoulder. Flexion is directly in front of the shoulder, and scaption is at about 45 degrees to the side.

[/one_half]
[one_half_last]

Standing Ys

With the band looped around a pole, start with both arms crossed and at the opposite hip. While squeezing the scapulas together and keeping your back straight, bring your arms up and out to form a Y shape above your head.

[/one_half_last]

Step 4 – Waking up the primary swim movers

The final step is to warm up the primary swim muscle: the latissimus dorsi muscle. This is the most swim-specific part of your warm up, and it’s a great time to work on the early, high-elbow arm position that’s critical for generating a good catch while swimming. As you move through these next four exercises, focus on the timing of the stroke pulls; start the movement slower and increase the speed through the back of the pull—just as you would with a normal stroke—then control the return (don’t just let the arm snap back to the front.)

Spend about one minute on each exercise; repeat until you’re warmed up and ready to go.

[one_half]

Standing Swimmers

Stand facing a pole with scapulas depressed and controlled pull from about shoulder height down to your hips. Your arms should move in a direct line with shoulders and hips.

[/one_half]
[one_half_last]

Front Quadrant Pulls

Bent forward with an active core and arms out in front of the shoulders, begin a stroke with a good high-elbow position and pull back until about the shoulder. Focus on coupling scapular depression and elbow flexion in order to wake up and perfect the timing of the arm engaging with the scapula moving.

[/one_half_last]
[one_half]

Butterfly Pulls

Both arms together do a front quadrant pull, but continue the motion all the way back to the hips. Make sure focus on accelerating the pull from shoulder to hip. Bring arms back out to the front underneath the body in a controlled fashion. Keep the arms controlled while recovering and don’t let them elevate above the shoulder. Do not bounce the whole body; focus on isolating the arms.

[/one_half]
[one_half_last]

Freestyle Pulls

Same as butterfly pulls, but one arm at a time. Work on adding a little thoracic rotation. Do the first few with an under-the-body recovery, then you can advance to a more freestyle-like recovery—just be careful of pulling on the shoulder while it’s coming up behind the hip.

[/one_half_last]

Conclusion

This warm up is a great way to help prepare for the swim—with or without being able to get into the water. Make sure to play around with the timing before swimming during normal training; some races will make you wait around a while in a chute before swim starts. Also make the routine your own, you might benefit from more time doing double arm butterfly pulls to help wake up your lats and primary swimmers, or more time with speed skaters and freestyles in order to help open up your stiff thoracic spine. It is still important to get into the water as soon as possible to try and swim if possible, get water into your wetsuit, and acclimate to the temperature of the water. At the end of the day, make sure you practice this and are comfortable doing it before your normal swim training sessions: never try anything new on race day!

Have fun out at the races. Each triathlon is an adventure, don’t lose sight of the journey by only thinking of the destination.


StaffHeadshot-MaxMax Biessmann, DPT is a licensed physical therapist at Rausch Physical Therapy & Sports Performance. He received his Doctorate of Physical Therapy degree at the University of St. Augustine, San Marcos in 2016 and started his career at Rausch PT. Max is passionate about helping people achieve their goals through physical therapy and innovative rehab technologies. As the Endurance Sports PT, Max says he’s lucky to be able to combine his professional coaching experience and PT knowledge to help his patients achieve their personal bests in sports and daily life.

Learn more about Max and our other physical therapists »


Tackling Common Soccer Injuries


With the ever-growing popularity of soccer comes an increase in soccer-related injuries in players of all levels. PT Lyndsay explains who’s at risk for the most common injuries and why, and (more importantly) how to avoid sidelining and/or chronic injuries.

LF-BLOG
BY LYNDSAY DEFILIPPO, DPT, RAUSCH PHYSICAL THERAPY
While football, basketball, and baseball may be the most popular sports in the U.S., soccer reigns supreme in most other countries. Millions of people around the world love to watch and play soccer, with an estimated 200,000 professional athletes and 240 million players at lower-level amateur status.

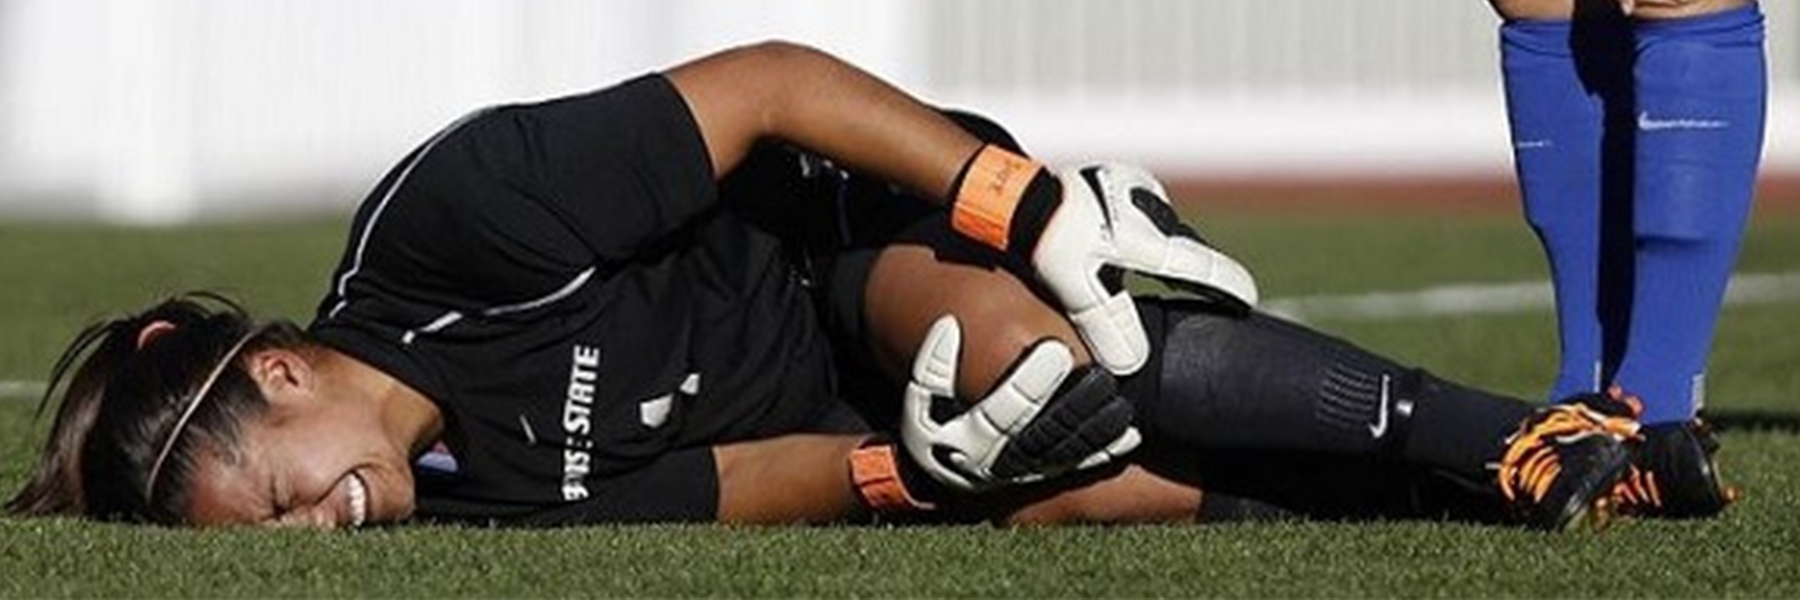
With more people participating in this physically-demanding sport, coupled with a dangerous societal obsession with year-round competition (meaning little-to-no breaks for players,) we are seeing more and more soccer-related injuries. While head and neck injuries are not unheard of, the vast majority of soccer injuries occur within the lower extremity; of those injuries, the foot/ankle complex is the most affected, followed by the knees, thighs, and hips.

With this heightened rate of injury comes an increase in the time players are spending on the sidelines, unable to play the sport they love. Research shows that on average, soccer players will sit out seven to 30 days when they suffer mild to moderate injuries. However, when you compare that to the average time it takes for soft-tissue and bones to properly heal, you can clearly see that the timelines don’t match up.

Tackling Common Soccer Injuries 3

Athletes are returning to sport too soon and playing on tissues that are still injured, placing  them at increased risk for re-injury, as well as heightened risk for new injuries. You may ask, “Well why are the professionals back on the pitch faster than me?” Keep in mind, it is their job to play soccer, they are in PT and rehab sometimes 8 hours a day, and the team is losing money each minute they are on the bench. Many times a professional athlete will also return sooner than they should, again increasing their risk for further injuries or sustaining new injuries from compensations within the body.

Who’s At Risk, and Why?

While research is still on the fence as to what definitively causes the most injuries in soccer players, here are some of the more notable findings I’ve come across:

  1. Most soccer injuries occur in competition versus practice scenarios, when physical demands, contact, intensity, etc. are all heightened.
  2. A study by Hawkins and Fuller reported 59% of injuries were caused by non-body contact, while 41% are caused by body contact.
  3. Other studies show that tackling is the biggest cause of injury.
  4. Other factors to consider are body mechanics and alignment, gender, and time spent playing the sport, as well as outside variables, such as pitch surface, athlete footwear, etc.

Basically, there are plenty of sport specific factors that put players at risk of sustaining lower extremity injuries; again, the most common area for concern in soccer players. In fact, one study has shown ankle sprains account for 80% of injuries in soccer, compared to 40% across all other sports. Even if you’re lucky enough to have never “rolled your ankle” while playing soccer, you may be one of those players who has sustained other common lower-body injuries, such as a contusions, strains, sprains, muscle tears—and in more severe cases—ACL tears, meniscal pathologies, and MCL sprains.

Seven Ways to Combat Common Soccer Injuries

So, if soccer players at all levels are constantly at high risk for sidelining injuries due to the nature of their sport, what can they do to prevent them?

First and foremost, athletes (as well as parents and coaches) need to put their body’s needs first, and if/when injury occurs, they need to respect the amount of time it needs for proper healing and recovery. This shift in mindset alone will help players avoid not only re-injury, but also future injuries and chronic pain down the road.

Simply put, playing through the pain is no longer an acceptable excuse (unless you don’t care about chronic injury, early arthritis and a host of other health issues later in life.) While athletes in demanding sports will always be at risk for injury, here are a few steps you can take to get started on your path to preventing overuse injuries and chronic pain:

  1. Always, always warm up. Do a proper, structured dynamic warm up program, such as the FIFA 11+ Program, before every practice and game. A dynamic warm up includes exercises that mimic the movements you’ll actually be doing while playing soccer, which properly preps your body to perform.
  2. Focus on exercises that target and build stability in the most vulnerable areas of soccer players, i.e. the ankles, foot, knees, and hips. Some good exercises for this are single leg balance drills, lateral walks with resistance bands, heel raises, and hip series exercises targeting lateral hip stabilizers.
  3. Build a good support system. Find a good coach, physical therapist, certified athletic trainer, and/or other sport professionals to assist you with injury prevention techniques. These people should share your focus on listening to your body, and should never push you to return to sport before your body is properly healed.
  4. Make sure to stretch and foam roll after every practice, training session, or game. Click to download the Rausch Physical Therapy & Sports Performance Foam Roll Routine poster.
  5. Emphasize proper form. Always focus on form when performing sport-specific movements (eg. long kicks, corners, short kicks, penalties, passing, etc.) They may feel second-nature after many years playing, but when you get sloppy you risk re-injury.
  6. Do NOT depend on braces, taping, etc. long term to “fix” an injury. While these bracing methods are good for prevention and short-term protection, ultimately you are treating the symptoms of the problem, not the cause. Visit a physical therapist who can use manual therapy to actually rehab traumatic and chronic injuries, as well as create an exercise program to strengthen your weak areas to keep you off their table and on the field.
  7. Listen to your body! Pain is not the only indicator for injury. Instability, weakness, poor-tissue mobility, etc. can all indicate that an athlete is NOT ready to return to the pitch.


StaffHeadshot-LyndsLyndsay DeFilippo PT, DPT, CKTP received her Doctorate of Physical Therapy from New York University in 2010. She’s a Graston Practitioner and a Certified Kinesiotaping Practitioner. Lyndsay looks at each injury as a constantly changing puzzle, which is only solved when her patient returns to what s/he loves doing. She enjoys helping with the full recovery process, which includes providing the education, tools and fundamentals to prevent re-injury and the potential for new injuries.

Click to learn more about Lyndsay and our other physical therapists »

Proper Lower-Body Alignment for Maximum Pedal Power


Are poor cycling mechanics effecting your power output? Dustin shares his thoughts on proper biomechanics on the bike, as well as the single exercise you need to ensure all your hard work is translating to optimum pedal power.

Blog-Dustin
BY DUSTIN HANCOCK, DPT, RAUSCH PHYSICAL THERAPY
Are poor cycling mechanics robbing you of your precious pedal power? You can train long and hard to improve your performance on the bike, but if your body alignment is off, you’re putting yourself at risk for both injury and power loss.

For cyclists, proper biomechanical alignment in these three lower extremities is the key to not only avoiding injury, but also to increasing your power output levels.

Hips

As the powerhouse of the body, the hips are an important aspect of a cyclist’s biomechanics. There are several common issues cyclists face in this area, such as overuse of the quadriceps muscles while pedaling, as well as tightening of the hip flexor from sitting for too many hours in a day.

Tight hip flexors inhibit the most important hip extensor muscle, the gluteus maximus, while a lack of full flexion results in compensations at the spine, which can cause joint stress, compression of the discs, lower back pain, and saddle-related pelvic floor dysfunctions.

The “best” hip position while riding is different for each person, which is why it’s important to get a professional evaluation to figure out the natural shape of your hips (Q-angle) and ideal riding style. However, the general rule is to imagine a plumb line from the hip through the middle of the knee and finishing between your second and third toes. Since everyone is different in shape and size, the best position is usually the most natural feeling to you; so, hop on a trainer, close your eyes, and feel to the path of least resistance.

Knees

Think of your legs as pistons; as they attack a hill, they need to keep the power straight and consistent to operate effectively. As a physical therapist, I always perform a frontal plane exam on cycling patients to check that their knees are tracking correctly, as poor alignment causes power loss and puts you at risk for injury.

My frontal plane exam simply consists of having my patients stand in front of me and perform a Single Leg Squat. The squat simulates the cyclist’s foot position, and it shows me what my patient feels is comfortable. In my evaluation, I look to see if the feet are turned out, which results in a collapsed arch and can cause a deviation or torsion strain at the knee. I also check if the hips move backwards first when the patient squats, indicating it’s a gluteal-dominate movement, so the trunk of the body can stay controlled, which ensures core/hip stability. The knee should not go past the toes, and I also advocate for the shins staying as vertical as possible to take stress off the ACL—the most important ligament in the knee.

You can perform a frontal plane exam yourself at home by performing a Single Leg Squat in front of a mirror. As you squat, check that you’re keeping the knee tracking wherever the second and third toes are pointed; this ensures all your power is being transferred to the bike.

Ankles

Your ankle joint positioning is important to efficiently transfer the power into the pedal without any leaks in the system. There are generally three postures of cyclists—toe-down (stabbers), neutral/horizontal, and heel dropped—each of which has some pros and cons. The toe-down posture is designed for flexibility or compliance to the surface beneath, while the neutral/horizontal and heel-dropped ankle postures are understood to derive more power.

Heel Drop: Good

The human body is structurally designed to allow us to use muscles as pulleys and produce power to accelerate our body. When the ankle is in the heel-dropped posture, the ankle is positioned so that you have the least power transfer loss; this is known as a “closed pack” position” in medical terms, meaning the shape of the bones lock into place and all ligaments are in tension. This stiff ankle joint position allows every watt to transfer into the pedal.

Toe Down: Not So Good

If your toe is pointed down in the stabbing posture, typically you’ll lose power on the downstroke, as the ankle will suck up some watts in this “softer” ankle joint position. The analogy that helps the understanding of this concept is to think, “What is more efficient when climbing a steep hill, a bike with full suspension opened up in the rear, or a hard tail or lock out in the rear?” The full suspension example above is like having the stabbing ankle posture (too soft and springy) and as you power stroke up the hill you are leaking power.

Again, each individual is different, so I say the most comfortable, relaxed ankle posture is what’s best for you. However, biomechanically speaking, you may have an advantage dropping the heels during the power stroke to ensure all the power and hard work goes where you want it to.

Prescription for a Quick Fix

There is one particular exercise cyclists can do off the bike to ensure their lower-body biomechanics stay in check: the Single-Leg Squat on an unstable surface (such as a BOSU® Ball*.)

Correct Single-Leg Squat Mechanics:

  • Hips move back first
  • Toes stay relaxed while ankle stays relatively flat to the ground
  • The motion down is controlled and super slow (at least six seconds) with good alignment
  • Finish strong by going back up fast, squeezing the buttock at the top

Start with 10 to 15 reps focused on form, then work up to three sets of 10 to 15 reps, two to three times a week.

*If you don’t have a BOSU®, use a pillow as the unstable surface.

Applying the PAP Theory for MTB

To make this “quick fix” exercise more sport-specific, mountain bikers can apply the Post-Activation Potential (PAP) theory to help unleash greater potential power gains for exploding up those steeps hills.

PAP is a high-level training concept that combines heavy-resistance strength training with explosive plyometric, sport-specific movements. The concept of “explosion timing” and the focus on quality alignment under heavy loads is at the foundation of each movement.

[vsw id=”QmIhTkEQFsA” source=”youtube” width=”425″ height=”344″ autoplay=”yes”]

Single Leg Squat Using PAP:

  1. Stand on one leg. Squat in a controlled and slow downward motion (five to six seconds down) with a focus on good alignment.
  2. Start the upward motion slowly for one to two seconds, then explode to finish.

Applying the PAP theory to a Single Leg Squat—with a two-second delayed, explosive movement—will not only improve your cycling biomechanics, but also your climbs.


DustinDustin Hancock, DPT graduated from San Diego State University with a bachelor’s degree in kinesiology/nutrition. He went on to receive his doctorate in physical therapy in 2011 from University of St. Augustine, and began his career at Rausch Physical Therapy and Sports Performance in 2012. As a snowboarder and mountain bike enthusiast, Dustin specializes in treating extreme sport athletes. As a physical therapist, Dustin says he looks forward to being a companion every step of the way on his patient’s path to recovery.

Click to learn more about Dustin and our other physical therapists »

Client Spotlight: John Elliott


At 72 years old with progressive heart and lung conditions, John Elliott may not be able to speak loudly or for a long time, but he has a lot to say. As one of our long-time patients, John is a staple around the clinic, and his determination and attitude continues to inspire our staff to get involved and never give up.

John Elliott first came to Rausch Physical Therapy & Sports Performance nearly six years ago, when a car barreling down the wrong side of the road hit him head-on as he was waiting at a stop sign on his bicycle. John suffered shoulder, leg, ankle, and neck injuries, which meant a good deal of intensive physical therapy. According to John, he’d been to physical therapy at a number of facilities over 30 years, but the approach and atmosphere at Rausch PT took him by surprise, especially its focus on sports recovery and performance.

“Since being treated [at Rausch PT], I can’t imagine ever again being treated by a PT who has not participated in sports and experienced the strains and issues that attend just about every sport. Sports injuries are not ‘if,’ they are ‘when,’ and I feel that a PT who has experienced these issues has a better understanding than someone who just got it from a book or as feedback from their patients.”

Ride On, John

John has been a cyclist his entire life, a fact that his cardiologist now says is the major reason why he’s survived his heart problems. Ironically, 25 years ago his heart and lung issues nearly forced him off the bike for good. John is a retired Nuclear Health Physicist, and when an industrial accident in an adjacent laboratory facility impacted his health enough to force me into a disability retirement, it also drastically impacted his life-long road bike activities when balance became a major issue.

Apparently 50 years of riding 2,000 to 4,000 miles a year was too hard to abandon, so John researched his alternatives and eventually purchased a recumbent racing trike. It was during his daily trike rides when John met two Challenged Athletes, also riding adaptive cycles, who encouraged John to re-enter competitive events through Challenged Athletes Foundation as a relay triathlete.

So, at 65 years old, John entered his first event, and since then (between yearly hospitalizations) John has been able to complete several races each year, from sprint tri events to an Ironman 70.3 event. However, his most treasured event is the San Diego Triathlon Challenge benefiting CAF.

Challenge Accepted

“CAF and the mentoring program are major inspirational forces in my life, and have become an inseparable part of cycling for me,” John said. “Working with athletes facing many different physical challenges always reaffirms my belief that the easy roads only lead downhill; you owe yourself the climb!”

It was John who introduced Rausch PT to the Challenged Athletes Foundation in 2013. The residual pain from his car accident injuries prevent John from running or swimming, and so he always enter triathlons as a relay team member. In 2013, John wanted to have his support team behind him, so he approached a few Rausch PT staff/athletes to join his relay team, and ever since then John has been a driving force behind our clinic’s involvement in CAF and SDTC. This year alone, Team Rausch PT raised more than $10,000 for CAF… thanks to John’s encouragement to never give up.

John nearly didn’t get to race this year after undergoing bypass surgery in June. With only four months until his 44 mile bike race at SDTC, John’s surgeon said it wasn’t going to happen, that it would at least a year to recover from the surgery. In fact, John wasn’t even allowed to walk outside until mid-July, or get on a bike until August for his first 2-mile “baby steps” ride. Nevertheless, John says that his years of physical therapy at Rausch PT, learning how to re-train his body after his 40 heart hospitalizations to-date, really paid off. His physical therapist, Dustin Hancock, coordinated with John’s cardiac rehab team to modify John’s PT treatment to the realities of “being held together with wire and glue,” as John puts it. Dustin also helped coach John on how to work in 1,200+ miles of progressively increasing distance and speed cycling in just two shorts months before SDTC.

“The best part for me is always the actual event–the fun, companionship, and inspiration of all my teammates and all the Challenged Athletes. That, and the satisfaction of having made it back to the starting line one more time!”

Never Give Up

John says the hardest part of his recovery journey is the progressive nature of his heart and lung issues, along with aging. Each trip to the hospital means weeks of conditioning before he’s cleared for cycling again, which means keeping a training schedule can be difficult. Still, John says he’s confident that with the clinic atmosphere, the skill of the PTs and helpfulness of the PT aides, and the fact that the staff at Rausch PT listen to what you are saying about your injury and progress will keep him in the saddle for as long as possible.

“I don’t plan on stopping my riding, so I probably won’t ever stop needing PT at Rausch.”

Your Prescription to Wellness in 2017


In the past, physical therapy has primarily been a field of reactive treatment for an issue, a way to get you back to good health. But is that really the best way to take care of your well-being? Kevin Rausch, President and Owner of Rausch Physical Therapy & Sports Performance, shares his new vision for the future of PT to better serve YOUR health and wellness.

KR-BLOG
BY KEVIN RAUSCH, PT, PRESIDENT OF RAUSCH PHYSICAL THERAPY

During Christmas dinner this year, I overheard my son ask his uncle (my baby brother, the L.A. firefighter,) “How do you put out a fire?” My brother quipped back, “You just put the wet stuff on the red stuff!” Being eight, my son smiled and ran off, satisfied with his uncle’s answer—but I wasn’t.

In my humble opinion, the best way to stop a fire is to never let it start in the first place.

The Past

From IT band syndrome to shoulder surgeries and all sorts of aches, pains and strains in between, our physical therapists have been successfully “putting out fires” that threaten our patients’ well-being for the past 10 years now. Our clinic’s focus on manual therapy combined with the latest-and-greatest rehabilitation technology has been the key to helping thousands of people recover from traumatic and chronic injuries. We’ve helped IRONMAN athletes rehab after muscle tears, fixed marathon runners’ form to combat knee pain, and corrected “armchair athletes” posture to beat the 9-to-5 grind. Whoever you are, our mission has always been to get you better, faster, so you can get back to doing what you love.

But with the passing of Rausch PT’s 10th anniversary this year, I’ve been thinking about our next 10 years and how we can continue to revolutionize the field of physical therapy to better care for our patients’ health and wellness. No doubt, we’re very good at getting you better after an injury, but considering the current state of our healthcare system, I’ve come to believe that this traditional way of dealing with injuries is outdated. We’ve just been putting wet stuff on the red stuff.

Prevention, Not Reaction

To better illustrate my point, let’s compare the different approaches of these two athletes:
[one_half][framedbox]John is getting ready to race his first triathlon, so he puts all his time and energy into his strenuous training schedule. But after a month of tough training, he suffers a fracture. So, he hobbles into urgent care to be seen by a doctor who has never run a mile in his life. He takes one look at John and sends him off to get an X-Ray. After the results get back, he’s off to see an orthopedic surgeon, who also has never raced in her life, to schedule his surgery. Finally, six weeks after John’s injury, he finds himself in physical therapy. SIX WEEKS LATER, and it’s the first time someone’s put their hands on him to work out the tissue injuries, stretch out the tightness, and strengthen the weakness so he can begin to heal. If John works hard in PT (and if his health insurance company doesn’t limit his visits—which is a big “if”) he’ll make a full recovery in a few months. But, unfortunately for John, race day has long come and gone.[/framedbox][/one_half]
[one_half_last][framedbox]Jane is also getting ready to race her first triathlon, but her first step is to go get a run form analysis done by her physical therapist, an expert in biomechanics. He fixes a few issues with her gait, then clears her to start her training program. Jane schedules in physical therapy every other week for muscle maintenance and recovery, and when she starts to feel a slight pain in her foot she immediately makes a PT appointment. Her physical therapist spends a little more hands-on time with Jane and has her train on the AlterG® Anti-Gravity Treadmill® for a week until she’s back to 100 percent. Jane’s race ready on the day of her triathlon and is all smiles across the finish line.[/framedbox][/one_half_last]

Now, wouldn’t you agree that the more effective way of dealing with the “fire” (in this case, an overuse injury) is Jane’s approach: preventing it? I think so, professional athletes think so, and I believe that YOU should, too.

It’s time to stop settling for less because healthcare companies have made you think there’s no other way. Instead, surround yourself with a team that’s always in your corner, that works hard for you, cares about and improves your wellness, builds your fitness, and supports your goals, whatever they may be.

Our Future

I am proud to say that for the past year, our team here at Rausch PT has been hard at work figuring out better ways to face fires before they can flare out of control; something that gives you a chance to act before it’s too late; a way to take care of yourself, better than ever before.

In 2017, you’ll see the launch of our Rx Wellness Membership Program, and like it’s name suggests, it’s been carefully designed with your overall wellness and health in mind. From physical therapy and massage to fitness, nutrition, and so much more, this membership is a holistic option to not only help you get healthy, but stay healthy. It’s your prescription for wellness.

Of course, Rausch PT will always be here for you on your road to recovery after unavoidable injuries and surgery; it’s what we do best. We’re just ready to take our role as care provider one step further to wellness coordinator. After all, YOU is what it’s all about, and if we can keep you healthy, then you can battle everything life throws your way, in 2017 and beyond.

We’ve already built a specialized team for you here at Rausch PT, all you have to do is join us.

To Your Health,

Your Prescription to Wellness in 2017 4


Kevin RauschAs the president and founder of Rausch Physical Therapy & Sports Performance, Kevin Rausch, PT, MPT takes great pride in the care of every single patient he treats. Kevin specializes in sacroiliac joint dysfunctions, running and cycling injuries, and return-to-sport planning for athletes. Since the first day he opened his clinic in 2006, Kevin has strived to provide the best in care, service and technology so as to strengthen his patients’ total body health and get them back to doing what they love.

Find Kevin on Google+

Should I Exercise While I’m Sick?


Feeling under the weather but still itching to hit the gym? Jonathan Meltzer, DPT explains how to know when you should just stay in bed and shares tips for how to modify your workout routine if you’re up for it.

JM-BLOG
BY JONATHAN MELTZER, DPT, RAUSCH PHYSICAL THERAPY

Winter always seems to bring on the flu and many other illnesses, whether it be the change in weather, traveling, or other end-of-year stressors. At the same time, there’s also plenty of holiday dinners and parties to enjoy, which means a ton of decadent food and drinks to gorge on for two months straight. So, come New Year’s Eve (or maybe the morning after a particularly indulgent party) we vow to start an exercise routine to combat the holiday weight gain.

But what happens if/when that nasty cold or flu hits? Should we stay inside and let it pass, or get to the gym and work it off?

How to Know When You Should and Should NOT Exercise When Sick

Exercising when you’re sick usually depends on if you have a cold or a fever, since the two have different symptoms that can affect your body differently during a workout. In general, if you have a cold it’s usually considered okay to exercise. In fact, it may even make you feel better to get out of your stuffy house, work up a sweat, and increase your endorphins with some exercise. Personally I know that when I have a cold, I feel better having done some light exercise because it makes me feel like I’m getting back to normal. Of course, the level of activity will depend on how sick you are feeling and how much you think you can handle that day.

On the other hand, if you have the flu or a fever you should put your workout plans on hold until the fever passes. When you exercise, your internal body temperature increases, which can make you sicker if you have the flu. If your fever is about 101 degrees, it is highly recommended that you do NOT exercise due to the risk of heat stroke.

Here’s what Neil Schachter, MD, medical director of respiratory care at Mount Sinai Medical Center in New York has to say in The Good Doctor’s Guide to Colds and Flu:

A neck check is a way to determine your level of activity during a respiratory illness. If your symptoms are above the neck, including a sore throat, nasal congestion, sneezing, and tearing eyes, then it’s OK to exercise. If your symptoms are below the neck, such as coughing, body aches, fever, and fatigue, then it’s time to hang up the running shoes until these symptoms subside.


Tips for Exercising When You’re Sick

If you’re managing your symptoms with medication and feel up for a workout, I’d recommend you consider these tips for exercising when sick:

  • Follow a workout video at home to avoid spreading germs.
  • If you do hit the gym–wash, wash, wash your hands!
  • Reduce the intensity and duration of your workout (e.g. Go for a walk instead of a run.)
  • Do a light elliptical workout for 20-30 minutes.
  • Try light circuit weight training, with more repetitions and less weight.
  • IMPORTANT! You absolutely must hydrate to compensate for sweat loss and sickness.


What to avoid while sick:


  • Vigorous intense workouts
  • Working out for longer duration than your normal routine
  • Exercising with a fever


The Best Workout Plan to Boost Immunity

Of course, the best solution to this whole dilemma is to avoid getting sick at all. According to Schachter, thirty minutes of regular exercise three to four times a week has been shown to raise immunity, so why not give that exact plan a try? Not only will you feel and look good from keeping a consistent exercise routine, but you’ll also steer clear of those annoying winter illnesses.

This holiday season, give yourself the gift of getting healthy before you get sick, and you’ll stay on track with all your fitness goals in 2017 and for many years to come.


StaffHeadshot-JonJonathan Meltzer graduated from the University of Redlands with a bachelor of arts in biology and a minor in physical education. Following graduation, Jonathan discovered his passion for physical therapy while working as a Physical Therapy Aide. After graduating top of his class from Loma Linda University in 2012 with a Doctorate in Physical Therapy, Jonathan began his career at Rausch Physical Therapy and Sports Performance. Jonathan’s goals are to identify limitations and treat his patients with the most recent and innovative techniques in order to maximize functional independence and obtain his patients’ individual goals.

Click to learn more about Jonathan and our other physical therapists »


Why Do Physical Therapists Hate CrossFit?

BY LYNDSAY DEFILIPPO, DPT, RAUSCH PHYSICAL THERAPY

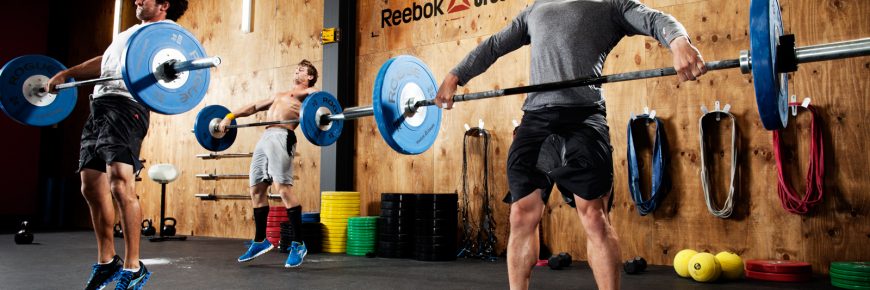
Okay, let me begin by stating that all PTs do NOT hate CrossFit! In fact, there are many physical therapists who participate in and praise the workout. While CrossFit has been around for awhile, founded in 2000, it’s become increasingly popular in the last few years; there are televised CrossFit Games, uber-popular social media accounts for CrossFit Athletes/overnight celebrities, and—at the heart of it all—the local boxes popping up on every corner, delivering daily workouts that tend to be as addictive as they are intense.

My first experience with CrossFit was as an observer while I was still living back on the East Coast. I was invited by one of my patients, a CrossFit coach, whom I was also treating for a shoulder injury.  A coworker and I woke up way earlier than normal one morning to check out this phenomenon first hand. Walking into the box that morning, I was greeted with blaring music, a vast open space with very minimal equipment, and a bunch of pumped-up people who were clearly more awake at 6 a.m. than me.

Why CrossFit Athletes are Getting Injured

As a Doctor of Physical Therapy, I cringed every time I saw someone performing an improper squat, and grimaced as I quickly assessed the amount of weight being lifted with those poor mechanics. My immediate thought? “I’m going to see a lot of these folks in my practice sooner rather than later!” However, during the workout, I was also surprised to see components of stretching and cardio interspersed between the heavy lifting, and slowly I began to see how people could become so addicted to CrossFit.

Nevertheless, I was still concerned about the lack of form and focus on mechanics that I’d seen in some of the participants. So, in the following days I did more research; I quickly realized that CrossFit actually goes deeper than the stereotypical  “bros who lift” or “those who drink the CrossFit Kool-Aid.”

I learned that while each CrossFit box (what most of us refer to as gym) is a privately owned-and-operated entity, each being connected through a uniform Workout of the Day (WOD.) Coaches and trainers are there to direct, motivate and push members through each WOD, offering guidance to maintain form and offer ways to scale or modify certain lifts. I was also pleasantly surprised to discover that CrossFit offers a multitude of training and certification programs, which address movement patterns, lifting techniques, defense training, methodology, etc.

So with all of these proper form-and-function bases seemingly covered, and with so much emphasis on the overall health of the athletes themselves, why are we seeing increased injuries in CrossFit enthusiasts?

Quality Control

My theory? Since each CrossFit box is its own franchise, I think it’s safe to say that not all CrossFit boxes are created equal. Like any gym, the experience and safety within a session is only as good as the coaches or trainers who are leading the workouts. So while I think the CrossFit model itself is exceptional, I fear that not all leaders are following the guidelines, and this is why we are seeing a majority of CrossFitters making their way into PT offices.

The CrossFit Workout Itself

The nature of CrossFit—repeated lifting with increased weight, intensity-based within a short time frame—lends itself to a plethora of injuries.

When it comes to Olympic-style lifting, maintaining form through each movement is crucial, as is having proper mobility and movement patterns established prior to adding the speed factor. In CrossFit, people fatigue during timed workouts, which inevitably causes a break in form and puts them at risk for injury.

Overuse injuries are another concern with CrossFit. Overuse of the body in one plane can lead to an increase in soft-tissue injuries, such as tendonitis and muscle tears. To combat this issue, try adding other HIIT/circuit programs that have an emphasis on rotational planes, lateral planes, and muscle confusion to your weekly workout routine; they’re not only kick-ass workouts, but they’ll also help you avoid overstress in one muscle group. This is similar to the theory of why three-season athletes see fewer injuries than those who specialize in one sport year round.

Most Common CrossFit Injuries

As a physical therapist with quite a few CrossFit patients, I’d say that 25% of the injuries I see are knee, hip or back-related, while the rest are shoulder injuries (which makes total sense considering CrossFit requires a lot of upper-extremity movement.)  Most lower extremity injuries come from improper hip hinge, decreased ankle mobility, poor gluteal firing, and poor lower extremity mechanics. For my shoulder patients, I find a majority of them are hurt because they don’t have full range of motion in their shoulder or sufficient thoracic spine mobility, which can cause serious compensations and, inevitably, injuries.

A good friend of mine and fellow physical therapist C. Shante Cofield, PT, DPT, OCS, CSCS has broken into the CrossFit field, offering amazing tips on her Instagram page, breaking down the movement patterns most CrossFitters struggle with and teaching them how to correct to avoid injuries. Shante and I often chat to geek out about movement patterns, so I asked for her thoughts on the relationship between the shoulders and hips when performing Olympic-style lifts:

Shoulder injuries are often a result of doing too much too soon, as well as poor stabilization. CrossFit incorporates Olympic lifts and certain gymnastics movements, both of which utilize the hips for momentum and force production. Since the hips are much bigger than the shoulders, it’s imperative that you train your shoulder to be strong enough to accept that force. Additionally, traditional CrossFit-training tends to focus on strengthening the larger, prime movers of the shoulder, which ultimately overpower the (less-often trained*) stabilizing muscles. All of this leads to injury.]

* Your PT can help you to understand these “less-trained” muscle groups, and avoid future injuries.


Five Ways to Avoid CrossFit Injuries


  1. Have your form, mobility, and strength assessed by a professional before starting CrossFit. If there are deficits in any of those, fix them before starting.
  2. Don’t let adrenaline overpower your body’s pain-response. Our bodies feel pain as a result of injury—don’t brush it off.
  3. Use a PVC pipe to focus on form. Once you begin CrossFit, spend more time with a PVC pipe to really address form prior to adding weight, repetitions, speed or intensity.
  4. Don’t forget to work the understated muscles, like the rotator cuff, scapular stabilizers, transverse abdominus, etc. They may not be the “pretty muscles,” but they will ensure overall body stability.
  5. Learn and improve your body awareness. This is actually something people struggle with in almost every situation on a daily basis. Learn how to utilize dissociative movement patterns to your advantage.


Conclusion

Again, all physical therapists do NOT hate CrossFit; most of us just want to make sure that there’s a greater emphasis on form and movement, instead of reaching a PR or adding weight before you’re ready.

Seeing a physical therapist is not only a great way to assess form and function weaknesses once you’re injured, it’s also a good way to spot poor mechanics before starting a program with such high physical demands, such as CrossFit. So whether you’re a seasoned pro or you’re thinking about stepping into the box for the first time, do your research, take the time to learn the proper fundamentals, and go see a licensed physical therapist; I guarantee you’ll see better workouts, better results, and fewer injuries.


Why Do Physical Therapists Hate CrossFit? 5Lyndsay DeFilippo PT, DPT, CKTP received her Doctorate of Physical Therapy from New York University in 2010. She’s a Graston Practitioner and a Certified Kinesiotaping Practitioner. Lyndsay looks at each injury as a constantly changing puzzle, which is only solved when her patient returns to what s/he loves doing. She enjoys helping with the full recovery process, which includes providing the education, tools and fundamentals to prevent re-injury and the potential for new injuries.

Click to learn more about Lyndsay and our other physical therapists »

The Myth of the “Ergonomic Workplace”

The Myth of the “Ergonomic Workplace” 6
BY KEVIN CAPATA, DPT, RAUSCH PHYSICAL THERAPY

Should I get a standing desk? Do I need a chair with a lumbar-support cushion? Is it okay to cross my legs? How can I keep correct posture for eight hours at work!?

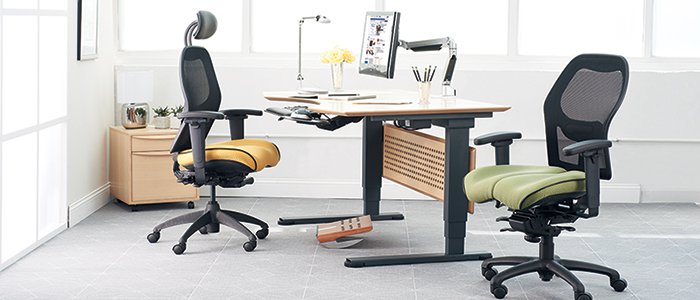
As a physical therapist, my patients ask me these types of questions far too often. I can understand why; we’ve heard that sitting at a desk all day is (literally) killing us, we can feel the aches and pains of the 40-hour work week, and we want a quick fix. Enter: “The Ergonomic Workstation”—the latest “solution” to the daily grind.

We’ve all heard or read about the ideal “ergonomic” setup for your office, and people will spend hundreds of dollars on products to achieve it. Try a treadmill desk. Swap out your chair for a stability ball. Get an ergonomic keyboard. Sit up straight… no, lean back… NO, stand up! From desk accessories to office furniture, my patients are buying anything that promises to alleviate their poor posture and the pain that comes with it—but is this money well spent?

The Myth of the “Ergonomic Workplace”

Now, I believe that ergonomic products are great in theory, and yes an “ergonomic” set up at your office may help correct some “poor” posture during your workday. But as a physical therapist, I’m here to let you in on a secret: it doesn’t really matter what kind of chair you use or how you sit at your desk; what matters is YOU.

Yep, when it comes down to it, the ergonomic workstation is a myth. The truth is, being desk-bound and sedentary is what’s killing us.

When you’re at your desk for hours, it doesn’t matter how you’re sitting, or if you’re standing, or even if you’re walking on a treadmill—if you do the same movement or hold the same position for a prolonged period, it’s unhealthy. You can be sitting in the most ergonomic chair money can buy, but if you sit in it for hours at a time, your body will adapt and struggle to function when you’re no longer in that position, which is why you feel that soreness, stiffness and pain.

So yes, always sitting hunched forward at your computer is bad, BUT always sitting stick straight is not great either. Maintaining ANY position all day, every day is not good for you! As biomechanist Katy Bowman puts it in one of my favorite books, “It’s not the load that breaks you down, it’s the way you carry it.”

DID YOU KNOW? The Average American is Sedentary for 21 Hours Per Day

In fact, sitting has joined smoking and obesity as a top risk factor for chronic disease. Recent studies show that too much sitting contributes to a host of diseases—from obesity and diabetes to cancer and depression—and literally shortens your life.

Right down to the cellular level, our bodies crave frequent and varied movement. Yet I bet you can count the number of positions you are in throughout the day on one hand:

  1. Walk to your car
  2. Sit while you drive, at work, for meals, while watching TV…
  3. Lie down to sleep

In total, Americans are sitting an average of 13 hours a day and sleeping an average of eight hours, resulting in a sedentary lifestyle of around 21 hours per day. Sure, maybe you squeeze in a trip to the gym, but when you think about it, a sedentary lifestyle plus an hour of “exercise” is like eating candy and junk food all day, then deciding to have an apple for dinner!

The British Medical Journal claims that reducing the average time you spend sitting to less than three hours per day could increase your life expectancy by two years, but that’s definitely easier said than done considering that 13-hour average. So, what can we do to get—and stay—moving?

Stay Moving, Stay Healthy

It’s time to forget this notion that there’s one “best” work setup or posture; instead realize that the best position is your next position. Get up. MOVE. Change positions. Get into a new posture that you haven’t tried in a while. You don’t have to allow your environment to determine how you interact with it.
[framedbox]
[styled_title size=”2″]Kevin’s Three Rules for Avoiding Sitting[/styled_title]
Bound to your desk? Here are three rules to remember throughout your workday to help restore proper function to your tissues and muscles and combat sitting at work:

  1. For every 30 to 45 minutes of sitting, you should do five minutes of stretching or mobilization exercises
  2. Set an alarm for every 20 to 30 minutes to remind you to change positions. We all have smart phones, so no excuses!
  3. Find alternative positions to work in (e.g. kneel/stretch in front of your desk, use a headset and pace while on the phone, etc.)

EXAMPLES OF ALTERNATIVE WORKING POSITIONS:>

[one_fourth]

KNEELING

Place a towel under your knee, and alternate every few minutes.[/one_fourth][one_fourth]

<

HIGH/LOW CHAIR

Stand, then sit and hang one leg off at a time, switching sides every few minutes[/one_fourth][one_fourth]


STANDING

Try putting one leg on a small stool or box, and alternate every few minutes.[/one_fourth][one_fourth_last]


STRETCHING

Stretching while working is a great way to maintain productivity.[/one_fourth_last]

[/framedbox]

Apply this mantra to everything you do throughout your day. Been standing up for a while? Sit down. Sitting down? Stand up! Lay on your stomach while you’re watching TV, sit cross-legged while you read, stand on one foot while you brush your teeth. If you have kids, just watch how they move and how often they move, then imitate them for once.

To borrow again from Katy Bowman: “Exercise is movement, but movement is not always exercise.” Let’s change that! Make the decision to consciously create more movement in your daily life and you can exercise all day long. Instead of thinking of a 30-minute gym workout as your “exercise” for the day, recognize the fact that taking out the trash, choosing stairs over elevators, or jogging down the hall to talk to a colleague are all forms of daily “movement,” and movement is what your body truly needs to function properly.

By transforming your “exercise routine” into a daily “movement practice,” you can drastically decrease those creaks and pains that supposedly show up one morning out of nowhere. Don’t get me wrong, we are human and our bodies will breakdown. Still, I can tell you that by focusing on a daily movement practice, you’ll lower your risk of throwing out your back while doing a mundane task like taking out the trash.

Conclusion

Healing our country’s addiction to a sedentary lifestyle starts with a culture shift within the workplace. We need stop fearing that it’s taboo or unacceptable to leave our desks and move around. We shouldn’t feel weird doing exercises at our desk or standing during a long meeting. And if you are struggling to conjure up ways to get out of your chair and still maintain productivity, ask your PT for help! As movement experts, physical therapists can assess your work/home-life setup and create a personalized movement practice to help alleviate aches and “chronic” pain, and ultimately extend your life.



K2Kevin Capata, PT, DPT, CSCS is a licensed physical therapist at Rausch Physical Therapy & Sports Performance. After receiving his Doctor of Physical Therapy degree at Columbia University, Kevin started his career at Rausch PT, where he used to work as a physical therapy aide. Now, Kevin enjoys helping his patients recognize and fix movement faults to help them overcome their injury or pain, as well as empowering them with the knowledge and tools to prevent re-injury or potential new injuries.

Click to learn more about Kevin and our other physical therapists »