

While most triathletes focus on training for the run and bike portion of their race, it’s actually the swim that can make or break your day. A proper warm up is key to success—with or without being able to get into the water before your start.
 BY MAX BIESSMANN, DPT, RAUSCH PHYSICAL THERAPY
USAT LEVEL I COACH, ASCA LEVEL I COACH, USA SWIMMING COACH
It’s no secret that triathlon is a very difficult sport to find the time to train. Not only do you have to train a large volume to build the proper endurance, but you also have to find the time to train in three different disciplines.
Running and cycling share the most in common, as both are leg-driven sports and make up the majority of your race, and because of this, many triathletes will focus most of their time and effort into training for these two sports. However, I believe that it’s the swim portion of triathlon that’s the most important; a solid swim starts your day off right and sets you up for success for the rest of your event. As the saying goes, “You can’t win the race in the swim, but you can lose it.”
Beating the Rush
As the first of the three events on race day, the swim has an undoubtedly hectic beginning. Everyone is still fresh, nervous, and pumping with adrenaline, which makes for a fast and chaotic start to your day. Still, if you’re looking to place well or find the feet of the right person, it’s important to be able to handle this initial energy surge and settle into your pace after the first 300 to 500 meters.
A proper warm up is crucial to combatting this high-intensity rush so you can avoid overloading your body with lactic acid or excessively tapping into your anaerobic system, which is especially important since you’re about to do an activity with limited oxygen availability.
Fish Out of Water
Most events allow racers to get into the water before start time to warm up their arms and shoulders, get their wetsuit to “settle” onto the body, and acclimate to the water temp, which is especially helpful for those of us racing in So Cal in the cold Pacific Ocean. However, there are several very popular races on the IRONMAN circuit, such as Oceanside 70.3 or St George 70.3, that make it challenging or near impossible to get into the water before the start of the race due to race logistics.
While you should do your best to always get in the water before a race, a “dry swim” warm up using theraband tubing is another great way to get your arms and shoulders ready for the load of the swim. If for whatever reason you can’t get in the water before your race start (or even for your weekly swim workout) this “Dry Swim” Warm Up will quickly activate the stabilizing muscles of the shoulder complex to prepare you to swim at your best.
Four Steps, 10 Exercises: The “Dry Swim” Warm Up
In order to complete this warm up you’ll need a relatively long (3 to 4 ft.) piece of surgical tubing or theraband. Light resistance (green or red theraband) is best, as you’re not trying to load up the muscles or increase strength; this is just get the muscles moving and warmed up. The key is to focus on the speed and quality of the movement.
Step 1 – Complete your usual warm up or pre-race routine
- Start with your usual jog or dynamic stretch warm up to get your lower body and cardiovascular system ready, as these will carry you throughout the entire day.
- Put on your wetsuit so you can check in the morning clothes bags and be ready to go at any point.
- Don’t forget your body glide or lubricant for neck, underarms, etc.!
Step 2 – Get your shoulders ready to move
Begin with a few arm circles, forwards and backwards, both single and double arms. This is a great time to check and adjust the fit of your suit on the neck and shoulders. Make sure to move your whole shoulder complex, including the scapula. Focus on relaxed arms, generating the movement from the trunk and shoulders and preparing the joints for movement.
Then, go on to speed skaters. This involves bending at the waist and swing your arms side to side with a bit of thoracic spine rotation—another key point in being able to swim well. Speed skaters also help by adding a dynamic stretch to your pec muscles and anterior chest. Speed skaters can also be done standing, known as helicopters.
Do each stretch for about 15-30 seconds.
Step 3 – Waking up the shoulder stabilizers
Time to break out the theraband! A light-resistance piece of theraband or surgical tubing is all you need to wake up the muscles of the rotator cuff and scapular stabilizers and prepare your shoulder joint for the stresses that will be applied during the swim stroke.
Perform 20 to 30 reps or 30 seconds per exercise.
[one_half]
Internal/External rotations with arm at side
Start with your arm at your side with the elbow bent 90 degrees, then depress and squeeze the scapulas together. For external rotations, move your hand away from the body; for internal, move the hand towards the body.
[/one_half]
[one_half_last]
Rows
Standing facing the band with elbows bent about 90 degrees, squeeze the scapulas together and bring the elbows straight back. Make sure to keep the scapulas anchored and depressed the entire time.
[/one_half_last]
[one_half]
Flexion/Scaption Raises
Standing on the band, lift the band up to shoulder height with minimal hiking of the shoulder. Flexion is directly in front of the shoulder, and scaption is at about 45 degrees to the side.
[/one_half]
[one_half_last]
Standing Ys
With the band looped around a pole, start with both arms crossed and at the opposite hip. While squeezing the scapulas together and keeping your back straight, bring your arms up and out to form a Y shape above your head.
[/one_half_last]
Step 4 – Waking up the primary swim movers
The final step is to warm up the primary swim muscle: the latissimus dorsi muscle. This is the most swim-specific part of your warm up, and it’s a great time to work on the early, high-elbow arm position that’s critical for generating a good catch while swimming. As you move through these next four exercises, focus on the timing of the stroke pulls; start the movement slower and increase the speed through the back of the pull—just as you would with a normal stroke—then control the return (don’t just let the arm snap back to the front.)
Spend about one minute on each exercise; repeat until you’re warmed up and ready to go.
[one_half]
Standing Swimmers
Stand facing a pole with scapulas depressed and controlled pull from about shoulder height down to your hips. Your arms should move in a direct line with shoulders and hips.
[/one_half]
[one_half_last]
Front Quadrant Pulls
Bent forward with an active core and arms out in front of the shoulders, begin a stroke with a good high-elbow position and pull back until about the shoulder. Focus on coupling scapular depression and elbow flexion in order to wake up and perfect the timing of the arm engaging with the scapula moving.
[/one_half_last]
[one_half]
Butterfly Pulls
Both arms together do a front quadrant pull, but continue the motion all the way back to the hips. Make sure focus on accelerating the pull from shoulder to hip. Bring arms back out to the front underneath the body in a controlled fashion. Keep the arms controlled while recovering and don’t let them elevate above the shoulder. Do not bounce the whole body; focus on isolating the arms.
[/one_half]
[one_half_last]
Freestyle Pulls
Same as butterfly pulls, but one arm at a time. Work on adding a little thoracic rotation. Do the first few with an under-the-body recovery, then you can advance to a more freestyle-like recovery—just be careful of pulling on the shoulder while it’s coming up behind the hip.
[/one_half_last]
Conclusion
This warm up is a great way to help prepare for the swim—with or without being able to get into the water. Make sure to play around with the timing before swimming during normal training; some races will make you wait around a while in a chute before swim starts. Also make the routine your own, you might benefit from more time doing double arm butterfly pulls to help wake up your lats and primary swimmers, or more time with speed skaters and freestyles in order to help open up your stiff thoracic spine. It is still important to get into the water as soon as possible to try and swim if possible, get water into your wetsuit, and acclimate to the temperature of the water. At the end of the day, make sure you practice this and are comfortable doing it before your normal swim training sessions: never try anything new on race day!
Have fun out at the races. Each triathlon is an adventure, don’t lose sight of the journey by only thinking of the destination.
 Max Biessmann, DPT is a licensed physical therapist at Rausch Physical Therapy & Sports Performance. He received his Doctorate of Physical Therapy degree at the University of St. Augustine, San Marcos in 2016 and started his career at Rausch PT. Max is passionate about helping people achieve their goals through physical therapy and innovative rehab technologies. As the Endurance Sports PT, Max says he’s lucky to be able to combine his professional coaching experience and PT knowledge to help his patients achieve their personal bests in sports and daily life.
Learn more about Max and our other physical therapists »
Tackling Common Soccer Injuries
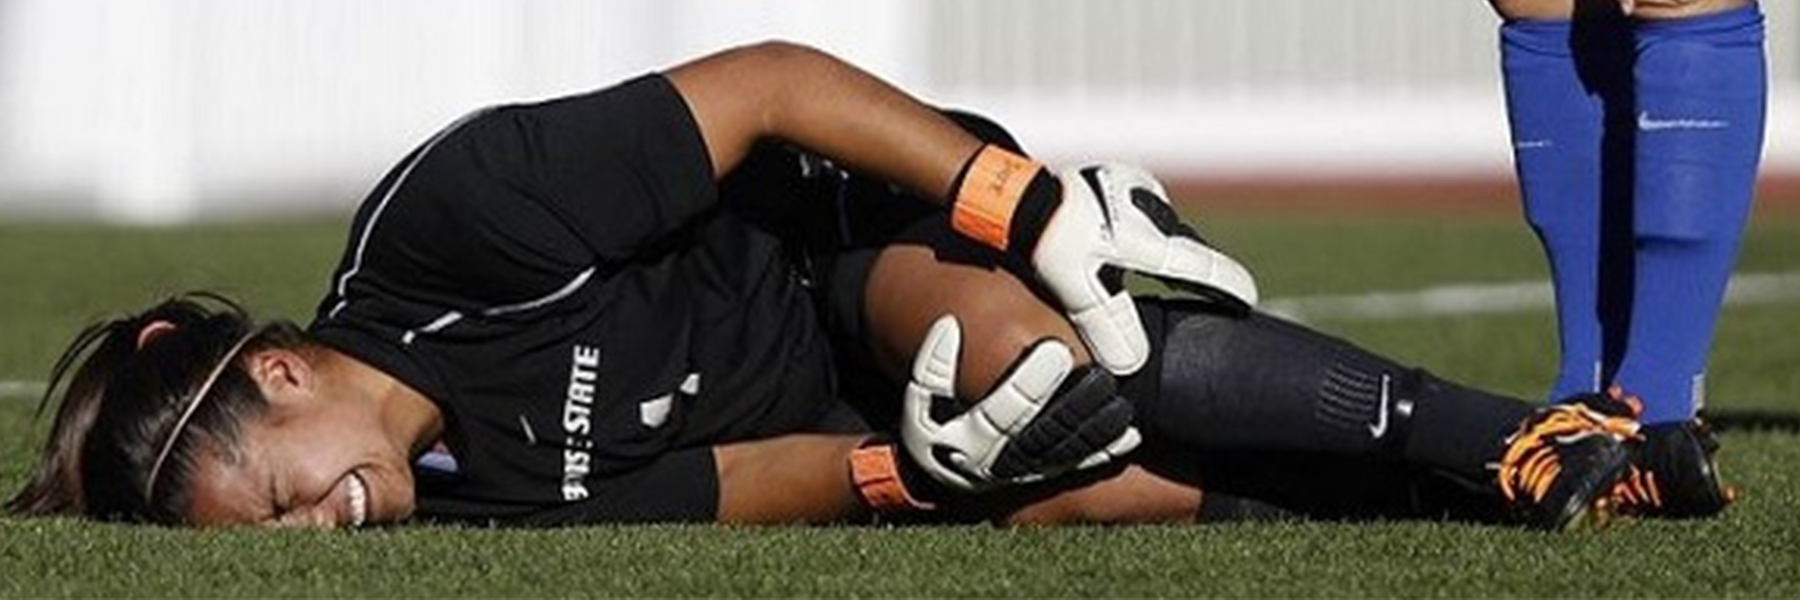
With the ever-growing popularity of soccer comes an increase in soccer-related injuries in players of all levels. PT Lyndsay explains who’s at risk for the most common injuries and why, and (more importantly) how to avoid sidelining and/or chronic injuries.

BY LYNDSAY DEFILIPPO, DPT, RAUSCH PHYSICAL THERAPY
While football, basketball, and baseball may be the most popular sports in the U.S., soccer reigns supreme in most other countries. Millions of people around the world love to watch and play soccer, with an estimated 200,000 professional athletes and 240 million players at lower-level amateur status.
With more people participating in this physically-demanding sport, coupled with a dangerous societal obsession with year-round competition (meaning little-to-no breaks for players,) we are seeing more and more soccer-related injuries. While head and neck injuries are not unheard of, the vast majority of soccer injuries occur within the lower extremity; of those injuries, the foot/ankle complex is the most affected, followed by the knees, thighs, and hips.
With this heightened rate of injury comes an increase in the time players are spending on the sidelines, unable to play the sport they love. Research shows that on average, soccer players will sit out seven to 30 days when they suffer mild to moderate injuries. However, when you compare that to the average time it takes for soft-tissue and bones to properly heal, you can clearly see that the timelines don’t match up.

Athletes are returning to sport too soon and playing on tissues that are still injured, placing them at increased risk for re-injury, as well as heightened risk for new injuries. You may ask, “Well why are the professionals back on the pitch faster than me?” Keep in mind, it is their job to play soccer, they are in PT and rehab sometimes 8 hours a day, and the team is losing money each minute they are on the bench. Many times a professional athlete will also return sooner than they should, again increasing their risk for further injuries or sustaining new injuries from compensations within the body.
Who’s At Risk, and Why?
While research is still on the fence as to what definitively causes the most injuries in soccer players, here are some of the more notable findings I’ve come across:
- Most soccer injuries occur in competition versus practice scenarios, when physical demands, contact, intensity, etc. are all heightened.
- A study by Hawkins and Fuller reported 59% of injuries were caused by non-body contact, while 41% are caused by body contact.
- Other studies show that tackling is the biggest cause of injury.
- Other factors to consider are body mechanics and alignment, gender, and time spent playing the sport, as well as outside variables, such as pitch surface, athlete footwear, etc.
Basically, there are plenty of sport specific factors that put players at risk of sustaining lower extremity injuries; again, the most common area for concern in soccer players. In fact, one study has shown ankle sprains account for 80% of injuries in soccer, compared to 40% across all other sports. Even if you’re lucky enough to have never “rolled your ankle” while playing soccer, you may be one of those players who has sustained other common lower-body injuries, such as a contusions, strains, sprains, muscle tears—and in more severe cases—ACL tears, meniscal pathologies, and MCL sprains.
Seven Ways to Combat Common Soccer Injuries
So, if soccer players at all levels are constantly at high risk for sidelining injuries due to the nature of their sport, what can they do to prevent them?
First and foremost, athletes (as well as parents and coaches) need to put their body’s needs first, and if/when injury occurs, they need to respect the amount of time it needs for proper healing and recovery. This shift in mindset alone will help players avoid not only re-injury, but also future injuries and chronic pain down the road.
Simply put, playing through the pain is no longer an acceptable excuse (unless you don’t care about chronic injury, early arthritis and a host of other health issues later in life.) While athletes in demanding sports will always be at risk for injury, here are a few steps you can take to get started on your path to preventing overuse injuries and chronic pain:
- Always, always warm up. Do a proper, structured dynamic warm up program, such as the FIFA 11+ Program, before every practice and game. A dynamic warm up includes exercises that mimic the movements you’ll actually be doing while playing soccer, which properly preps your body to perform.
- Focus on exercises that target and build stability in the most vulnerable areas of soccer players, i.e. the ankles, foot, knees, and hips. Some good exercises for this are single leg balance drills, lateral walks with resistance bands, heel raises, and hip series exercises targeting lateral hip stabilizers.
- Build a good support system. Find a good coach, physical therapist, certified athletic trainer, and/or other sport professionals to assist you with injury prevention techniques. These people should share your focus on listening to your body, and should never push you to return to sport before your body is properly healed.
- Make sure to stretch and foam roll after every practice, training session, or game. Click to download the Rausch Physical Therapy & Sports Performance Foam Roll Routine poster.
- Emphasize proper form. Always focus on form when performing sport-specific movements (eg. long kicks, corners, short kicks, penalties, passing, etc.) They may feel second-nature after many years playing, but when you get sloppy you risk re-injury.
- Do NOT depend on braces, taping, etc. long term to “fix” an injury. While these bracing methods are good for prevention and short-term protection, ultimately you are treating the symptoms of the problem, not the cause. Visit a physical therapist who can use manual therapy to actually rehab traumatic and chronic injuries, as well as create an exercise program to strengthen your weak areas to keep you off their table and on the field.
- Listen to your body! Pain is not the only indicator for injury. Instability, weakness, poor-tissue mobility, etc. can all indicate that an athlete is NOT ready to return to the pitch.
 Lyndsay DeFilippo PT, DPT, CKTP received her Doctorate of Physical Therapy from New York University in 2010. She’s a Graston Practitioner and a Certified Kinesiotaping Practitioner. Lyndsay looks at each injury as a constantly changing puzzle, which is only solved when her patient returns to what s/he loves doing. She enjoys helping with the full recovery process, which includes providing the education, tools and fundamentals to prevent re-injury and the potential for new injuries.
Click to learn more about Lyndsay and our other physical therapists »
Proper Lower-Body Alignment for Maximum Pedal Power

Are poor cycling mechanics effecting your power output? Dustin shares his thoughts on proper biomechanics on the bike, as well as the single exercise you need to ensure all your hard work is translating to optimum pedal power.

BY DUSTIN HANCOCK, DPT, RAUSCH PHYSICAL THERAPY
Are poor cycling mechanics robbing you of your precious pedal power? You can train long and hard to improve your performance on the bike, but if your body alignment is off, you’re putting yourself at risk for both injury and power loss.
For cyclists, proper biomechanical alignment in these three lower extremities is the key to not only avoiding injury, but also to increasing your power output levels.
Hips
As the powerhouse of the body, the hips are an important aspect of a cyclist’s biomechanics. There are several common issues cyclists face in this area, such as overuse of the quadriceps muscles while pedaling, as well as tightening of the hip flexor from sitting for too many hours in a day.
Tight hip flexors inhibit the most important hip extensor muscle, the gluteus maximus, while a lack of full flexion results in compensations at the spine, which can cause joint stress, compression of the discs, lower back pain, and saddle-related pelvic floor dysfunctions.
The “best” hip position while riding is different for each person, which is why it’s important to get a professional evaluation to figure out the natural shape of your hips (Q-angle) and ideal riding style. However, the general rule is to imagine a plumb line from the hip through the middle of the knee and finishing between your second and third toes. Since everyone is different in shape and size, the best position is usually the most natural feeling to you; so, hop on a trainer, close your eyes, and feel to the path of least resistance.
Knees
Think of your legs as pistons; as they attack a hill, they need to keep the power straight and consistent to operate effectively. As a physical therapist, I always perform a frontal plane exam on cycling patients to check that their knees are tracking correctly, as poor alignment causes power loss and puts you at risk for injury.
My frontal plane exam simply consists of having my patients stand in front of me and perform a Single Leg Squat. The squat simulates the cyclist’s foot position, and it shows me what my patient feels is comfortable. In my evaluation, I look to see if the feet are turned out, which results in a collapsed arch and can cause a deviation or torsion strain at the knee. I also check if the hips move backwards first when the patient squats, indicating it’s a gluteal-dominate movement, so the trunk of the body can stay controlled, which ensures core/hip stability. The knee should not go past the toes, and I also advocate for the shins staying as vertical as possible to take stress off the ACL—the most important ligament in the knee.
You can perform a frontal plane exam yourself at home by performing a Single Leg Squat in front of a mirror. As you squat, check that you’re keeping the knee tracking wherever the second and third toes are pointed; this ensures all your power is being transferred to the bike.
Ankles
Your ankle joint positioning is important to efficiently transfer the power into the pedal without any leaks in the system. There are generally three postures of cyclists—toe-down (stabbers), neutral/horizontal, and heel dropped—each of which has some pros and cons. The toe-down posture is designed for flexibility or compliance to the surface beneath, while the neutral/horizontal and heel-dropped ankle postures are understood to derive more power.
Heel Drop: Good
The human body is structurally designed to allow us to use muscles as pulleys and produce power to accelerate our body. When the ankle is in the heel-dropped posture, the ankle is positioned so that you have the least power transfer loss; this is known as a “closed pack” position” in medical terms, meaning the shape of the bones lock into place and all ligaments are in tension. This stiff ankle joint position allows every watt to transfer into the pedal.
Toe Down: Not So Good
If your toe is pointed down in the stabbing posture, typically you’ll lose power on the downstroke, as the ankle will suck up some watts in this “softer” ankle joint position. The analogy that helps the understanding of this concept is to think, “What is more efficient when climbing a steep hill, a bike with full suspension opened up in the rear, or a hard tail or lock out in the rear?” The full suspension example above is like having the stabbing ankle posture (too soft and springy) and as you power stroke up the hill you are leaking power.
Again, each individual is different, so I say the most comfortable, relaxed ankle posture is what’s best for you. However, biomechanically speaking, you may have an advantage dropping the heels during the power stroke to ensure all the power and hard work goes where you want it to.
Prescription for a Quick Fix
There is one particular exercise cyclists can do off the bike to ensure their lower-body biomechanics stay in check: the Single-Leg Squat on an unstable surface (such as a BOSU® Ball*.)
Correct Single-Leg Squat Mechanics:
- Hips move back first
- Toes stay relaxed while ankle stays relatively flat to the ground
- The motion down is controlled and super slow (at least six seconds) with good alignment
- Finish strong by going back up fast, squeezing the buttock at the top
Start with 10 to 15 reps focused on form, then work up to three sets of 10 to 15 reps, two to three times a week.
*If you don’t have a BOSU®, use a pillow as the unstable surface.
Applying the PAP Theory for MTB
To make this “quick fix” exercise more sport-specific, mountain bikers can apply the Post-Activation Potential (PAP) theory to help unleash greater potential power gains for exploding up those steeps hills.
PAP is a high-level training concept that combines heavy-resistance strength training with explosive plyometric, sport-specific movements. The concept of “explosion timing” and the focus on quality alignment under heavy loads is at the foundation of each movement.
[vsw id=”QmIhTkEQFsA” source=”youtube” width=”425″ height=”344″ autoplay=”yes”]
Single Leg Squat Using PAP:
- Stand on one leg. Squat in a controlled and slow downward motion (five to six seconds down) with a focus on good alignment.
- Start the upward motion slowly for one to two seconds, then explode to finish.
Applying the PAP theory to a Single Leg Squat—with a two-second delayed, explosive movement—will not only improve your cycling biomechanics, but also your climbs.
 Dustin Hancock, DPT graduated from San Diego State University with a bachelor’s degree in kinesiology/nutrition. He went on to receive his doctorate in physical therapy in 2011 from University of St. Augustine, and began his career at Rausch Physical Therapy and Sports Performance in 2012. As a snowboarder and mountain bike enthusiast, Dustin specializes in treating extreme sport athletes. As a physical therapist, Dustin says he looks forward to being a companion every step of the way on his patient’s path to recovery.
Click to learn more about Dustin and our other physical therapists »
Why Do Physical Therapists Hate CrossFit?
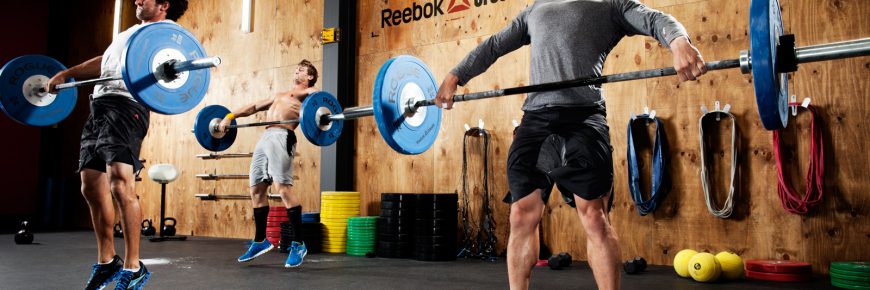
BY LYNDSAY DEFILIPPO, DPT, RAUSCH PHYSICAL THERAPY
Okay, let me begin by stating that all PTs do NOT hate CrossFit! In fact, there are many physical therapists who participate in and praise the workout. While CrossFit has been around for awhile, founded in 2000, it’s become increasingly popular in the last few years; there are televised CrossFit Games, uber-popular social media accounts for CrossFit Athletes/overnight celebrities, and—at the heart of it all—the local boxes popping up on every corner, delivering daily workouts that tend to be as addictive as they are intense.
My first experience with CrossFit was as an observer while I was still living back on the East Coast. I was invited by one of my patients, a CrossFit coach, whom I was also treating for a shoulder injury. A coworker and I woke up way earlier than normal one morning to check out this phenomenon first hand. Walking into the box that morning, I was greeted with blaring music, a vast open space with very minimal equipment, and a bunch of pumped-up people who were clearly more awake at 6 a.m. than me.
Why CrossFit Athletes are Getting Injured
As a Doctor of Physical Therapy, I cringed every time I saw someone performing an improper squat, and grimaced as I quickly assessed the amount of weight being lifted with those poor mechanics. My immediate thought? “I’m going to see a lot of these folks in my practice sooner rather than later!” However, during the workout, I was also surprised to see components of stretching and cardio interspersed between the heavy lifting, and slowly I began to see how people could become so addicted to CrossFit.
Nevertheless, I was still concerned about the lack of form and focus on mechanics that I’d seen in some of the participants. So, in the following days I did more research; I quickly realized that CrossFit actually goes deeper than the stereotypical “bros who lift” or “those who drink the CrossFit Kool-Aid.”
I learned that while each CrossFit box (what most of us refer to as gym) is a privately owned-and-operated entity, each being connected through a uniform Workout of the Day (WOD.) Coaches and trainers are there to direct, motivate and push members through each WOD, offering guidance to maintain form and offer ways to scale or modify certain lifts. I was also pleasantly surprised to discover that CrossFit offers a multitude of training and certification programs, which address movement patterns, lifting techniques, defense training, methodology, etc.
So with all of these proper form-and-function bases seemingly covered, and with so much emphasis on the overall health of the athletes themselves, why are we seeing increased injuries in CrossFit enthusiasts?
Quality Control
My theory? Since each CrossFit box is its own franchise, I think it’s safe to say that not all CrossFit boxes are created equal. Like any gym, the experience and safety within a session is only as good as the coaches or trainers who are leading the workouts. So while I think the CrossFit model itself is exceptional, I fear that not all leaders are following the guidelines, and this is why we are seeing a majority of CrossFitters making their way into PT offices.
The CrossFit Workout Itself
The nature of CrossFit—repeated lifting with increased weight, intensity-based within a short time frame—lends itself to a plethora of injuries.
When it comes to Olympic-style lifting, maintaining form through each movement is crucial, as is having proper mobility and movement patterns established prior to adding the speed factor. In CrossFit, people fatigue during timed workouts, which inevitably causes a break in form and puts them at risk for injury.
Overuse injuries are another concern with CrossFit. Overuse of the body in one plane can lead to an increase in soft-tissue injuries, such as tendonitis and muscle tears. To combat this issue, try adding other HIIT/circuit programs that have an emphasis on rotational planes, lateral planes, and muscle confusion to your weekly workout routine; they’re not only kick-ass workouts, but they’ll also help you avoid overstress in one muscle group. This is similar to the theory of why three-season athletes see fewer injuries than those who specialize in one sport year round.
Most Common CrossFit Injuries
As a physical therapist with quite a few CrossFit patients, I’d say that 25% of the injuries I see are knee, hip or back-related, while the rest are shoulder injuries (which makes total sense considering CrossFit requires a lot of upper-extremity movement.) Most lower extremity injuries come from improper hip hinge, decreased ankle mobility, poor gluteal firing, and poor lower extremity mechanics. For my shoulder patients, I find a majority of them are hurt because they don’t have full range of motion in their shoulder or sufficient thoracic spine mobility, which can cause serious compensations and, inevitably, injuries.
A good friend of mine and fellow physical therapist C. Shante Cofield, PT, DPT, OCS, CSCS has broken into the CrossFit field, offering amazing tips on her Instagram page, breaking down the movement patterns most CrossFitters struggle with and teaching them how to correct to avoid injuries. Shante and I often chat to geek out about movement patterns, so I asked for her thoughts on the relationship between the shoulders and hips when performing Olympic-style lifts:
Shoulder injuries are often a result of doing too much too soon, as well as poor stabilization. CrossFit incorporates Olympic lifts and certain gymnastics movements, both of which utilize the hips for momentum and force production. Since the hips are much bigger than the shoulders, it’s imperative that you train your shoulder to be strong enough to accept that force. Additionally, traditional CrossFit-training tends to focus on strengthening the larger, prime movers of the shoulder, which ultimately overpower the (less-often trained*) stabilizing muscles. All of this leads to injury.]
* Your PT can help you to understand these “less-trained” muscle groups, and avoid future injuries.
Five Ways to Avoid CrossFit Injuries
- Have your form, mobility, and strength assessed by a professional before starting CrossFit. If there are deficits in any of those, fix them before starting.
- Don’t let adrenaline overpower your body’s pain-response. Our bodies feel pain as a result of injury—don’t brush it off.
- Use a PVC pipe to focus on form. Once you begin CrossFit, spend more time with a PVC pipe to really address form prior to adding weight, repetitions, speed or intensity.
- Don’t forget to work the understated muscles, like the rotator cuff, scapular stabilizers, transverse abdominus, etc. They may not be the “pretty muscles,” but they will ensure overall body stability.
- Learn and improve your body awareness. This is actually something people struggle with in almost every situation on a daily basis. Learn how to utilize dissociative movement patterns to your advantage.
Conclusion
Again, all physical therapists do NOT hate CrossFit; most of us just want to make sure that there’s a greater emphasis on form and movement, instead of reaching a PR or adding weight before you’re ready.
Seeing a physical therapist is not only a great way to assess form and function weaknesses once you’re injured, it’s also a good way to spot poor mechanics before starting a program with such high physical demands, such as CrossFit. So whether you’re a seasoned pro or you’re thinking about stepping into the box for the first time, do your research, take the time to learn the proper fundamentals, and go see a licensed physical therapist; I guarantee you’ll see better workouts, better results, and fewer injuries.
 Lyndsay DeFilippo PT, DPT, CKTP received her Doctorate of Physical Therapy from New York University in 2010. She’s a Graston Practitioner and a Certified Kinesiotaping Practitioner. Lyndsay looks at each injury as a constantly changing puzzle, which is only solved when her patient returns to what s/he loves doing. She enjoys helping with the full recovery process, which includes providing the education, tools and fundamentals to prevent re-injury and the potential for new injuries.
Click to learn more about Lyndsay and our other physical therapists »
How to Keep Injuries from Killing Your Big League Dreams

Injury prevention is a top concern for many young players whose goals of playing college or professional baseball rely on them staying healthy. “The Baseball PT” Jonathan Meltzer, DPT shares his four tips for proper arm and body care and maintenance to help youth overhead athletes achieve a long, healthy career.

BY JONATHAN MELTZER, DPT, RAUSCH PHYSICAL THERAPY
So, you want to play baseball at the next level? Whether that means making a college team or making it to the show, the opportunities to play at a higher level are there for the taking, but it requires significant diligence, dedication and talent. It also takes training and—most importantly—you have to stay healthy.
One of the biggest big league dream killers is injury. You see it time and again; a high school player ignores an injury he suffered playing club ball as a kid, and now when it’s time for scouts and coaches to evaluate his skill, he’s stuck in the dugout on the disabled list.
As a physical therapist, nothing makes me prouder than when I help a young ballplayer rehabilitate from a potentially career-ending injury, and he then goes on to achieve his goal of playing college baseball. By taking care of your body and implementing a specific strength training program, injuries are much less likely to occur, and you can greatly expand your career longevity.
Here are four tips for getting your arm and body in the most efficient shape possible so that injuries don’t keep you from playing ball at the next level.
#1 – Be Honest
First and foremost, you have to be honest about your symptoms. Ask yourself, “Do I feel pain, discomfort, or soreness anywhere in my body that doesn’t seem to go away?” Answering yourself honestly and being able to accept that something “just doesn’t feel right” is the first step in injury prevention.
If you do notice any minor aches, pains or soreness that doesn’t seem to go away, you need to get it checked out by your physical therapist or sports physician. For example, as “the Baseball PT,” I always perform a full biomechanical analysis and assessment of the entire “baseball body” when a player comes to see me about some “minor” pain. Trust me when I say something small will usually develop into a more serious injury because of the repetitive nature of baseball mechanics (i.e. pitching, throwing and hitting.)
FOR PARENTS/COACHES: If your player is trying to be honest with you about pain, LISTEN TO HIM. I cannot tell you how many times an overzealous parent or coach will push their kid to play through pain and soreness because a scout might be in the stands, only to cause permanent damage that ends their kid’s baseball career while he’s still a teenager.
#2 – Take Care of Your Tissues
Once recognizing some ache, pain or soreness, you need to start preventative care with consistent soft tissue work. For this, I recommend every one of my athletes to get a lacrosse ball or baseball. You can either lay or stand with the ball pressed against your back/shoulder and some hard surface. Any sore or tender spots you find means there are restrictions there that must be worked out before and after every practice and game. Another great soft-tissue mobilization tool–particularly for your upper back and lats–is a foam roller. Again, you should foam roll before and after every practice and game to keep the rotational component of your body loose.
#3 – Stretch the Proper Way
Take note because this is very important: we DO NOT want to static stretch prior to performance. When you static stretch (e.g. hold arm across body, pec stretch holding on to fence, hamstring stretch, etc.) all you’re doing is tricking your brain into thinking your tissues are lengthening (i.e. getting loose) when in reality, they’re not. Your brain has told your body it’s warmed up and ready to go, but actually the tissue is still stiff and not properly prepared for action, which is what can lead to injury. Static stretching also negatively effects your performance, as research shows that it leads to a nine percent decrease in strength for up to an hour afterwards (obviously not ideal before a game.)
Instead, before every practice and game you need to perform a dynamic warm up, which mimics the movements you’ll actually be doing while playing ball, such as active wrist movements, dynamic hugs, and throwing position rotation.
For a simple dynamic stretching program you can implement into your warm up routine today, watch my video Dynamic Baseball Warm Up (Part 1): Stretching:
#4 – Build Entire-Body Strength
Finally, the last piece to get us to the next level and help prevent injuries is a proper strength training program. However, in this case* I’m not just talking about strengthening the arm, but rather the entire body. I really can’t emphasize enough how important it is for baseball players to work on their shoulder stabilizers to improve their back, core and lower-half strength, as well as balance.
To view my four favorite stabilization and strength training exercises for preventing injuries, check out my blog “4 Strength Exercises All Baseball Players Should Add to Their Training Program.”
[framedbox]*PLEASE NOTE that my Dynamic Baseball Warm Up mentioned in #3 also includes an arm strength exercise program, to be performed prior to every practice and game to dynamically warm up the arm before use. Stay tuned for part two of the above video, “Dynamic Baseball Warm Up (Part 2): ARM STRENGTH & BANDS,” coming soon![/framedbox]
So, as you continue to put in the work to achieve your dream of playing baseball at the next level, just remember that consistency is key. Professional athletes are all known for their consistent drive and dedication, and with that dedication comes an intense focus on daily body health maintenance. The fact is that if you’re consistent with your daily recovery routine and if you start listening to your body, you will perform better, and ultimately your shot at playing baseball at the next level is as good as anyone’s.
 Jonathan Meltzer graduated from the University of Redlands with a bachelor of arts in biology and a minor in physical education. Following graduation, Jonathan discovered his passion for physical therapy while working as a Physical Therapy Aide. After graduating top of his class from Loma Linda University in 2012 with a Doctorate in Physical Therapy, Jonathan began his career at Rausch Physical Therapy and Sports Performance. Jonathan’s goals are to identify limitations and treat his patients with the most recent and innovative techniques in order to maximize functional independence and obtain his patients’ individual goals.
Click to learn more about Jonathan and our other physical therapists »
Best Foam Rolling Routine for Mountain Bikers
BY DUSTIN HANCOCK, DPT, RAUSCH PHYSICAL THERAPY
This post has an accompanying article, “This Soft-Tissue Maintenance Routine Will Keep You On Your Bike Longer.” Click here to read it now on the Over the Hump blog.
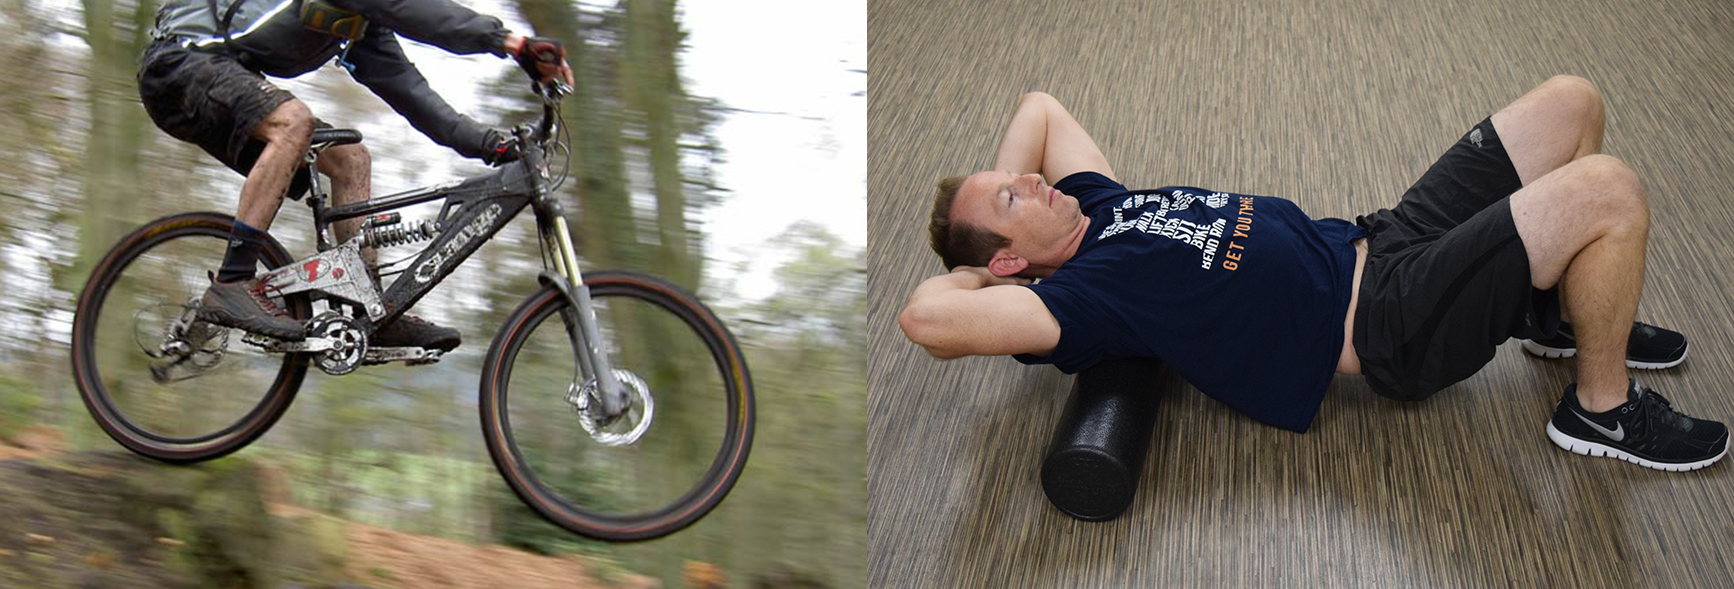
As mountain bikers, we put our bodies through the ringer. Introducing a soft-tissue mobilization technique like foam rolling can help you avoid limiting aches and pains so you can stay on the bike longer, train harder, and reduce your recovery time.
Recovery and maintenance programs aren’t always convenient, but I personally make it a point to implement them in my training to ensure I get to join the riding group every weekend and race stronger at Over the Hump. The daily grind takes a big toll on our bodies and will cause imbalances, whether it’s from poor posture at your desk, lack of cross training or focusing too much on strength training. This is why it’s critical for all MTB riders to actively pursue some form of mobility maintenance routine to keep their bodies balanced and their seat on the trails.
Best Foam Rolling Routines for Mountain Bikers
When you feel sore after you train hard or go for a long ride, it’s because your muscles are literally tearing apart to restructure fiber alignment for greater tolerance to that stress. This microfiber tearing will cause a formation of more cross-links so that you become stronger (Good!) However, if you don’t then work on those specific tissues after training—say, with a foam roller—they’ll become glued down in a mal-aligned direction, and you’ll lose mobility (Bad.)
The foam roller is one of my favorite tools for working out your muscle and tissue on a routine basis; it’s cheap, easy, and you can do it yourself. Ideally, you should spend time working out the tissues that are tight for five to 10 minutes daily, or until you feel about a 50% reduction in pain. After a long ride, you should also spend a little extra time focusing on the areas you worked hard.
Here are the muscles I specifically attack with the foam roller after every mountain bike ride:
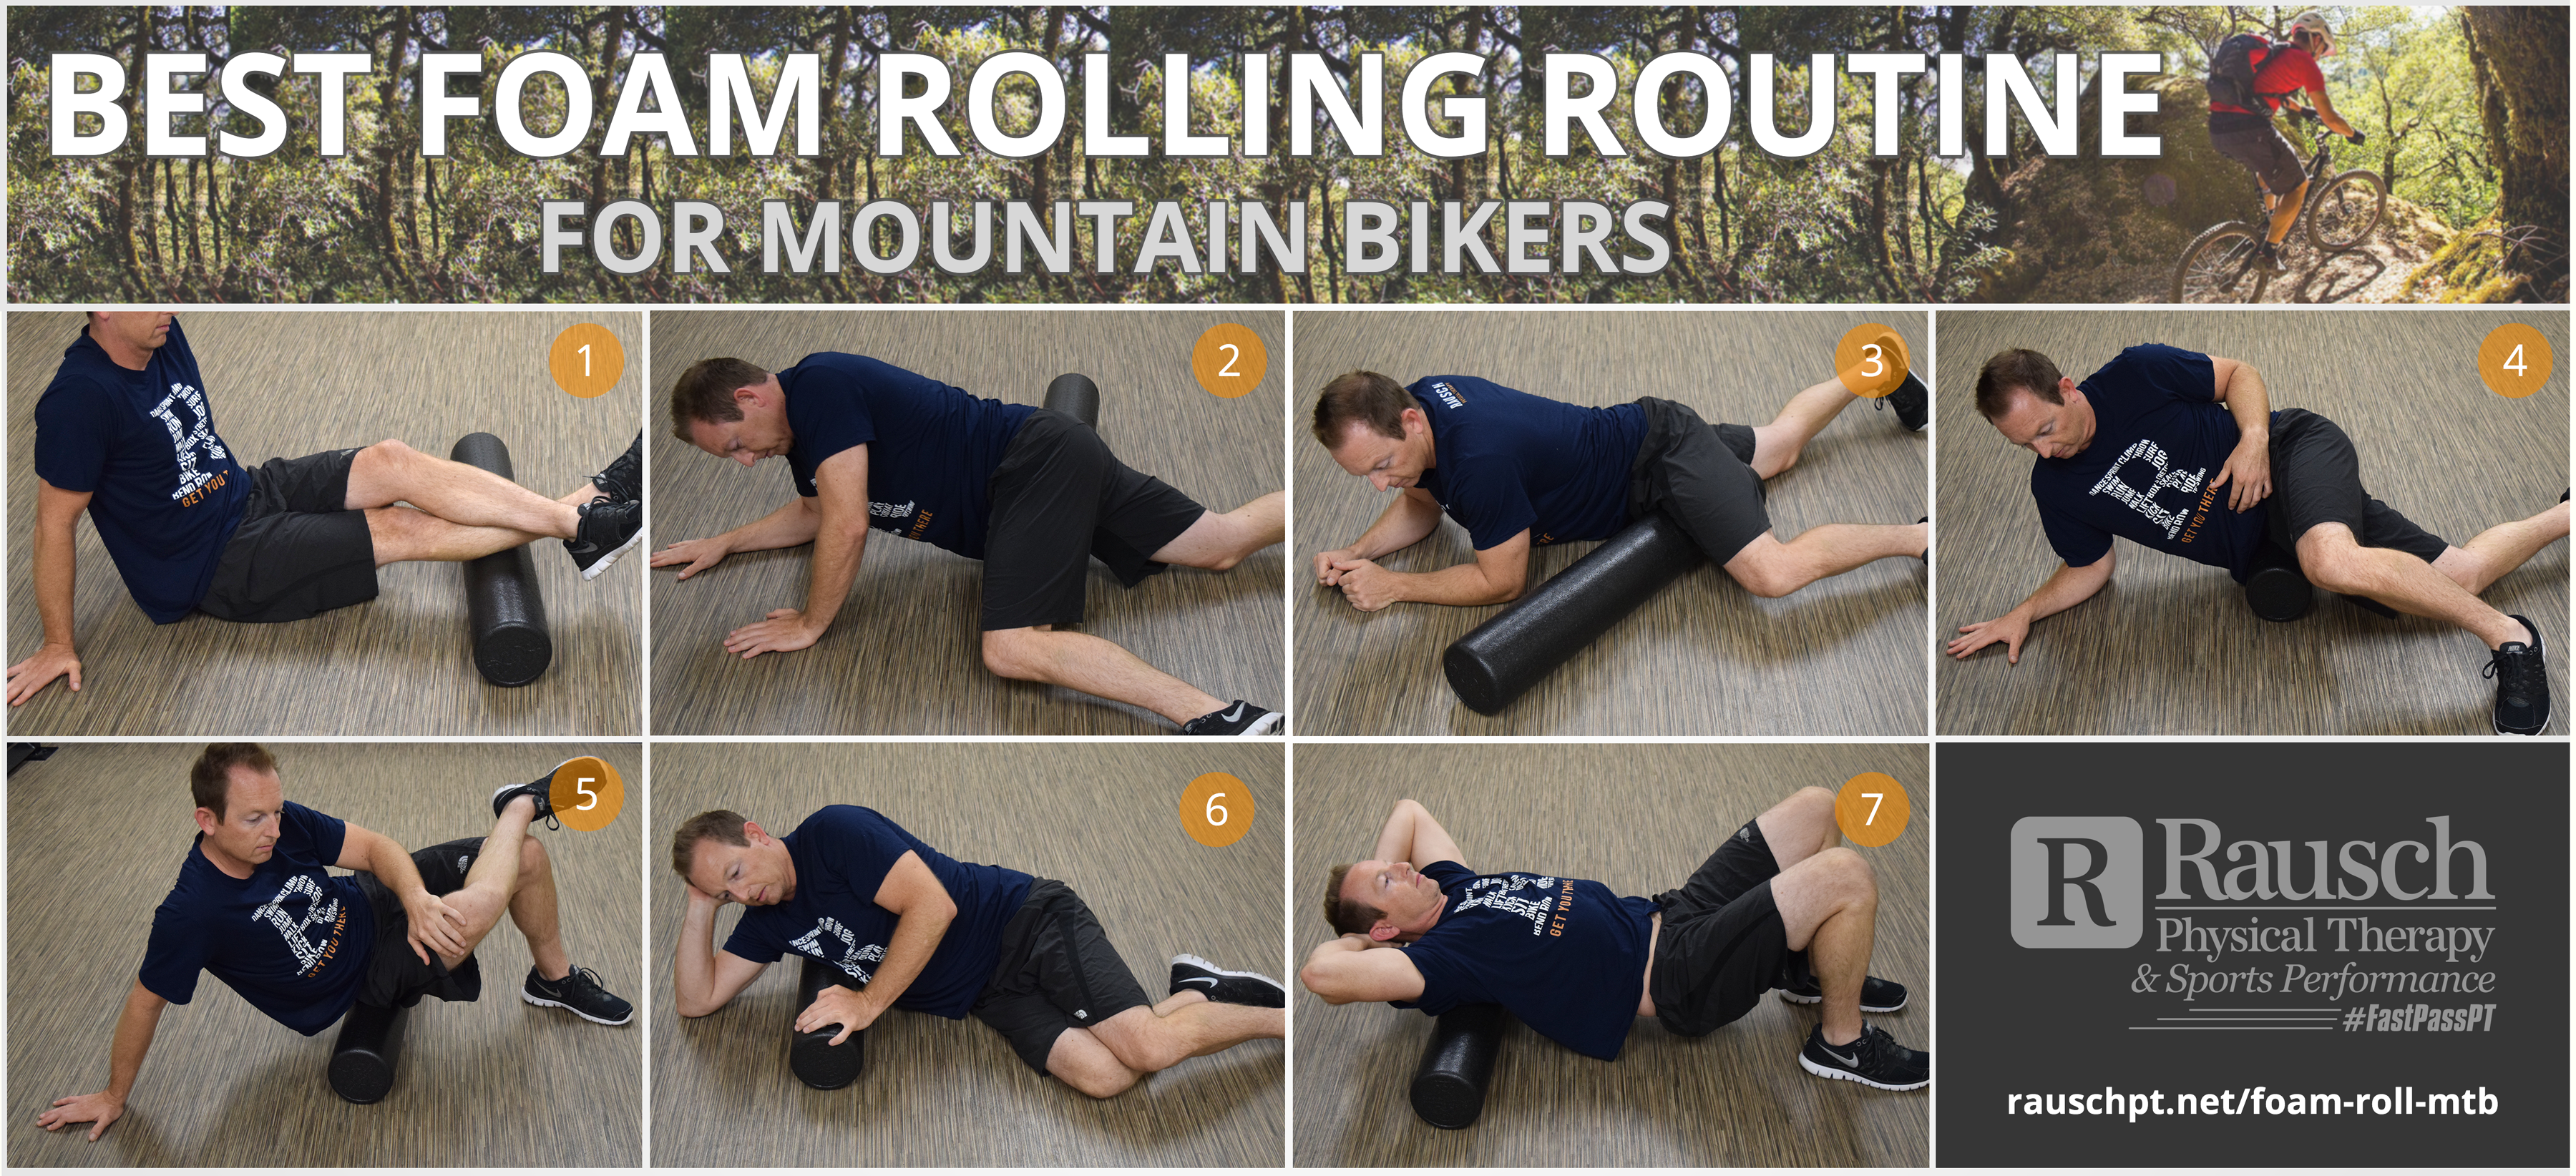
- Calf muscles
- Quadriceps
- Groin
- Tensor fasciae latae (TFL). Helps work the IT band and hip flexor complex)
- Gluteals/piriformis
- Latissimus dorsi
- Thoracic Spine extension. Great for avoiding the dreaded Rounded Shoulder posture.
* PRO TIP: When foam rolling, focus on going across the tissue fibers (i.e. laterally rather than up and down.) This lateral rolling will emphasis on “going against the grain” and most mimics a manual therapy technique called cross friction. This will restructure the muscle fiber alignment and keeps things sliding-and-gliding freely.
By incorporating the foam roller into your daily routine, you can reduce your risk of injuries, improve recovery time and overall athleticism—best of all, it will help you feel less old! So be specific, be consistent, and respect mobility with cross friction-based foam rolling.
This post has an accompanying article, “This Soft-Tissue Maintenance Routine Will Keep You On Your Bike Longer.” Click here to read it now on the Over the Hump blog.
Dustin Hancock, DPT graduated from San Diego State University with a bachelor’s degree in kinesiology/nutrition. He went on to receive his doctorate in physical therapy in 2011 from University of St. Augustine, and began his career at Rausch Physical Therapy and Sports Performance in 2012. As a snowboarder and mountain bike enthusiast, Dustin specializes in treating extreme sport athletes. As a physical therapist, Dustin says he looks forward to being a companion every step of the way on his patient’s path to recovery.
Click to learn more about Dustin and our other physical therapists »
Four Strength Exercises All Baseball Players Should Add to Their Training Program
BY JONATHAN MELTZER, DPT, RAUSCH PHYSICAL THERAPY
In my blog “How to Keep Injuries from Killing Your Big League Dreams,” I discuss four ways youth baseball players can take better care of their bodies and get in the most efficient shape possible so that injuries don’t keep them from playing ball at the next level. One of these ways is to implement a global strength program into your training regimen, which emphasizes building entire body strength rather than simply focusing on your throwing arm.
The Best Exercises for Building Entire-Body Strength
A proper strength training program will not only will this improve your overall athletic performance, but it will also help you to avoid the common overuse injuries that are plaguing youth sports today. However, I’m not just talking about strengthening the arm, but rather the entire body. I really can’t emphasize enough how important it is for baseball players to work on their shoulder stabilizers to improve their back, core and lower-half strength, as well as balance.
Here are my four favorite stabilization and strength training exercises for preventing injuries:
1. Planks
Planks are great for total body stabilization and core. Perform this plank series every day to increase your strength.
Front Plank – Hold for 45 seconds.
Side Planks – Hold for 45 seconds on each side.
2. I.T.W.Y. on Swiss Ball with Weights
For this exercise you’ll need 1, 2 and a 3 lbs. dumbbells and a swiss ball. As you move through the sequence below, keep your abs tight and lifted so your back is flat. Perform 2 sets x 15 reps (2 x 15).
” I – 3 lbs. weight”
” T – 1 lbs. weight”
” W – 2 lbs. weight”
” Y – No weight”
3. Side-Lying Dumbbell Pyramid
To perform this series, lay on your side with 1, 2 and 3 lbs. dumbbells in front of you. Place a rolled towel between on your side and top arm, just below the elbow. Grab the 3 lbs. dumbell first, and lift up and down, keeping the elbow glued to the hip and shoulder blades squeezed together. Do 30 lifts or until fatigue, then move to the next lowest weight, repeating the same movements. Once you have completed reps with each dumbbell, roll over and do the other arm.
3 lbs. weight first.
lbs. weight.
Finish up with the 1 lb. weight, then switch sides.
4. Swiss Ball Core Series
This tricky series will strengthen your core and improve your balance.
Roll down the ball until you’re in a plank position, then do a push up. (2 x 15)
Tuck knees toward your chest. (2 x 15)

Lift your hips into the pike position. (2 x 15)
By implementing these four exercises into your current strength training program, you can begin to greatly improve your entire-body strength and stability, two very important keys to athletic success and a long, healthy baseball career.
Jonathan Meltzer graduated from the University of Redlands with a bachelor of arts in biology and a minor in physical education. Following graduation, Jonathan discovered his passion for physical therapy while working as a Physical Therapy Aide. After graduating top of his class from Loma Linda University in 2012 with a Doctorate in Physical Therapy, Jonathan began his career at Rausch Physical Therapy and Sports Performance. Jonathan’s goals are to identify limitations and treat his patients with the most recent and innovative techniques in order to maximize functional independence and obtain his patients’ individual goals.
Five Exercises to Increase Surfers’ Paddling Strength and Endurance

BY ASHLEY, MPT, RAUSCH PHYSICAL THERAPY
How well did your shoulders hold up to the El Niño this winter? Building strength through your shoulders and upper back to improve paddling endurance is your key to paddling out in bigger surf, catching bigger waves, and being able to stay out for longer surf sessions.
Strengthening the rotator cuff, scapular stabilizers and upper back are all key components to improve paddling strength. The rotator cuff muscles are extremely important for stabilizing the shoulder joint, which is the most mobile joint in the body. Specifically, strengthening the external rotators of the rotator cuff act to counterbalance the more dominant internal rotators (pecs & lats), minimize muscle imbalances when paddling, and promote good shoulder mechanics. Enhancing strength and endurance of the scapular stabilizers will also help you maintain good shoulder mechanics to prevent injury during extended periods of paddling.
Exercises for paddling endurance should focus on high reps and low weight, while exercises for paddling power should focus on increased weight with lower reps to maximize overall strength. As you build strength, it’s important to maintain shoulder mobility and flexibility by stretching and foam rolling before and after every session to minimize any joint stiffness throughout the shoulder and upper back, as well as to minimize muscle fatigue and soreness. Check out my previous surfing blog for the Best Foam Rolling Exercises for Surfers’ Shoulders.
Five Exercises to Target Muscles for Paddling
While the best way to gain paddling strength is actually getting out in the water, these five exercises can help compliment the work you do in the water, on dry land:
Exercise 1: Scaps Clocks
Promotes endurance of the upper back and shoulder
- Start with the right arm. Pull tension in the band to 1 → 3 → 5 o’clock. Repeat with left arm, pull band to 11 → 9 → 7 o’clock. Make sure to keep your shoulders down and back; standing against the wall is a good cue for upright posture.
- Perform 10-15 reps on each side.
Exercise 2: Alternating Rows with cables or bands
Promotes stabilization and endurance of the shoulder blade while paddling
- Keeping your elbow at your side, pull the band back while squeezing the shoulder blades together.
- Perform 2 sets of 20, increase resistance if you’re not fatigued by the end of the set
Exercise 3: Alternating Lat Pull-Downs with cables or bands
Builds paddling endurance through lats for a strong pull through the water
- Stand in a partial squat to activate your core. Pull the band down towards your hip, keeping your elbow straight. Let the tension out of the band slowly to return to starting position. Alternate arms.
- Perform 2-3 sets of 20 on each side alternating strokes
Exercise 4: Prone external rotation/internal rotation on swiss ball
Promotes rotator cuff strengthening while paddling
- Lay prone on the swiss ball, keeping your back straight and chin tucked. Start with the shoulder abducted and externally rotated in the ‘90/90 position’ (as shown in photo.) Internally rotate your shoulder to simulate paddling while keeping your shoulder and elbow aligned.
- Perform 2-3 sets of 10, add light weight (1-3 lbs. dumbells) as strength improves
Exercise 5: Simulated paddling on swiss ball with band
- Keep chin tucked and shoulders back and keeping your elbow straight while pulling. Slowly let tension out of band to return to overhead position, alternate arms.
- Perform 2-3 sets of 20 on each side alternating strokes
Training to build muscle strength to help you paddle longer and faster will improve your overall surfing endurance. The best way to practice paddling is getting out in the water; these specific paddling exercises are to help compliment the work you do in the waves. See you in the water!
 Ashley Heller, MPT is the newest member of the Rausch PT team. She received her Masters of Physical Therapy degree at California State University, Long Beach and is passionate about working with patients with shoulder, knee and ankle injuries. With background in orthopedic-related injuries and post-operative rehabilitation, Ashley believes that the combination of manual therapy and personalized therapeutic exercise program is vital to recovery. As a physical therapist, it’s Ashley’s goal to help her patients better understand their injuries and the plan for their road to recovery.
Click to learn more about Ashley and our other physical therapists »
Quick Fix for Dead Spots in Your Pedal Stroke
BY DUSTIN HANCOCK, DPT, RAUSCH PHYSICAL THERAPY
When cycling, there are two things that can improve your velocity: power output and turnover cadence. However, the overall power output can be weakened if at some point during your pedal stroke, you have inconsistencies during that full, circular motion. Inconsistent torque forces, or dead spots, typically occur at the initiation of the upstroke. You can determine if you have dead spots by using a power meter or by doing a test like our Performance Lab’s Bike Right, but a simple indicator if your stroke has dead spots is smashing and hammering of the pedals.
Like most exercise movements, a healthy pedal stroke relies on the stretch shortening cycle (SSC) to be efficient. SSC occurs when a muscle stores elastic energy as a muscle lengthens; this stored-up energy is then used when the muscle immediately shortens. Since SSC is a myofascial and nervous system stretch reflex, if the body has adequate mobility and dynamic stiffness, the SSC will allow for any athlete to access free kinetic energy, i.e. more power for less work! Improving SSC can not only be a huge efficiency booster, it can also help improve joint stability and congruency to save those knees from arthritic changes.
Quick One-Legged Exercise to Improve Dead Spots
Here’s a great neuromuscular recalibration drill that you can do on a trainer to improve those dead spots.
Step 1: Hop on a trainer and warm up with the smooth circular stroke pattern focused on relaxing your legs especially your ankles.
Step 2: When you feel warm and ready, pick up the cadence to 92-95 rounds per minute (RPM) and take one foot off the pedal. Place that foot in the center frame.
Step 3: Maintain the cadence for 30-second intervals, working up to 90-second intervals for three to five rounds.
This exercise ensures the leg pulls up at the bottom of your stroke, allowing the hamstring to apply more power into the equation. It also improves the circular stroke pattern and gets you away from that less effective “smashing pedal” form. Try to apply this exercise to your warm up and see what it can do for your cycling efficiency and overall speed.
Enjoy one more thing to think about on your ride!
Dustin Hancock, DPT graduated from San Diego State University with a bachelor’s degree in kinesiology/nutrition. He went on to receive his doctorate in physical therapy in 2011 from University of St. Augustine, and began his career at Rausch Physical Therapy and Sports Performance in 2012. As a snowboarder and mountain bike enthusiast, Dustin specializes in treating extreme sport athletes. As a physical therapist, Dustin says he looks forward to being a companion every step of the way on his patient’s path to recovery.
Click to learn more about Dustin and our other physical therapists »
Best Foam Rolling Exercises for Surfers’ Shoulders
As a licensed physical therapist, my passion is helping others. I love being able to help my patients feel better so that they can get back to doing what they love. There’s nothing better… except maybe my other passion: surfing.
I started surfing competitively at a fairly young age, and I continued through high school and college. Nothing compares to that feeling you get when you make a big turn with a good board under your feet and spray in your face. Surfing continually pushes you physically and mentally; the more physically challenging, the more rewarding it is. But with two decades of competing under my wetsuit, I know how hard it is to continuously battle those waves year after year without suffering an injury or two along the way.
So, here are some pearls of wisdom from a surfing PT to improve your paddling mechanics and minimize your risk of injury.
Common Causes of Surfing-Related Injuries
Shoulder impingement is a common injury in sports that require repetitive overhead shoulder motions, such as surfing, paddling, swimming and baseball. Restoring proper shoulder alignment is essential to reducing the risk of impingement, tendonitis and instability.
Rounded Shoulder Posture
Over time, paddling can create muscle imbalances in surfers, which often results in “Rounded Shoulder Posture.” Rounded shoulders, also known as shoulder protraction, can interfere with proper shoulder mechanics for paddling. Tight internal rotators (pecs, lats and subscapularis) limit the shoulder’s ability to externally rotate when reaching overhead to paddle. This can ultimately lead to bursitis, impingement, tendonitis and—if left unaddressed—potentially a rotator cuff tear.
Limited Thoracic Extension
Thoracic extension, or extension throughout the upper spine, is crucial to maximizing shoulder mobility and preventing joint dysfunctions in the shoulder and neck. Limited thoracic extension also contributes to Rounded Shoulder Posture and limits the range of motion us surfers need to elongate our stroke when paddling. By addressing restrictions in thoracic extension, you can improve the biomechanics of your shoulder to optimize strength and stability while paddling.
Five Foam Rolling Techniques to Improve Mobility for Paddling
The foam roller is a simple yet important piece of equipment that can be used in a variety of ways to target and stretch different muscles to help decrease the tissue tension and adhesions/knots you can get from paddling. Try these five foam rolling exercises for shoulders to help maintain flexibility, minimize Rounded Shoulder posture, and workout any knots/trigger points after a hard day of hitting the waves.
1. Foam Roll Pec Stretch and Lacrosse Ball Release
 2. Foam Rolling Thoracic Spine with Extension
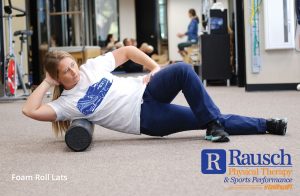
3. Foam Rolling Lats
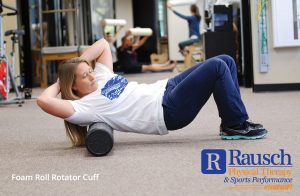
4. Foam Rolling Rotator Cuff (shoulder blade)
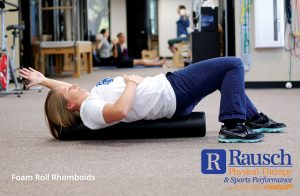
 5. Foam Rolling Rhomboids (between shoulder blades)
So, dust off that foam roller (or buy one after your next appointment at Rausch PT) and start using it! If you have any questions about foam rolling, come talk to me during your next PT session. Want to really get a good foam roll workout in? Take advantage of the new foam roll class at ABC Pilates, located in the same suite as Rausch PT.
Ashley Heller, MPT is the newest member of the Rausch PT team. She received her Masters of Physical Therapy degree at California State University, Long Beach and is passionate about working with patients with shoulder, knee and ankle injuries. With background in orthopedic-related injuries and post-operative rehabilitation, Ashley believes that the combination of manual therapy and personalized therapeutic exercise program is vital to recovery. As a physical therapist, it’s Ashley’s goal to help her patients better understand their injuries and the plan for their road to recovery.
Click to learn more about Ashley and our other physical therapists »
Four Breathing Tips to Beat Your Triathlon Swim
As someone who’s swam both competitively and recreationally for many years, I finally did my first open water swim last summer. While I have plenty of experience with stroke, breath and mechanics, I was still winded, fatigued, and admittedly a little shaken up after the 1000m ocean course. Everything that I knew about swimming went out the window as I battled three-foot waves, choppy water, and ridiculous amounts of kelp.
I should have expected it, though. I treat many triathletes as a physical therapist at Rausch Physical Therapy & Sports Performance, so I’m familiar with the triathlon-newbies’ popular slogan: “I just really hate the swim portion.” When I used to ask why (I stopped after last summers’ brush with death) I would hear everything from “I can’t breathe,” to “I just get fatigued so quickly.” Even, “I can zone out when I run, but I just focus on not drowning when I swim.”
It’s comforting to recognize that most swimmers (even Olympians… even awesome physical therapists!) have felt that way during the swim at one time or another. However, there are plenty of tips and tricks out there to help calm those fears and get you those swimming PRs.
Four Breathing Tricks for Conquering “The Swim”
Here are my top four training tips that focus on the most important part of swim: breathing! Note that depending on the type of swimming you’re doing (distance, sprints, open water, etc.) your breathing technique is going to have to change.
Tip #1: Be odd
To ensure you train your body to breathe out both sides, try taking a breath every three strokes (when starting, then try every five if comfortable.) This not only allows you to scan the competition around you, but it also helps you avoid injuries to the neck/shoulder and impingement within the shoulder complex that can occur with repetitive, one-sided cervical spine rotation and repetitive overhead reaching. Of course, in situations that require you to take more frequent breaths, such as rough water or fatigue, go ahead and breathe on one side.
Tip #2: Channel your inner fish
When swimming, don’t lift your entire head out of the water to breathe. Instead, do a rotation with your head parallel to the top layer of water, coupled with a small, quick inhalation. You’ll look like a fish gasping for air. Most competitive swimmers use this “fish mouth” technique, but again you may have to switch it up once you hit open water and conditions change. In certain situations, you may have to actually rotate your body more to accommodate, and that’s okay!
Tip #3: Get nosey
People tend to overthink the breath, which can throw off your timing further. Blowing air out of your nose rather than your mouth while submerged will help your timing, especially once you add in the stroke and kicking aspects. Make sure to expel ALL of your air when underwater and to inhale fresh air during each breath.
Tip #4: Practice makes perfect
Make sure to practice your breathing techniques (preferably in a pool) before you even attempt to add the stroke, kick and endurance aspects of the sport. Your body obviously needs oxygen to function, so it’s the first thing you have to master before you can successfully add swimming to your resume. Check out master swim classes or, if you have access, a SwimLabs facility to help assess breathing mechanics.
Below you’ll find a few video tutorials to help illustrate some great breathing tips; some are more laid back while others are more technical, but I think each highlights some basic points that can help beginner/intermediate level swimmers. Even those of us who haven’t been in competition mode for years can benefit from brushing up on our breathing basics; I definitely will before my next attempt to conquer the ocean swim.
[framedbox]Additional Links and Sources:
- Aaron Lawson Video – Helpful Tips on How to Swim
- Swim Art Video – Breathing Skills For Open Water Swimming
- SwimLabs Video – Swimming Freestyle 101: Balanced Breathing[/framedbox]
Lyndsay DeFilippo PT, DPT, CKTP received her Doctorate of Physical Therapy from New York University in 2010. She’s a Graston Practitioner and a Certified Kinesiotaping Practitioner. Lyndsay looks at each injury as a constantly changing puzzle, which is only solved when her patient returns to what s/he loves doing. She enjoys helping with the full recovery process, which includes providing the education, tools and fundamentals to prevent re-injury and the potential for new injuries.
Proper Pitcher’s Hip Rotation and How to Get It
Remember that game Twister? Every time that spinner landed on a new color, you were forced to reach your hand behind your back, underneath a leg, and across the board, all while trying not to fall. While incredibly entertaining, this silly game can also be a valuable lesson about positional torques, balance, rotation and flexibility—especially when it comes to baseball.
Looking at the specific qualities to win this game can be related to the critical components of the throwing motion in baseball. Often times when assessing a pitcher’s mechanics, there’s a miss in relating the lower half to the upper half of the body. It is crucial for a pitcher—no matter the age—to begin to learn the importance of max hip rotation in order to achieve full torque of the trunk and obtain maximal velocity through the pitch.
The Sling Shot Effect
The rubber band of a sling shot is wound up with so much tension so that when it’s released, a massive amount of kinetic energy hurls the rock (or projectile of your choice) forward. The pitching motion in baseball is similar in that the lower half of the body, starting with proper foot placement and maximal hip rotation, will create a buildup of kinetic energy through the trunk, shoulder blades, shoulder and finally release through the fingers.
Proper Hip Rotation and How to Get It
Without proper hip rotation, a pitcher’s hips will fly open, which creates torque at the elbow. To avoid this, we want proper hip rotation, which occurs when:
- The hips are fully rotated just before the lead foot strikes the ground
- The shoulders are closed with arm extended out into the cocked phase of throwing.
Proper rotation allows for maximal hip-to-shoulder separation, which in turns creates the most amount of torque and velocity possible. There are two specific keys to obtaining this position and preventing further stress on the arm, the lead leg and posture.
The lead leg
The lead leg must be relaxed from the knee down and have proper landing position. Proper landing position includes:
- Toes pointing slightly towards the right-handers box (if a right-handed pitcher.)
- The hips will remain closed until just before lead foot strikes the ground.
- At this time they will lead their front hip towards the plate and really turn open the front hip at the latest possible time.
- If done properly, the pitcher shoulder feel tightness along their oblique muscles, NOT their back.
Posture
When a pitcher transitions from early-stance phase to the cocked position, their posture can completely affect their ability to rotate through their hips and finish off a throw. For example, if a pitcher is bent too far forward when their foot lands, they will not have the ability to achieve full pelvic rotation, thus not allowing this maximal hip/shoulder separation.
The key for good throwing posture is to focus on balancing and creating extension or back-bending through the middle part of the athlete’s back. It has been statistically proven and correlated that the optimal position of posture is the thoracic spine slightly extended, slight lean towards the back leg, and non-throwing hip flexed up. Therefore, it is important to not allow early rotation of the trunk or shift the center of gravity towards the throwing arm, as both will cause the trunk and shoulders to “open early.” before the hips, and create abnormal stresses on the shoulder and arm.
Maintaining proper foot landing position and rotation of the hips will create the maximal amount of separation leading to good pitching mechanics and increased velocity. Posture is also considerably important and must be taken into account when looking at the ability to create this hip to shoulder separation.
Suggested Training and Exercises
- Baseball Rebellion has a good Drill for Hip Rotation video to practice this max hip rotation with proper foot positioning.
- For a more in-depth analysis of your form, come see me for a Throw Right session at the Performance Lab.
- Somax Performance Institute‘s hip strength exercise video can also help improve speed.
Jonathan Meltzer graduated from the University of Redlands with a bachelor of arts in biology and a minor in physical education. Following graduation, Jonathan discovered his passion for physical therapy while working as a Physical Therapy Aide. After graduating top of his class from Loma Linda University in 2012 with a Doctorate in Physical Therapy, Jonathan began his career at Rausch Physical Therapy and Sports Performance. Jonathan’s goals are to identify limitations and treat his patients with the most recent and innovative techniques in order to maximize functional independence and obtain his patients’ individual goals.




Stay Connected
Sign up to receive monthly specials, events, and expert tips & tricks.

IN-PERSON ONLY
Three hours.
Exclusive savings.

LAGUNA NIGUEL | DECEMBER 1
WINTER WELLNESS
SALE
Save on every Rausch PT & Wellness service, including Rx Chiro, Rx Massage, StretchFix, Rx Wellness memberships, premium physical therapy and pelvic health therapy. Try a free Rx Wellness demo session and enjoy seasonal snacks and drinks.
These discounts are only available in person at the event. Bring a friend, or pick up a wellness focused holiday gift.
30100 Town Center Dr, Suite Y/Z, Laguna Niguel