
Sports Performance Archives - Rausch Physical Therapy & Wellness

Blog

Unlock More Distance, Less Pain: The Physical Therapy Guide to a Better Golf Swing in South Orange County

Rausch Physical Therapy & Sports Performance — Laguna Niguel • Dana Point • Mission Viejo

Ask any golfer in South Orange County what they’d trade for 15 more yards off the tee and a round without back pain, and the answer is usually “almost anything.” Here’s the part most golfers miss: those extra yards aren’t hiding in a new driver. They’re locked up in your hips, your mid-back, and your core.

Your swing can only be as good as your body allows. At Rausch Physical Therapy & Sports Performance, our Doctors of Physical Therapy look at your body the way a coach looks at your swing — finding the tight, weak, or unstable links in the chain that are quietly costing you distance, consistency, and comfort. Pair that expert care with our StretchFix assisted stretching program, and you have the same one-two punch the pros use: build the movement, then keep it. Here’s how it works.

“Golf is family time for me — most weekends you’ll find me out on the course with my son and daughter. And I’ll tell you what I tell every golfer who walks into our clinics: the best piece of equipment in your bag is a body that moves well. Take care of your mobility and strength, and the game takes care of itself.”
— Kevin Rausch, PT — Founder, Rausch Physical Therapy & Sports Performance

How Can I Improve My Golf Swing With Better Mobility and Strength?

A powerful, repeatable golf swing is a full-body rotational movement. You coil against a stable lower body, store energy through the trunk, and release it in sequence. If any link can’t do its job — hips that won’t rotate, a stiff thoracic spine, a core that can’t transfer force — your body compensates somewhere else. That’s where slices, inconsistency, and injuries are born.

How Physical Therapy and StretchFix Improve Your Swing

This is where Rausch PT is different from a gym program or a YouTube stretching routine. Your Doctor of Physical Therapy starts with a hands-on movement assessment — hip rotation, thoracic mobility, shoulder range, single-leg stability — and pinpoints exactly which restrictions are shaping your swing. Then you get a personalized plan of hands-on treatment and targeted exercise, with your therapist beside you the entire session, every session.

Then StretchFix keeps the gains. In a one-on-one assisted stretching session designed by our Doctors of Physical Therapy, a trained practitioner moves your hips, hamstrings, shoulders, and spine through ranges you simply can’t reach on your own — the maintenance side of the equation that keeps your new mobility from stiffening back up between rounds.

Why Improved Mobility Means a Better Golf Swing

  • More hip and trunk rotation = a bigger shoulder turn — a fuller backswing stores more energy, which converts directly into clubhead speed and distance.
  • Better separation between hips and shoulders — the famous “X-factor” that lets you sequence the downswing properly instead of swinging all-arms.
  • Stable ankles and hips = a consistent base — better balance through the swing means better contact, round after round.
  • Free movement = no compensation — when your body isn’t fighting its own restrictions, your swing coach’s changes finally stick.

Can Stretching and Strengthening Really Help My Golf Swing?

In a word: yes — and it’s one of the best-documented ideas in golf fitness. Golf-specific mobility and strength programs are the backbone of how touring professionals train. Amateur golfers who improve rotational mobility and core strength routinely see faster clubhead speed, better ball-striking consistency, and dramatically fewer aches after 18 holes.

How Rausch PT and StretchFix Help Golfers Get Better

Think of it as a team approach to your golf body. Physical therapy identifies and fixes the problems: restoring lost joint motion with hands-on care, then strengthening the new range so it holds up under a full-speed swing. StretchFix maintains and extends the progress — regular assisted stretching sessions that keep your hips, spine, and shoulders moving freely all season long. Golfers who combine the two don’t just get out of pain; they build a body with more swing in it.

The Key Muscles (and Joints) We Target for Golfers

  • Hips and glutes — the engine of the swing; internal hip rotation is the single most common restriction we find in amateur golfers.
  • Thoracic spine (mid-back) — where your shoulder turn actually comes from; desk jobs lock it up and swings suffer.
  • Core and obliques — transfer power from the ground to the club and shield your lower back from rotational stress.
  • Lats and shoulders — control the club at the top of the backswing and through the release.
  • Hamstrings and calves — maintain your posture and spine angle from the first tee to the 18th green.
Unlock More Distance, Less Pain: The Physical Therapy Guide to a Better Golf Swing in South Orange County 1Lower Back Pain After Golf: Causes and Fixes

Low back pain is the most common complaint in golf, at every age and skill level. The swing puts enormous rotational and compressive force through the lumbar spine — up to eight times body weight at impact by some estimates — and it repeats that force 70 to 100 times a round, plus practice swings.

The Usual Suspects

  • Stiff hips and mid-back — when the joints built for rotation won’t rotate, the lower back (built for stability) is forced to do it instead.
  • A weak core and glutes — without a strong trunk and hip engine, the small muscles of the low back absorb forces they were never designed for.
  • Muscle imbalance — golf is a one-sided sport; hundreds of swings in the same direction create asymmetries that pull on the spine.
  • No warm-up, no stretching — walking straight from the car to the first tee is the most common back-pain recipe we see.

Sample Stretches and Fixes You Can Start Today

  • Open books — lie on your side, knees bent, and rotate your top arm open; 10 per side for thoracic rotation.
  • 90/90 hip switches — seated, rock both knees side to side to restore hip internal rotation.
  • Glute bridges and bird dogs — wake up the glutes and deep core that protect your spine.
  • Standing trunk rotations with a club across your shoulders — grooves rotation through the right joints.

If back pain is already following you home from the course, don’t stretch blindly at it — get it assessed. Your Rausch PT evaluation will tell you exactly why your back hurts and what will fix it — and because California allows direct access to physical therapy, you don’t need a physician referral to get started in most cases.

A Golf-Specific Warm-Up to Add Distance and Reduce Injury Risk

Research on golfers consistently shows that a proper dynamic warm-up improves clubhead speed and cuts injury risk — yet most amateurs skip it entirely. Ten minutes before your round is all it takes:

  1. Brisk walk — 2 minutes, from the parking lot or around the range, to raise your core temperature.
  2. Leg swings — 10 forward/back and 10 side-to-side per leg for the hips and hamstrings.
  3. Hip circles and lunges with rotation — 8 per side to open the hips and turn on the glutes.
  4. Standing open books / trunk rotations — 10 per side to unlock the mid-back.
  5. Arm circles and shoulder crossovers — 15 each to prep the shoulders and lats.
  6. Wrist circles and forearm stretch — 30 seconds; your elbows and wrists take more load than you think.
  7. Progressive practice swings — start at 50% with a short iron, build to full driver speed over 8–10 swings.

Want the warm-up to actually have range of motion to work with? That’s the StretchFix effect. Golfers who come in for a weekly StretchFix session start their rounds with looser hips and a freer shoulder turn — so the first tee shot looks like the tenth. Book your session here.

Unlock More Distance, Less Pain: The Physical Therapy Guide to a Better Golf Swing in South Orange County 2

FAQs: Golf, Mobility & Physical Therapy at Rausch

I’m not injured — can I still see a physical therapist to improve my golf game?
Absolutely. Performance-focused physical therapy is one of the smartest investments a golfer can make. Your therapist will assess your swing-relevant mobility and strength and build a plan to add range, speed, and consistency before pain ever shows up. Book an evaluation here.

What’s the difference between physical therapy and StretchFix?
Physical therapy is one-on-one care from a Doctor of Physical Therapy — assessment, hands-on treatment, and a personalized exercise plan to fix a problem or build performance. StretchFix is our assisted stretching program, designed by those same Doctors of Physical Therapy, focused purely on improving and maintaining your mobility. Many golfers use both: PT to fix, StretchFix to maintain.

How often should a golfer do StretchFix?
Most golfers do great with one session per week during the season. If you’re working through a mobility restriction or playing several rounds a week, your practitioner may suggest twice weekly to start.

Do I need a referral to start physical therapy at Rausch?
In most cases, no — California is a direct-access state, so you can start PT without a physician referral at any of our three South Orange County clinics: Laguna Niguel, Dana Point, and Mission Viejo.

Ready for Your Best Golf Season Yet?

More distance, a smoother swing, and a back that doesn’t complain on the back nine — your body is capable of all three with the right team behind it. The Rausch PT crew can get you there.

“My kids keep my swing honest — StretchFix keeps my back honest. If you love this game and want to play it for decades, come see us.”
— Kevin Rausch, PT — Founder

Rausch Physical Therapy & Sports Performance — helping South Orange County athletes get back to doing what they love.

Pickleball Without the Pain: How to Improve Your Game and Protect Your Body in South Orange County

Rausch Physical Therapy & Sports Performance — Laguna Niguel • Dana Point • Mission Viejo

Pickleball has been named America’s fastest-growing sport for several years running — and nowhere is the boom more obvious than here in South Orange County. Courts in Laguna Niguel, Dana Point, and Mission Viejo are packed from sunrise to sunset. But as participation has exploded, so have pickleball-related injuries, especially among players over 40.

Here’s the good news: the most common pickleball injuries are largely preventable. At Rausch Physical Therapy & Sports Performance, our Doctors of Physical Therapy help racquet-sport athletes of every age play harder, recover faster, and stay off the injured list — and our StretchFix assisted stretching program has quickly become the not-so-secret weapon of local pickleball players. Here’s your complete guide.

How Can I Improve My Pickleball Game Without Getting Injured?

The fastest way to get better at pickleball isn’t just more court time — it’s building a body that moves better. Power in pickleball comes from your legs, hips, and core, not just your paddle arm. When those areas are strong and mobile, you get to more balls, hit with more control, and put far less strain on your shoulders, elbows, and knees.

Key Strength Exercises for Pickleball Players

Add these 2—3 times per week and your game (and joints) will thank you:

  • Squats and split squats — build the leg drive behind every lunge, drop shot, and quick recovery step while protecting your knees.
  • Lateral lunges and side shuffles — side-to-side movement is the heart of pickleball; training it directly reduces ankle and knee sprains.
  • Single-leg balance work (single-leg reaches, single-leg deadlifts) — improves ankle stability for fast direction changes.
  • Rows and band pull-aparts — balance out all that forward, paddle-side dominance and keep your shoulders healthy.
  • Farmer’s carries and forearm work — grip strength is your first line of defense against elbow and wrist overuse injuries.
Pickleball Without the Pain: How to Improve Your Game and Protect Your Body in South Orange County 3
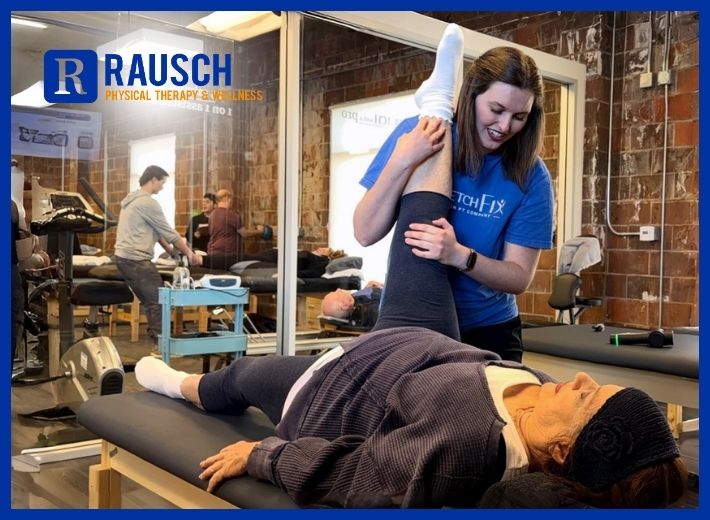
Take your range of motion further. Try StretchFix assisted stretching by Rausch Physical Therapy and Wellness.

The Best Off-Court Activity for Pickleball Players: Assisted Stretching

If strength is half the equation, mobility is the other half — and it’s the half most players skip. That’s exactly what StretchFix was built for. Crafted by Doctors of Physical Therapy, StretchFix is a one-on-one assisted stretching program where a trained practitioner takes your hips, hamstrings, calves, shoulders, and spine through a deeper, safer range of motion than you can ever reach stretching on your own.

For pickleball players, that translates to a longer reach at the kitchen line, a quicker first step, smoother rotation on drives — and far less wear and tear between games. Book a StretchFix session here and feel the difference on the court within a week.

Pickleball Without the Pain: How to Improve Your Game and Protect Your Body in South Orange County 4

The Most Common Pickleball Injuries — and How to Prevent Them

Emergency rooms and PT clinics nationwide have seen pickleball injuries surge alongside the sport’s popularity. These are the ones we treat most at Rausch PT:

  • Ankle sprains — from quick lateral movements and sudden stops.
  • Calf and Achilles strains — especially common in players over 40 who go from zero to full speed without warming up.
  • “Pickleball elbow” (lateral epicondylitis) — yes, the same condition as tennis elbow. More on that below.
  • Rotator cuff strains — from repetitive overhead smashes and serves.
  • Wrist injuries and fractures — usually from bracing a fall.
  • Knee sprains and meniscus irritation — from pivoting and lunging on hard courts.

Simple Exercises That Prevent Them

  • Calf raises (straight-knee and bent-knee) plus slow, controlled heel drops — your best insurance against Achilles trouble.
  • Wrist curls and extensions with a light dumbbell — condition the forearm tendons that take a beating from dinks and drives.
  • Banded shoulder external rotations — keep the rotator cuff strong enough for overheads.
  • Planks and side planks — a stable core protects your lower back on every twist and reach.

Why StretchFix Is a Pickleball Player’s Best Friend

Notice a pattern in those injuries? Almost all of them start with tight, under-prepared tissue. Tight calves overload the Achilles. Stiff hips force your knees and lower back to absorb every lunge. Restricted shoulders turn an easy overhead into a rotator cuff strain.

Regular StretchFix sessions systematically restore that lost range of motion, so your muscles and tendons can absorb the demands of play instead of breaking down under them. Think of it as a maintenance plan for your pickleball body — most of our regulars come in weekly or biweekly and swear by it. Reserve your spot here.

What Causes Tennis Elbow — and How Can Physical Therapy Help?

Despite the name, you don’t need to play tennis to get it — pickleball players are one of the fastest-growing groups we treat for it. Tennis elbow (lateral epicondylitis) is an overuse injury of the tendons that anchor your wrist-extensor muscles to the outside of your elbow. Repetitive gripping and swinging — especially with a paddle that’s too heavy, a grip that’s the wrong size, or backhand mechanics that rely on the wrist instead of the shoulder and trunk — gradually overloads those tendons until every handshake, coffee cup, and backhand hurts.

Physical therapy is the gold-standard, non-invasive treatment. At Rausch PT, your therapist works with you one-on-one through your entire plan of care to:

  • Find the true root cause — often weakness in the shoulder or poor swing mechanics further up the chain, not just the elbow itself.
  • Calm the pain down with hands-on manual therapy and smart load management (usually without stopping play completely).
  • Rebuild tendon capacity with progressive, eccentric strengthening — the approach research consistently supports.
  • Correct grip, equipment, and technique factors so it doesn’t come back.

Bonus: California is a direct-access state, which means you can start physical therapy at Rausch without waiting for a physician referral in most cases. The earlier tendon issues are treated, the faster they resolve — don’t play through it for six months first.

The Best Warm-Up Routine for Pickleball Players Over 40

Most pickleball injuries in players over 40 happen in the first 15 minutes of play — cold muscles and tendons simply can’t handle explosive movement. This 6–8 minute dynamic warm-up is the cheapest injury insurance there is:

  • Brisk walk or easy jog around the court — 2 minutes to raise your body temperature.
  • Leg swings — 10 forward/back and 10 side-to-side per leg.
  • Walking lunges with a gentle torso twist — 10 total.
  • Lateral shuffles — 2 trips across the court, gradually picking up speed.
  • Arm circles and band pull-aparts — 15 each to wake up the shoulders.
  • Wrist circles and a gentle forearm stretch — 30 seconds.
  • Progressive dink rally — start soft, build to game speed over 2 minutes.

Save the long static stretches for after you play — or better yet, let us do the stretching for you. A weekly StretchFix session is the perfect recovery ritual for players over 40: it targets exactly the areas (calves, hips, hamstrings, shoulders) that stiffen with age and playing volume, keeping you loose enough to play multiple days a week — pain-free.

Pickleball Without the Pain: How to Improve Your Game and Protect Your Body in South Orange County 5

FAQs: Pickleball, Injuries & StretchFix

What exactly is StretchFix?
StretchFix is Rausch PT’s one-on-one assisted stretching program, designed by Doctors of Physical Therapy. A trained practitioner guides your body through targeted, PT-informed stretches to improve mobility, speed recovery, and reduce injury risk. Learn more and book here.

How often should I do StretchFix if I play pickleball several times a week?
Most regular players do best with one session per week; players logging four or more days on the court often benefit from twice weekly. Your practitioner will tailor a cadence to your body and schedule.

Do I need a doctor’s referral to start physical therapy?
In most cases, no — California allows direct access to physical therapy, so you can book an evaluation as soon as something feels off.

Where is Rausch PT located?
We have three South Orange County clinics: Laguna Niguel (30100 Town Center Drive), Dana Point (24582 Del Prado Ave), and Mission Viejo (24000 Alicia Pkwy). All three offer physical therapy and wellness services.

Ready to Play More and Hurt Less?

Don’t wait for an injury to force you off the court. Whether you want to move better, recover faster, or finally fix that nagging elbow, the Rausch PT team can get you there.

Rausch Physical Therapy & Sports Performance — helping South Orange County athletes get back to doing what they love.

Golf Injuries Are Not a Normal Part of the Game: How to Play Better, Hit Farther, and Stay on the Course

If you’ve played golf long enough, you’ve probably heard someone say, “My back always hurts after 18 holes.” Or maybe you’ve said it yourself. The truth is, soreness, stiffness, and nagging pain have become so common in golf that many players assume they’re simply part of the game. They’re not. Whether you’re trying to break 80, outdrive your buddies, or simply enjoy a pain-free round, your body has a huge impact on your performance. And often, the difference between a great round and a frustrating one has less to do with your clubs—and more to do with your mobility, strength, and movement quality.

At Rausch Physical Therapy, we work with golfers of all ages and skill levels who want to move better, swing more efficiently, and spend more time celebrating birdies than icing sore muscles afterward.

The Most Common Golf Injuries We See

Golf looks low-impact, but your body experiences tremendous forces during every swing. A modern golf swing can place significant rotational stress through the spine, hips, shoulders, and knees. When mobility is limited or certain muscles aren’t doing their job, something else has to compensate. Common golf-related injuries include:

🏌️ Low back pain

🏌️ Rotator cuff and shoulder pain

🏌️ Elbow pain (“Golfer’s Elbow”)

🏌️ Hip stiffness and hip impingement

🏌️ Knee discomfort

🏌️ Wrist and hand injuries

Many of these issues don’t happen because of one bad swing. They develop over time through repetitive movement, poor mechanics, mobility restrictions, or strength deficits.

Golf Injuries Are Not a Normal Part of the Game: How to Play Better, Hit Farther, and Stay on the Course 6

The Surprising Reason Your Swing May Be Holding You Back

Most golfers immediately look at their swing when performance declines. But often the problem starts before the swing ever begins. If your hips don’t rotate properly, your lower back picks up the slack. If your thoracic spine is stiff, your shoulders work overtime. If your core isn’t stabilizing effectively, power leaks throughout the swing. Translation? You can spend thousands on lessons, new clubs, and launch monitors, but if your body can’t physically get into the positions your swing requires, you’ll continue fighting the same problems.

The Golf Performance Formula

Better mobility = better rotation

A powerful golf swing depends on rotational movement. Key areas include:

✅ Thoracic spine mobility

✅ Hip mobility

✅ Shoulder mobility

When these areas move well, golfers often see:

  • Increased clubhead speed
  • More consistent ball striking
  • Improved accuracy
  • Reduced stress on the lower back
  • Better stability = better control
  • Distance is fun.
  • Control wins golf tournaments.
  • Strong core muscles, glutes, and lower body stability create a foundation that allows your swing to repeat consistently.

Golf Injuries Are Not a Normal Part of the Game: How to Play Better, Hit Farther, and Stay on the Course 7

Think of it this way: A cannon sitting on a canoe isn’t nearly as effective as a cannon sitting on concrete. Better recovery = more golf many golfers spend more money on equipment than they do taking care of the body swinging it. Regular mobility work, recovery treatments, stretching, and targeted strengthening can help keep minor aches from becoming season-ending problems.

Quick Self-Test: Are You Losing Distance Because of Your Body?

Answer these honestly:

1. Do you feel stiff during the first few holes?

2. Do you lose distance as the round progresses?

3. Does your lower back feel tight after playing?

4. Have you noticed reduced rotation over the years?

5. Do you feel soreness after most rounds?

If you checked two or more boxes, your body may be limiting your golf performance more than your swing mechanics.

The good news? Most of these limitations are highly treatable.

What Makes Golf Physical Therapy Different?

At Rausch PT, we don’t just treat pain. We evaluate how your body moves and identify the specific restrictions affecting your golf swing. Your customized plan may include:

✔ Mobility training

✔ Strength development

✔ Golf-specific movement analysis

✔ Injury prevention strategies

✔ Recovery and manual therapy

✔ Personalized home exercises

Golf Injuries Are Not a Normal Part of the Game: How to Play Better, Hit Farther, and Stay on the Course 8Our goal is simple: Help you move better, play better, and stay on the course longer.
FAQ: Golf Injuries & Performance

Is back pain common in golfers?

Yes—but common doesn’t mean normal. Limited hip mobility, poor rotation, and core weakness are often major contributors.

Can physical therapy improve my golf swing?

Absolutely. Many swing limitations originate from physical restrictions rather than technical flaws. Improving mobility and stability often translates directly to better performance.

Can PT help me hit the ball farther?

In many cases, yes. Better mobility and force generation can improve clubhead speed and power transfer.

Should I wait until I’m injured to see a physical therapist?

Not at all. Some of the best results come from identifying limitations before they become injuries.

I’m over 50. Is it too late to improve my mobility?

Not even close. Many golfers see meaningful improvements in flexibility, strength, and performance well into their 60s, 70s, and beyond.

Golf Injuries Are Not a Normal Part of the Game: How to Play Better, Hit Farther, and Stay on the Course 9

Stop Letting Your Body Dictate Your Scorecard

You don’t need a new driver. You don’t need another YouTube swing tip. and you definitely don’t need to accept pain as the price of playing golf. What you need is a body that can do what your swing is asking it to do. Whether you’re recovering from an injury, trying to increase distance, or simply want to walk off the 18th green feeling as good as you did on the first tee, our team is here to help.

Call Rausch Physical Therapy today at 949-276-5401.

Schedule your golf performance assessment and discover what’s holding your swing back.

Follow us on Instagram for movement tips, injury prevention strategies, and performance insights:
@rauschpt.

Play more golf. Hit better shots. Feel better doing it.

How Can I Prevent a Sports Injury?

When it comes to sports, staying healthy is just as important as playing hard. A serious injury can knock you out of the game for weeks—or even months—whether you’re a pro athlete or simply enjoying weekend competition. The good news is that many common injuries can be prevented with a few smart adjustments to your training and lifestyle.

Exercise is good for the body and with the proper precautions, sports injuries can often be prevented. The quality of protective equipment – padding, helmets, shoes, mouth guards – has helped to improve safety in sports. But, you can still be susceptible to injury. Always contact your healthcare provider before starting any type of physical activity, especially vigorous types of exercises or sports.

Causes of sports injuries may include:

  • Improper or poor training practices
  • Wearing improper sporting gear
  • Being in poor health condition
  • Improper warm-up or stretching practices before a sporting event or exercise

How Can I Prevent a Sports Injury? 10

Common sports injuries include:

  • Sprains and strains
  • Joint injuries (knee)
  • Muscle injuries
  • Dislocations
  • Fractures
  • Achilles tendon injuries
  • Pain along the shin bone

How can I prevent a sports injury?

The following are some basic steps to prevent a sports injury:

  • Develop a fitness plan that includes cardiovascular exercise, strength training, and flexibility. This will help decrease your chance of injury.
  • Alternate exercising different muscle groups and exercise every other day.
  • Cooldown properly after exercise or sports. It should take 2 times as long as your warm-ups.
  • Stay hydrated. Drink water to prevent dehydration, heat exhaustion, and heatstroke.
  • Stretching exercises can improve the ability of muscles to contract and perform, reducing the risk of injury. Each stretch should start slowly until you reach a point of muscle tension. Stretching should not be painful. Aim to hold each stretch for up to 20 seconds.
  • Use the right equipment or gear and wear shoes that provide support and that may correct certain foot problems that can lead to injury.
  • Learn the right techniques to play your sport.
  • Rest when tired, Avoid exercise when you are tired or in pain.
  • Always take your time during strength training and go through the full range of motion with each repetition.
  • If you do sustain a sports injury, make sure you participate in adequate rehabilitation before resuming strenuous activity.

How Can I Prevent a Sports Injury? 11

At Rausch Physical Therapy, we go beyond treating injuries—we help athletes of every level stay in peak condition so they can keep doing what they love. Our team develops personalized prevention plans that focus on strengthening weak points, improving flexibility, correcting movement patterns, and reducing risk factors unique to your sport. This proactive approach keeps you on the field, the court, or the track longer and performing at your best.

👉 Don’t wait until an injury sidelines you. Call us today at 949-276-5401 to schedule your sports injury prevention session. And don’t forget we have RX Massage and Stretch Fix to support your best health! For daily insights and performance tips, follow us on Instagram @rauschpt.


Reference: [Read more here about prevention strategies from Johns Hopkins Medicine.]

The Female Athlete Triad & How Physical Therapy Helps Girls Grow Strong

As girls grow and step into competitive sports, their bodies go through a lot of changes. For young female athletes, balancing the demands of school, practice, competition, and growing bodies isn’t always easy. One challenge that often goes unnoticed is the Female Athlete Triad—a condition that can affect health, performance, and long-term well-being.

At Rausch PT, we’re passionate about helping athletes of all ages move better, recover faster, and build lifelong healthy habits. That’s why early awareness and support around this issue are so important.

1. What Is the Female Athlete Triad?

The Female Athlete Triad is a combination of three interconnected concerns:

  • Energy Deficiency: Not getting enough calories or nutrients to fuel both growth and training.
  • Menstrual Dysfunction: Irregular or absent menstrual cycles due to energy imbalance.
  • Low Bone Density: Higher risk of stress fractures and weaker bones over time.

Even if only one piece of this triad is present, it can impact an athlete’s overall health and performance.

The Female Athlete Triad & How Physical Therapy Helps Girls Grow Strong 12

2. How Physical Therapy Supports Young Athletes

Physical therapy is about more than just recovering from injury—it’s about prevention, performance, and confidence. Here’s how we help:

  • Early Recognition: PTs spot movement issues, fatigue, or recurring injuries that could point to energy imbalance or bone stress.
  • Strength & Movement Training: We guide athletes through safe strength programs to protect joints and build stronger bones.
  • Education & Collaboration: Our therapists partner with parents, coaches, and nutrition experts to make sure athletes are fueling and training the right way.
  • Healthy Habits: We help athletes learn body awareness, balance training loads, and build sustainable routines—skills that carry into adulthood.

3. Why Mental Health Matters Too

Sports aren’t just physically demanding—they’re mentally challenging as well. Confidence, mindset, and resilience all play a role in how young athletes perform and recover.

For parents looking to support both the body and mind, we recommend these great podcast episodes from The Elite Competitor:

Pairing physical support with mental strategies helps girls grow not just as athletes—but as strong, confident young women.

4. Takeaway: Strong Bodies, Strong Futures

The Female Athlete Triad can be serious, but with the right guidance and care, young athletes can thrive. Physical therapy gives girls the tools to stay healthy, prevent injury, and build confidence as they grow.

At Rausch PT & Wellness, we’re here to support your athlete’s journey every step of the way—whether it’s injury prevention, recovery, or building a strong foundation for future success.

The Female Athlete Triad & How Physical Therapy Helps Girls Grow Strong 13

📞 Want to learn more about supporting your young athlete? Call us at (949) 276-5401 or stop by Rausch PT to talk with our team.

👉 Check out The Elite Competitor’s free training on how to best support your girl athlete with confidence, encouragement, and the tools she needs to thrive.

Five Ways to Train Smarter This Offseason

Five Ways to Train Smarter This Offseason

By Sean Swopes, PT, DPT, CSCS

Rausch Physical Therapy & Sports Performance

While most people take the offseason to train for a better “next year,” Mountain Bike-PT Sean Swopes explains why you should spend some time out of the saddle and try a few other methods to improve your performance and overall health.

—

You survived racing through the dirt and heat, and now the Over the Hump 2016 season has come to an end. So, what next? For many of you, the end of OTH means it’s time to pump up those skinny tires and focus on road races, crits and TT’s. Before you get back to pounding those pedals, take some time away from tuning up your bike and spend some time tuning up your body.

While the subtle differences of road cycling and mountain biking offers great balance to your riding skill level, as the quickly changing terrain and variable cadence can help to enhance your riding technique, it’s also important to spend some time out of the saddle. As a physical therapist, I know that muscle imbalance/dominance are main contributors to pain and dysfunction, but as a mountain biker I also know that many of us will go to great lengths to enhance our power output, VO2 max, and velocity.

The offseason is a great time to train to improve your performance, but it’s also the perfect time to start focusing on ways to prevent the aches and pains that may be keeping you from reaching your potential. Here are five methods you can use to stay balanced this off-season.

1. Mix Things Up

A quick and easy method I like to use to offset this imbalance is to simply go for a run. Running is a great way to change the pace and the demands of those muscle that typically get overworked when cycling. Swimming also offers a great way to continue working on aerobic demand while also decreasing the load demands on your joints.

2. Get Rolling With Soft-Tissue Work

Ever feel your knees brushing the top tube during a down stroke? It’s a frequent technique used to stay in an aerodynamic position, but it can also create increased tightness of the liotibial (IT) band. In fact, it’s quite common for cyclists to develop IT Band Syndrome from repeated down stroke.

To combat this imbalance, my colleague Dustin Hancock, DPT has created a great foam rolling program to help improve flexibility and mobility of your tissues. Click here to check it out.

3. Strengthen Your Core

I went to a great workshop recently where we discussed how important it is to have core strength for successful cycling. I have been preaching this exact thing for years! We often think of our legs being our powerhouse, but how much power can you expect your legs produce without a stable base to explode from?

The primary drive for you pedal stroke is produced from the glutes, quadriceps and hamstrings. All of these muscles attach directly to the pelvis. Without good core balance and stability, your biomechanical leverage to utilize these muscle group is altered, and therefore you produce less force.

To improve your core and stability, try these exercises:

  1. Bird Dogs – Do these on a stable surface, or challenge yourself on an unstable surface. The key is to focus on your pelvis and prevent any rotation or tilting
  2. Planks – You know, that exercise we all love to do. Challenge yourself by starting with a static plank on your elbows and sides, then progress by involving leg movements.
  3. Swiss Ball Walkouts – Progress this exercise by incorporating knee tucks and pikes.

4. Work on Those Lungs

VO2 max is the maximum rate of oxygen consumption during vigorous activity. It’s often used to objectively measure an individual’s aerobic physical fitness and determine their endurance capacity during prolonged, submaximal exercise. The theory is: improve your VO2 max, improve your performance.

While the critical importance of VO2 max is debated, a 2012 article in the Journal of Strength and Conditioning Research concluded that VO2 max was a great determinant of mountain bike race performance, at least more so than for road races.

So, what can you do while training to improve your VO2 max? While research has shown that Hight Intensity Interval Training (HIIT) can lead to great benefits in cardiovascular gain, is HIIT really the only way to go? A 2010 article by International Journal of Sports Physiology and Performance reports that a 80/20 split in Low Intensity to High Intensity training program will create ideal physiological benefits, like V02 max.

And just remember, while it’s important to push you body to its limits to create physiological responses, this is often where injury occurs.

5. Go See a Physical Therapist

With weekly OTH races for the past three months, it’s likely you’ve developed a few aches and pains this summer. Unfortunately, many MTB racers (like most athletes) subscribe to the school of thought, “Just deal with the pain until the end of the season; it’ll get better when I stop racing.”

While I can’t force you to change your mindset, I can tell you that pain is often your body’s way of telling you that it’s undergoing an abnormal amount of stress. We often think that that one fall, that one crash, is what’s going to break our bodies. The truth is, most injuries are the result of overuse—repetitive stress over a prolonged period—and while our body does a great job of adapting to the stress we place on it, its ability to repair itself diminishes the more time we spend in stress/pain.

So, now that OTH 2016 season is finished, show your body you care and make an appointment with a physical therapist. At Rausch Physical Therapy & Sports Performance, your PT will perform a biomechanical assessment to determine any new abnormal alignment patterns, soft tissue restrictions, or areas that you need to address this offseason to repair your body and prevent future injuries.

Conclusion

Stop allowing pain to determine how your body moves. While you may think you can live with “a little” hip pain, you may not realize that pain in one region of your body can lead to compensatory movement in another.

Think of it this way: think of how your derailleur cable on your bike can begin to stretch. This affects how your bike can shift, but you tell yourself you can live with that. But that small sound you hear from your chain grinding against the cassette means you’re slowly wearing down your chain, until one day—it breaks.

The moral of the story here is to listen to your body’s signs that your internal drive train is breaking down, and get it fixed.


Sean Swopes | Rausch Physical TherapyAbout Sean Swopes, PT, DPT, CSCS

sean@rauschpt.net

Sean Swopes, DPT is the “Mountain Biking-PT” at Rausch Physical Therapy & Sports Performance. He is also a certified Strength and Conditioning Specialist. As a physical therapist, Sean’s goal is to help his patients understand their musculoskeletal impairments and work together to improve them.

Jon’s Youth Baseball Injury

Around the office, they call me “The Baseball Guy.” My years of clinical treatment of ballplayers at Rausch Physical Therapy and Sports Performance, coupled with my interest in biomechanical research, has motivated me to find new ways to reverse the alarming increase in youth baseball arm injuries. In fact, for the past two years I have been developing injury prevention programs for southern Orange County baseball leagues to help protect our youth’s elbows and shoulders.

And it looks like I am not the only one getting on base with this initiative. Major League Baseball and USA Baseball recently teamed up to launch their Pitch Smart program, which is designed to educate parents, coaches and young athletes about how to avoid overuse injuries. It includes information on pitching guidelines, injury risk factors, Tommy John surgery and more.


Did you know:

If you pitch more than 100 innings in a year, whether little league, club or showcase, it will increase your risk of injury by 3.5 times

If you pitch greater than 8 months in a year, it will increase risk of surgery by 5 times

The number one risk factor for injury

I have found that out of all the risk factors that can cause injury, the number one is pitching too much, both in a game and in any given year. New research is coming out every month about the correlation of throwing too much and arm injuries in little league athletes.

Kids should take off about 2-3 months of competitive pitching in a year and engage in other sports or active rest where they are still using their arms, just not in a pitching motion

As a healthcare professional, I believe that change needs to occur in the traditions and schedules of little league baseball across the nation. The Pitch Smart initiative proves to me—and hopefully to parents and coaches—how crucial injury awareness and prevention is. I want to take this information and use my skill to prevent, rehabilitate and treat the youth of little league baseball.

If you have any questions about throwing injury prevention or rehabilitation, please send me an email and I will be happy to answer them. For now, take care of those elbows and shoulders!

Sincerely, The Baseball Guy

Jonathan Meltzer, D.P.T. | jonathan@rauschpt.net


About the Author
Jonathan Meltzer graduated from the University of Redlands with a bachelor of arts in biology and a minor in physical education. Following graduation, Jonathan discovered his passion for physical therapy while working as a Physical Therapy Aide. After graduating top of his class from Loma Linda University in 2012 with a Doctorate in Physical Therapy, Jonathan began his career at Rausch Physical Therapy and Sports Performance. Jonathan’s goals are to identify limitations and treat his patients with the most recent and innovative techniques in order to maximize functional independence and obtain his patients’ individual goals.

A Beginner’s Weight Training Guide

Ready to unlock your inner strength and build a healthier you? Weight training isn’t just for bodybuilders anymore! Whether you’re a complete novice or someone curious about adding weights to your routine, here is a roadmap to success. If you have a pre-existing concern or want to know how to work this into your routine, we are here to guide you through and ensure you’re at your healthiest every step of the way!

A Beginner’s Guide to Weight Training

Some exercises, including bicep curls and squats, can support weight training at home or the gym. You can use free weights or your body weight with certain exercises to provide resistance.

Whether your goal is to build muscle mass or achieve a fitter, more toned body, lifting weights can help you get there.

Weight training, also known as resistance or strength training, builds lean, stronger muscles, strengthens your bones and joints, and can help keep your metabolism in a healthy state — meaning you’ll burn more calories even when you’re resting.

And the benefits of lifting weights aren’t just for young people. Weight training as we age can help fight the loss of muscle mass and mobility, as well as improve psychological well-being.

So even if you’ve never done any kind of weight training before — it’s never too late to start!

What’s more, you don’t even need to belong to a gym. You can simply use your body weight for many exercises or use free weights, resistance bands, or other home fitness equipment to get results.

This article will walk you through how to get started with weight training and provide suggested exercises and training advice for beginners.

What do you need to start weight training?

If you’ve never lifted weights before, consider starting out with the help of a certified personal trainer. They’ll be able to teach you the proper form for specific exercises and set up a strength training program tailored to your needs.

Many gyms or fitness centers offer introductory training sessions at little or no cost, or they have trainers available if you have questions. Additionally, there are many personal trainers who train clients online, through video platforms.

While most gyms have a combination of resistance machines and free weights, such as dumbbells and barbells, you can also get a comprehensive weight training workout at home with basic equipment.

A Beginner's Weight Training Guide 14Equipment options

You don’t necessarily need weights to build lean muscle mass and tone your body. As an example, for some strength training exercises, like pushups or lunges, you only need your body weight to provide resistance.

You can expand your at-home workout options with dumbbells. A beginner’s set of adjustable weight dumbbells starts at about $50, but the price increases as you add more weight.

Kettlebells, which are weighted balls with handles, are another popular option. Many kettlebell exercises work several muscle groups at once, which makes them effective for a full-body workout, especially if you’re short on time.

Resistance bands are also a helpful addition to your workout equipment. These color-coded elastic bands provide varying levels of resistance when pulled and stretched.

A set of resistance bands can be purchased for $10 to $60. Because they’re light and portable, you can take them with you when you travel.

What to know before you begin

Once you’re ready to get started with a weight training program, keep the following tips in mind.

Weight lifting tips for beginners

  • Warm up. Some aerobic activity, such as a 5-minute jog or brisk walk, will increase blood flow to your muscles and prime them for a good workout. Skipping rope or doing jumping jacks for a few minutes are also good warmup options.
  • Start with lighter weights. You want to start with a weight that you can lift 10 to 15 times with proper form. Begin with 1 or 2 sets of 10 to 15 repetitions, and slowly progress to 3 sets or more.
  • Gradually increase the weight. When you can easily do the recommended number of sets and reps, increase the weight by 5 to 10 percent. Check to make sure this is the right weight for you before doing a full workout.
  • Rest for at least 60 seconds in between sets. This helps prevent muscle fatigue, especially as you start out.
  • Limit your workout to no longer than 45 minutes. You can get the workout you need in this time frame. Longer sessions may not lead to better results and may increase your risk of burnout and muscle fatigue.
  • Gently stretch your muscles after your workout. Stretching can help boost your flexibility, ease muscle tension, and reduce your risk of injury.
  • Rest a day or two in between workouts. Resting gives your muscles time to recover and replenish energy stores before your next workout.

Exercises for beginners

You may be especially interested in building your biceps or toning your legs, but the best resistance training program works all the major muscle groups in your body.

In fact, overworking one muscle group at the expense of another could raise your risk of injury.

For a solid all-over workout, you may want to start off with the following exercises. Including these exercises in your weight lifting routine will work most of the large muscle groups in your body.

SETS AND REPS

Start off by doing 10 to 15 reps of each exercise. Aim for 1 to 2 sets to start. As you build strength, you can add extra sets, and also increase the weight.

  • What is a rep? A repetition (rep) is one complete exercise movement.
  • What is a set? A set is a certain number of reps. For instance, 10 to 15 reps make up 1 set.

Dumbbell single-arm rows

Targeted area: Your back and upper arm muscles.

How to do this exercise:

  1. Place your left knee on the end of a sturdy bench and place your left hand palm-down on the bench for balance.
  2. With your back parallel to the ground, reach down with your right hand and grab a dumbbell with your palm facing the bench.
  3. Slowly bring the dumbbell up to your chest. Squeeze your back and shoulder muscles and slowly straighten your arm to the starting position.
  4. Finish 1 set, then switch arms and do 1 set with your right knee and right hand on the bench.

Dumbbell shoulder press

Targeted area: Your shoulder muscles.

How to do this exercise:

  1. Sit or stand with a dumbbell in each hand, your palms facing forward, and your elbows out to your side at 90-degree angles.
  2. Without leaning back or arching your back, press the dumbbells up over your head until your arms are almost straight.
  3. Slowly return them to the starting position.

Dumbbell chest press

Targeted area: Your chest muscles.

How to do this exercise:

  1. Lie flat on a bench with a dumbbell in each hand and your palms facing forward.
  2. Slowly press the dumbbells upward until your arms are directly over the shoulders. Be careful not to lock your elbows.
  3. Slowly lower the dumbbells to the starting position. Your elbows should be a little lower than your shoulders.

Bicep curls

Targeted area: Your biceps (muscles in the front of your arms).

How to do this exercise:

  1. Sit or stand with a dumbbell in each hand in front of you, your elbows at your sides, and your palms facing up.
  2. Curl the dumbbells up toward your shoulders by bending your elbows but keeping them stationary at your sides.
  3. Reverse the curl to the starting position.

Triceps extensions

Targeted area: Your triceps (muscles in the back of your arms).

How to do this exercise:

  1. You can do this exercise sitting on a bench or standing with your feet about shoulder-width apart.
  2. Place both your hands around the dumbbell handle.
  3. Lift the dumbbell up over your head so that your arms are straight.
  4. Keeping your elbows by your ears, bend them to a 90-degree angle, lowering the dumbbell behind your head.
  5. Slowly straighten your arms so that the dumbbell is above your head again.

Resistance band pull apart

Targeted area: The muscles in your back, shoulders, and arms.

How to do this exercise:

  1. Stand with your arms stretched out in front of you at chest height.
  2. Hold a resistance band parallel to the ground and grasp it tightly with both hands.
  3. Keeping your arms straight, pull the band toward your chest by moving your arms outward, away from your body. Use your mid-back to initiate this movement.
  4. Keeping your spine straight, squeeze your shoulder blades together and “downward,” and then slowly return to the starting position.

Lunge

Targeted area: Your leg muscles, including your quadriceps, hamstrings, and calves, as well as your glutes (buttocks). If you include a dumbbell, you’ll work your biceps, too.

How to do this exercise:

  1. Stand tall with your feet shoulder-width apart (a dumbbell in each hand for the more advanced).
  2. Take a big step forward with your left leg so your heel touches down first.
  3. Lower your body so your left thigh is parallel to the floor.
  4. Pause for a second (curling the dumbbells up toward your chest and lowering them again to the starting position for the more advanced).
  5. Push off your heel and return to the starting position.
  6. Repeat, but lead with your right leg.

Squats

Targeted area: Your leg muscles, including your quadriceps, hamstrings, and calves.

How to do this exercise:

  1. Squats can be done with or without weights.
  2. Stand with your feet shoulder-width apart and slowly bend your knees, so your thighs are almost parallel to the floor.
  3. Slowly rise to your starting position.
  4. To add resistance, hold a dumbbell or kettlebell close to your chest with both hands.

Calf raises

How to do this exercise:

  1. Stand on the edge of a step with your feet parallel to each other.
  2. Slowly raise your heels a few inches above the step and hold for a few seconds.
  3. Slowly lower your heels below the edge of the step and hold for a few seconds. You should feel a stretch in your calves.
  4. You can add resistance by holding a light dumbbell in each hand down by your sides.

Plank

The plank works your entire body, but specifically targets your core. It also strengthens your arms, shoulders, back, glutes, and legs.

  1. Start on all fours, with your hands below your shoulders and your knees below your hips.
  2. Straighten your legs behind you, keeping your feet hip-width apart. Tighten your core.
  3. Hold for 10 to 30 seconds.
  4. As you get stronger, increase to holding it a minute or more

To make this exercise easier, place your knees on the floor.

Weight training schedule

If your goal is to mainly build strength, three weight training workouts a week will likely provide the results you need.

According to a 2019 studyTrusted Source, doing a weight training routine 3 times a week is as effective as more frequent workouts for strength building.

However, if you want to build up muscle mass, you’ll need to do more repetitions and more frequent workouts.

You can work all your muscle groups during a workout, doing 1 or 2 sets of each exercise to start, and working your way up to more sets or heavier weights as the exercises get easier.

Or, you can focus on certain muscle groups on specific days. For example:

Weekly weight training schedule

Monday: Chest, shoulders, triceps, and core

  • dumbbell chest press
  • dumbbell shoulder press
  • dumbbell triceps extension
  • plank

Wednesday: Back, biceps, and core

  • dumbbell single-arm rows
  • bicep curl
  • resistance band pull apart
  • plank

Friday: Legsand core

  • lunges
  • squats
  • calf raises
  • plank

As you become more comfortable with weight training, you can mix up the exercises you do for each muscle group. Be sure to add weight and more sets as you build up your strength.

A Beginner's Weight Training Guide 15Safety tips

It’s important to focus on safety when you start a weight training routine. Pay close attention to your body and resist the urge to push yourself too quickly.

To stay safe while weight training, remember to:

  • Wear proper clothing for weight lifting, like closed-toe shoes and weight lifting gloves if needed.
  • Perform each exercise slowly, paying attention to proper form.
  • Use a spotter to help you with heavier lifts, especially those that go above your head.
  • Stay hydrated throughout your workout.
  • Inhale before your lift and exhale during the lift. Never hold your breath when working out weights.
  • Stop your workout if you feel sharp or stabbing pain. If the pain doesn’t go away when you stop exercising, seek medical attention.

If you have a health condition, talk with your doctor about a weight training and exercise program that’s safe for you.

The bottom line

Weight training is also known as resistance or strength training. It involves moving parts of your body against some kind of resistance, like weights, resistance bands, weight machines, or even your own body weight.

Weight training is an excellent way to build muscle mass and make your muscles stronger. It can also keep your metabolism chugging, strengthen your bones and joints, improve your muscle tone, help you burn more calories, and keep you healthier as you age.

To make the most of your weight training routine, start with lighter weights until you master the proper form. Then increase the weight or resistance slowly to avoid injury. Be sure to work all your muscle groups for optimal strength and fitness.

Not sure where to start? Explore our qualified physical therapists who can help you embark on your weight training journey safely and effectively. Contact us today at 949-276-5401. For more tips, follow us on Instagram.


Reference: [ https://www.healthline.com/health/how-to-start-lifting-weights ]

Boost your fitness with 3 beginner-friendly plyometric moves!

These dynamic exercises harness the power of explosive jumps and bodyweight movements to skyrocket your fitness in no time. But hold on, don’t let the word “explosive” intimidate you! This post is your beginner-friendly guide to unlocking the benefits of plyometrics with 3 easy-to-learn moves.

What are plyometrics?

Plyometric training involves short, intense bursts of activity that target fast-twitch muscle fibers in the lower body. These fibers help generate explosive power that increases speed and jumping height.

“Plyometrics are used by competitive athletes who rely on quick, powerful movements, like those in basketball, volleyball, baseball, tennis, and track and field,” says Thomas Newman, lead performance specialist with Harvard-affiliated Mass General Brigham Center for Sports Performance and Research. Plyometrics also can help improve coordination, agility, and flexibility, and offer an excellent heart-pumping workout.

Who can safely try plyometrics?

There are many kinds of plyometric exercises. Most people are familiar with gym plyometrics where people jump onto the top of boxes or over hurdles.

But these are advanced moves and should only be attempted with the assistance of a trainer once you have developed some skills and muscle strength.

Keep in mind that even the beginner plyometrics described in this post can be challenging. If you have had any joint issues, especially in your knees, back, or hips, or any trouble with balance, check with your doctor before doing any plyometric training.

How to maximize effort while minimizing the risk of injury

  • Choose a surface with some give. A thick, firm mat (not a thin yoga mat); a well-padded, carpeted wood floor; or grass or dirt outside are good choices that absorb some of the impact as you land. Do not jump on tile, concrete, or asphalt surfaces.
  • Aim for just a few inches off the floor to start. The higher you jump, the greater your impact on landing.
  • Bend your legs when you land. Don’t lock your knees.
  • Land softly, and avoid landing only on your heels or the balls of your feet.

Three simple plyometric exercises

Boost your fitness with 3 beginner-friendly plyometric moves! 16

Here are three beginner-level exercises to jump-start your plyometric training. (Humming the bionic man sound is optional.)

Side jumps

Stand tall with your feet together. Shift your weight onto your right foot and leap as far as possible to your left, landing with your left foot followed by your right one. Repeat, hopping to your right. That’s one rep.

  • You can hold your arms in front of you or let them swing naturally.
  • Try not to hunch or round your shoulders forward as you jump.
  • To make this exercise easier, hop a shorter distance to the side and stay closer to the floor.

Do five to 15 reps to complete one set. Do one to three sets, resting between each set.

Jump rope

Jumping rope is an effective plyometric exercise because it emphasizes short, quick ground contact time. It also measures the coordination and repeated jump height as you clear the rope.

  • Begin with two minutes of jumping rope, then increase the time or add extra sets.
  • Break it up into 10- to 30-second segments if two minutes is too difficult.
  • If your feet get tangled, pause until you regain your balance, and then continue.

An easier option is to go through the motions of jumping rope but without the rope.

Forward hops

Stand tall with your feet together. Bend your knees and jump forward one to two feet. Turn your body around and jump back to the starting position to complete one rep.

  • Let your arms swing naturally during the hop.
  • To make this exercise easier, hop a shorter distance and stay closer to the floor.
  • If you want more of a challenge, hop farther and higher. As this becomes easier to do, try hopping over small hurdles. Begin with something like a stick and then increase the height, such as with books of various thicknesses.

Do five to 10 hops to complete one set. Do one to three sets, resting between each set.

Unlock the benefits of plyometrics safely and effectively with expert physical therapy designed for athletes! Contact us today at 949-276-5401. You can follow us on TikTok and Instagram for more inspiration and tips.


Reference: [https://www.health.harvard.edu/blog/plyometrics-three-explosive-exercises-even-beginners-can-try-202308022960]

Preventing Dance-Related Injuries

Dancers put their bodies through incredible feats of strength, agility, and flexibility. However, these demanding movements can also lead to a variety of injuries. As PTs, we understand the importance of maintaining peak performance while staying injury-free. Take a look at our valuable insights into prevention strategies and techniques to help dancers recover and thrive. 

Dance may look effortless, but it requires a lot of strength, flexibility and stamina. It also comes with a high risk of injuries. Whether you are a dancer, the parent of a dancer or a dance teacher, you should be aware of the most common dance injuries and learn how to avoid them.

Johns Hopkins performing arts physical therapists Andrea Lasner and Amanda Greene share valuable information about dance injury treatments and prevention tips. Lasner and Greene, both dancers, have turned their love for the art into a means of helping injured dancers.

What are some common dance injuries?

A few studies that looked into dance injuries found that injuries from using your joints and muscles too much (overuse injuries) are the most common in dancers. The majority of these overuse injuries involve an ankle, leg, foot or lower back. Some common dance injuries are:

  • Hip injuries: snapping hip syndrome, hip impingement, labral tears, hip flexor tendonitis, hip bursitis and sacroiliac joint dysfunction
  • Foot and ankle injuries: Achilles tendonitis, trigger toe and ankle impingement
  • Knee injuries: patellofemoral pain syndrome
  • Stress fractures: metatarsals, tibia, sesamoids and lumbar spine
  • Dancers are also likely to develop arthritis in the knee, hip, ankle and foot

Generally, dancers have a much lower rate of anterior cruciate ligament (ACL) injuries than other athletes. One explanation could be that dance training involves much more intense jumping from an earlier age than other sports, which helps improve muscle control.

How do I know if the pain is from an injury?

In most cases, the pain you experience after dancing is muscle soreness that usually subsides within 24 to 48 hours. Sometimes, it takes a few days for muscles to get sore, which is also normal. However, if you experience the following types of pain, you may have suffered an injury:

  • Pain that wakes you up at night
  • Pain that is present at the start of an activity
  • Pain that increases with an activity
  • Pain that makes you shift your weight or otherwise compensate your movements

If you experience such pain, consult with a medical specialist — preferably a physical therapist or physician with experience in treating dancers. They will be able to determine whether additional testing is needed and will formulate an appropriate treatment plan.

Why do dance injuries happen?

Dance is a physically demanding activity. Dancers perform repetitive movements for several hours a day. Studies have shown that dancing five hours a day or longer leads to an increased risk of stress fractures and other injuries.

On top of the intensive training, many dancers get little time to recover between the sessions and have no “offseason.” Restrictive diets and unhealthy body weights may also contribute to dance injuries. Proper nutrition is important for dancers of all ages.

How do dancers get ankle sprains?

Ankle sprains are the number one traumatic injury in dancers. Traumatic injuries are different from overuse injuries as they happen unexpectedly. When an ankle is sprained, ligaments on the inside or outside of your foot get twisted or overstretched and may experience tears. Ankle sprains often happen due to improper landing from a jump, misaligned ankles (when they roll in or out) or poorly fitted shoes. Torn ligaments never heal to their preinjury condition. Once you’ve sprained your ankle, you are at risk of doing it again. It’s important to build muscle strength to prevent further injuries.

Dance Injury Prevention

Preventing Dance-Related Injuries 17

How can dance injuries be prevented?

The majority of overuse injuries and even some traumatic dance injuries can be prevented. Follow these guidelines to reduce your risk of injury:

  • Eat well and stay hydrated before, during and after class.
  • Get enough rest and avoid overtraining.
  • Do cross-training exercises to build strength and endurance in all parts of your body.
  • Always wear proper shoes and attire.
  • Always warm-up before training or performances.
  • Lead a healthy lifestyle and get to know your body.

When injuries happen, address them immediately and get advice from a doctor or physical therapist.

What are good cross-training exercises for dancers?

Core and hip strengthening exercises like Pilates and stability-based yoga are great for dancers. And so are aerobic and cardiovascular activities, such as running, swimming or biking. They get your heart rate up and help build stamina for long performances.

Many dancers don’t do enough cardio during their regular training. Just 30 minutes three to four times a week is usually enough to improve your endurance. As always, do this in moderation and in short intervals to avoid stressing your joints. Being screened by a physical therapist with experience treating dancers will help you identify individual areas of weakness to address with specific exercises.

How much rest should a dancer get?

While many experts stress the importance of proper rest, there are no specific guidelines on the frequency and amount of rest. However, we know that dancing five hours a day or longer is linked to an increased risk of injury. It is also known that intense activity leads to microdamage, which peaks in recovery 12 to 14 hours after a workout. So it would make sense to take the next day off after a high-intensity activity. Dancers should work at their highest intensity a couple of times per week and then take at least two days off, preferably in a row. Also, a three- to four-week period of rest after the season is ideal for recovery.

Dance Injury Treatment

Should I ice or heat after a dance injury?

If it’s a sudden injury, it’s best to apply ice first to reduce swelling and inflammation. RICE treatment is a common approach that involves rest, ice, compression and elevation. After a few days, you can switch to heat to increase blood flow to the area and promote healing. However, every person is different. If you feel that ice helps you better than heat, then there is nothing wrong with continuing to ice. But be careful not to ice before dancing or stretching, because you want those muscles to be warmed up to prevent re-injury.

What are my treatment options for a dance injury?

It depends on the type of injury, your level as a dancer and many other factors. For example, for traumatic injuries like ankle sprains, your doctor may recommend RICE, joint protection and physical therapy. For stress fractures you may need to limit weight on your foot by using crutches, wearing a leg brace or walking boots. Surgery is typically used as the last resort. It is best to discuss your treatment options with a doctor who specializes in dance injuries. And if you are working with a physical therapist, make sure he or she is experienced in treating dancers. A big part of physical therapy is correcting the training technique that led to the injury. Otherwise, you risk hurting yourself again by making the same mistake.

What should be in the first aid kit for dance injuries?

Your regular first aid kit might already have many of the essentials for handling a medical emergency. However, when it comes to common dance injuries, you may want to include a few additional items, such as:

  • Instant cold pack
  • Pre-wrap and athletic tape (if qualified providers are available to apply)
  • Elastic bandages (to be used only for compression, not support while dancing)
  • Crutches
  • Topical pain reliever

Rausch PT is here to help you achieve your best performance. Our personalized PT programs can keep you moving with grace and confidence. Don’t let injuries steal the spotlight. Contact us today at 949-597-0007. You can follow us on TikTok and Instagram for more inspiration and tips.


Reference: [https://www.hopkinsmedicine.org/health/conditions-and-diseases/sports-injuries/common-dance-injuries-and-prevention-tips]

Pain-Free Lifting

Weightlifting is a popular way to build strength, increase muscle mass, and achieve fitness goals. However, it’s important to be aware of the potential risks associated with weightlifting, including injuries. Common weightlifting injuries can occur due to a variety of reasons. Here you can learn some of the most common weightlifting injuries and how to prevent them.

There are plenty of things that might prevent you from keeping up with your weightlifting routine. Don’t let an injury be one of them.

“A big part of avoiding weightlifting injuries is about letting go of the ego,” says Dr. David Braunreiter, a sports medicine specialist at Houston Methodist. “It’s also important to know what proper form looks like and that the goal should always be to perform to a level of fatigue — never pain.”

Here’s why weightlifting injuries occur and how to avoid making the common mistakes that lead to them.

What are the most common weightlifting injuries?

Maybe you’ve heard a tale or two of a gruesome weightlifting injury involving broken bones — or worse.

While these can be disastrous — even life-threatening — and precautions should be taken to avoid them, they aren’t the injuries that plague weightlifters the most.

“The injuries we see most often in people who lift weights are muscle strains from overuse or acute injury — the back, shoulder and knee being the most frequent sites,” says Dr. Braunreiter.

The most common weightlifting injuries include:

  • Back strain
  • Rotator cuff strain
  • Biceps strain
  • Patellar tendonitis

“There’s also the potential for a serious injury — a meniscus tear, patellar tendon tear and even Achilles tendon rupture, for example,” adds Dr. Braunreiter.

The most common reasons for weightlifting injuries are:

  • Doing too much over time (overuse injury)
  • Doing too much at one time (acute injury)
  • Using improper form while lifting (overuse and acute injuries)

“When you’re applying too much tension across a specific muscle or tendon, whether at once or repetitively over time, the stress can lead to injury,” explains Dr. Braunreiter.

An injury can also occur if you’re not applying tension correctly.

This can happen during any weightlifting exercise, but Dr. Braunreiter says that some are more likely to lead to injury than others — particularly the big power lifts, such as squats, deadlifts and power cleans.

“With all-out strength, it’s critical to have the right form, load and ego — otherwise you’re really putting yourself at risk,” warns Dr. Braunreiter. “For instance, squat lifting is a good compound movement, but it’s the perfect recipe for overloading your lower back if you’re taking on more weight than you can handle or using improper form.”

What can you do to prevent weightlifting injuries?

Pain-Free Lifting 18

Whether you’re new to weightlifting or you’re a seasoned weightlifter, Dr. Braunreiter has five tips for avoiding injuries:

1. Check your ego at the door

Dr. Braunreiter warns that the most common weightlifting pitfall involves peer pressure pushing people to take on more than their body can handle.

“If you’re trying to outdo the person next to you or show off to people around you, you’re at risk for overloading and experiencing an acute or overuse injury,” says Dr. Braunreiter.

Rather than trying to break someone else’s record, aim to break your own. Try to do a little better each time you lift.

“Compete with yourself, not other people,” Dr. Braunreiter adds.

2. Master your form first

Before trying a new weightlifting exercise, it’s crucial to understand what proper form looks and feels like — especially for a compound movement.

“For instance, a squat requires firing many different muscles at once,” explains Dr. Braunreiter. “If incorrect form is causing one or two muscles to do the work of many, you’re putting those muscles at a disadvantage and, ultimately, risk.”

Working with a personal trainer is a great way to learn how to lift weights safely and correctly. If this isn’t an option for you, watching videos from a trustworthy source can be a helpful substitute.

The key to mastering safe, proper form is to first practice a weightlifting exercise with very little weight — such as starting with an empty bar or simply squatting your body weight.

“The lift may feel too easy during this process, but it’s important to get your form correct before adding significant weight,” says Dr. Braunreiter.

3. Increase load slowly

Even with the correct form, doing too much at once or over time, especially without adequate rest, puts you at risk for injury, too.

When it comes to increasing your load, Dr. Braunreiter recommends the following tip: Only increase the weight if you feel like you could do one more repetition without cheating.

“If you usually do 15 repetitions and you get to 15 and feel confident you could do one more rep correctly, you’re likely ready for more load,” says Dr. Braunreiter. “If that last rep is a still a struggle, you’re not ready.”

He adds that keeping a journal or note on your phone where you track your current load and effort level can help you identify when you’re truly ready for more.

“It’s also important to give your muscles time to rest and recover between loads, too,” says Dr. Braunreiter. “If you work a muscle again too soon — before it’s fully recovered and ready to handle tension again — you put it at risk for overuse injury.”

4. Add in some variety

Even if your primary goal is to lift weights, having variety in your exercise routine can make you a better weightlifter.

“A strong core is a really important for avoiding injury, and flexibility and aerobic fitness matter, too,” says Dr. Braunreiter.

Another benefit of variety is that it helps you challenge your muscles in a different way.

“If you’re training too much in the same way, you might run into overuse issues or hit a lifting plateau sooner than you’d like,” adds Dr. Braunreiter.

Lastly, variety keeps your workouts fresh — and helps you stay engaged.

“If you do the same thing over and over, you’re likely to go into autopilot and lose sight of your mechanics,” explains Dr. Braunreiter. “This can lead to bad form and potentially even injury.”

5. Keep these safety precautions top of mind

A smart weightlifter is a safe weightlifter.

“The weightlifting safety basics are critical for avoiding disastrous injuries, especially while using free weights,” says Dr. Braunreiter. “You should always have a spotter.”

Be smart about using resistance bands, too.

“If a band is fraying or if you’re not anchoring it correctly, it can snap back at you and cause serious injury,” Dr. Braunreiter adds.

Taking preventative measures is key to avoiding injuries. If you’ve experienced a weightlifting injury or want to learn more about proper lifting techniques to prevent future injuries, Rausch PT can help you get back on track with your fitness goals. Contact us today at 949-597-0007 and join our Facebook community here.


Reference: [https://www.houstonmethodist.org/blog/articles/2022/aug/common-weightlifting-injuries-how-to-prevent-them/]

High School Football: What Are the Chances of Injury?

Youth football can be played safely if the athletes are coached and taught properly. To avoid further problems, keeping track of injuries and getting advice on treatment and prevention is essential. With the advice of your Rausch PT physical therapist, you and your teen can get to their best performance.

If a teen plays four years of high school football, chances are pretty good they’ll sustain an injury of some sort.

In fact, a high school athlete is about three times more likely to get hurt than competitors in other major sports.

In addition, that injury is more likely to be to their head or face. It’s also far more likely the injury will happen during a game instead of practice.

However, it is highly unlikely the injury will require surgery. And if it does, chances are it won’t have any serious lingering effects down the road.

Those are some of the conclusions that can be reached by sifting through statistics and talking with sports experts about high school football players.

Those experts add that advances in treatments, as well as injury prevention, are helping keep the number and severity of injuries down.

They also note the upside to participating in sports can make the risk of injury somewhat negligible.

“The benefits of participating in team sports far outweigh the risks,” Dr. Margot Putukian, F.A.C.S.M., director of athletic medicine at Princeton University, told Healthline.

Keeping track of injuries

Nearly 8 million teenagers now participate in high school sports.

That’s double the 4 million who participated in the 1971-72 school year.

For the past decade, the injuries sustained by those athletes have been monitored by the Colorado School of Public Health’s Program for Injury Prevention, Education & Research (PIPER).

The team, led by Professor Dawn Comstock, puts out an annual report on the injuries sustained in nine major high school sports.

The report has detailed statistics from 100 high schools across the country as well as estimated numbers for all high schools.

That data is gleaned from high school athletic officials who report their injuries to PIPER officials every Monday during their season.

The stats are broken down into number of injuries, the number of “athlete exposures,” and the rate of injuries for every 1,000 of those exposures.

Injuries are defined as any event that requires medical attention and keeps the athlete from participating in games or practices for at least one day. In addition, all fractures, concussions, dental injuries, and “heat events” are considered injuries.

Exposures are defined as one athlete participating in a single game or practice. For example, if 20 players get into a game, then that’s 20 exposures for that squad.

Football first in injuries

High School Football: What Are the Chances of Injury? 19

During the past decade, there has been an average of about 4 injuries per 1,000 athlete exposures in competition for all nine sports combined.

For high school football players, the rate during competition has ranged from 11.26 to 13.52 injuries per 1,000 athlete exposures.

The sport with the second highest rate is girls’ soccer, which hovers just above 5 injuries per 1,000 exposures every year.

For football, the injury rate during practice is right around 2 incidents per 1,000 exposures. That compares with an average rate of under 1.5 per 1,000 exposures for all nine sports combined.

Overall, the Colorado researchers estimate there are more than 500,000 injuries of some sort to high school football players nationwide every year.

In most years, less than 10 percent of those injuries require surgery.

In 2015, 28 percent of the football injuries were to a players’ head or face. Those included concussions.

Another 14 percent were knees, 11 percent were ankles, and 10 percent were shoulders.

For quarterbacks and other players who throw a lot, our Throw Right assessment looks at shoulder and elbow mechanics before small problems turn into injuries.

About 68 percent of the injuries happened while players were tackling. Another 22 percent occurred while players were blocking.

Treatment and prevention

Safety concerns were raised last year when it was reported at least 11 high school football players died in the United States during the 2015 season.

Two years earlier, a study was published that concluded high school players had nearly twice the concussion rate as college players.

Still, experts said more sophisticated medical treatments and better prevention programs are holding the line on football injuries and reducing the severity of them.

Scott Sailor, president of the National Athletic Trainers’ Association (NATA), says athletes are also better physically prepared for contact sports than in decades past, helping cut down on the seriousness of injuries.

When surgery or other medical attention is required, he says, there are now safer and better techniques available.

Sailor also told Healthline it’s important for schools to have athletic trainers available, especially during competition. He said only 37 percent of U.S. high schools currently have a full-time athletic trainer.

Some of these precautions are also extending to football practice.

Putukian notes the National Collegiate Athletic Association (NCAA) now restricts contact practices to twice a week for football teams.

In addition, Ivy League teams don’t allow tackling in practices.

Putukian said some of the measures may be trickling down to high school teams.

She and Sailor also point out there are new coaching techniques to help reduce football injuries.

One of them is the Heads Up Football program overseen by USA Football. The program promotes tackling and blocking techniques designed to make the game safer.

Parental involvement

Sailor and Putukian agree parents need to take the lead when it comes to their child’s sports safety.

Putukian urges parents to scope out both a school’s program as well as the football coach before their child signs up.

For example, does the coach teach good techniques and put their athletes’ safety first?

“You need to do your homework,” she said.

NATA has launched the program At Your Own Risk, which provides information for parents, athletes, and school officials on sports safety.

Sailor says he feels all the measures being taken make football a relatively safe contact sport for high school students.

Rausch PT professionals have the skills and expertise you need to improve and restore your muscle to enjoy your sport to the fullest. Book your appointment today at 949-276-5401 and meet our experts. Join our Facebook community.


Reference: [https://www.healthline.com/health-news/likelihood-high-school-football-player-gets-injured#Parental-involvement]