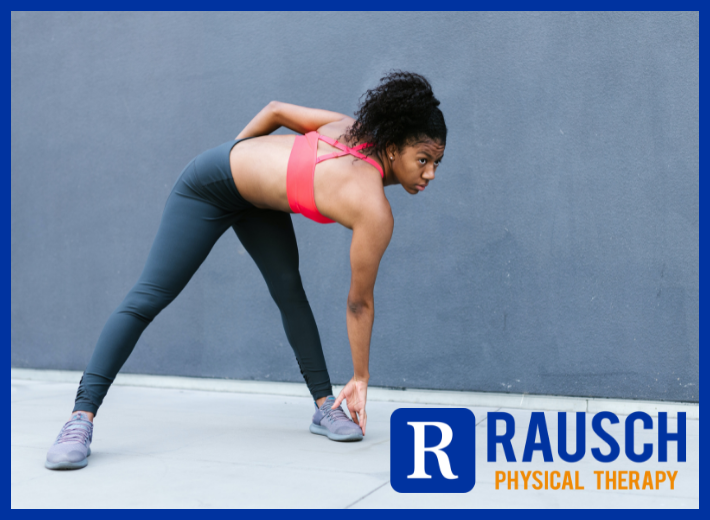
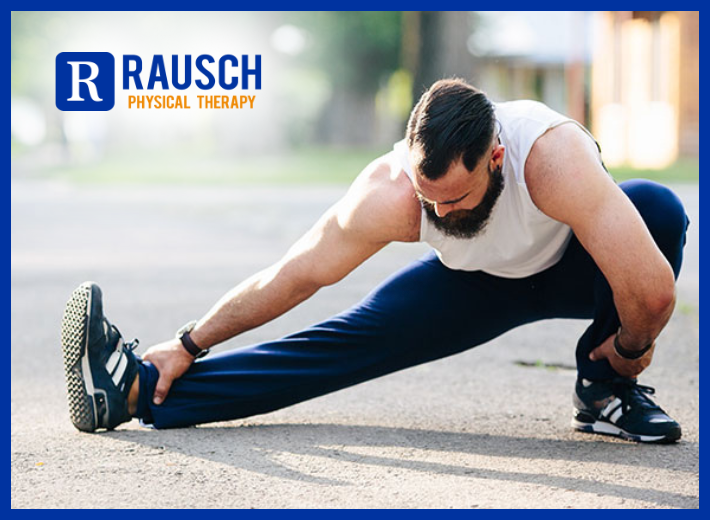
Sports Performance Archives - Page 2 of 6 - Rausch Physical Therapy & Wellness

Blog

How to Avoid Sports Injuries in 2023

Here’s to the new year…and the opportunity to start anew and set your fitness goals. But as essential as preparing for that match or running a marathon is to keep your body free from pain. To help keep you from experiencing a sports-related injury, we provide the following prevention tips. We have 1001 tools to help you crush your goals — enhancing your mobility and recovery — and keeping you injury-free. 

Whether you play sports for competition or fitness, you don’t want to be sidelined with an injury. Time away from the game or in forced inactivity is something we all want to avoid. While it is impossible to prevent every injury, the American Academy of Orthopaedic Surgeons says research suggests that injury rates could be reduced by 25% if athletes took appropriate preventative action. Use these general rules for injury prevention no matter what sport you play.

Be in Proper Physical Condition to Play a Sport

Keep in mind the weekend warrior has a high rate of injury. If you play any sports, you should adequately train for that sport. It is a mistake to expect the sport itself to get you into shape. Many injuries can be prevented by following a regular conditioning program of exercises designed specifically for your sport.

Know and Abide by the Rules of the Sport

The rules are designed, in part, to keep things safe. This is extremely important for anyone who participates in a contact sport. You need to learn them and to play by the rules of conduct. Respect the rules on illegal procedures and insist on enforcement by referees, umpires, and judges. These rules are there to keep athletes healthy. Know them. Follow them.

Wear Appropriate Protective Gear and Equipment

Protective pads, mouth guards, helmets, gloves, and other equipment are not for those you consider weak; they are for everyone. Protective equipment that fits you well can save your knees, hands, teeth, eyes, and head. Never play without your safety gear.

Rest

Athletes with a high number of consecutive days of training, have more injuries. While many athletes think the more they train, the better they’ll play, this is a misconception. Rest is a critical component of proper training. Rest can make you stronger and prevent injuries of overuse, fatigue and poor judgment.

Always Warm-Up Before Playing
How to Avoid Sports Injuries in 2023 1Warm muscles are less susceptible to injuries. The proper warm-up is essential for injury prevention. Make sure your warm-up suits your sport. You may simply start your sport slowly, or practice specific stretching or mental rehearsal depending upon your activity.

Avoid Playing When Very Tired or in Pain

This is a set-up for a careless injury. Pain indicates a problem. You need to pay attention to warning signs your body provides.

Factors That Increase Your Risk of Sport Injuries

Research provides us with helpful clues about the cause of sports injury. There are two factors that outweigh the rest when it comes to predicting a sports injury. They are:

  • Having a history of injury. Previous injuries to a muscle or joint tend to develop into chronic problem areas for many athletes. It is extremely important to warm up, and stretch previously injured parts.
  • A high number of consecutive days of training. Recovery days reduce injury rates by giving muscles and connective tissues an opportunity to repair between training sessions.

Physical therapy is a natural and healthier solution to ease pain and avoid injuries. Our team can teach you proper techniques to reduce your chances of recurrence. Start the new workout season fully prepared and at your peak. Find our team at 949-276-5401 or meet us on our Facebook page.


Reference: [https://www.verywellfit.com/how-to-prevent-sports-injuries-3119270]

5 Ways to Keep Your Shoulders Healthy While Swimming

Dr. Clay Simons – Dana Point

For those of us who enjoy circling the black line for several hours a day, the chances of getting pain or discomfort in your shoulder increase. People do many things once they have the pain, such as ice, PT, and/or rest — but here are a couple of things you can do to help prevent the pain in the first place.

1. Posture

We spend a lot of time slouched forward with rounded mid/upper back and forward head postures, sitting at our desks, staring at our phones, Netflix binging, etc. If you spend a lot of time in these postures most of the day, it does not magically go away once you hop in the pool, where you have to be tall, straight, and long to perform your best. Make sure when you are sitting that you are not slouching all the time — even breaking it up a few minutes per hour will help. Try to keep your spine straight and your ears aligned with the tops of your shoulders. Be aware and fix it when you think of it. Slouching for short periods is not bad, but be aware of it and don’t “live” in that position.

2. T/S mobility

For the shoulder joint to work properly you need to be able to move your spine, specifically your mid-back, with rotation and extension. Going back to posture: When you slouch much of that forward bend comes from the thoracic spine. To help counter the forward bend: spend some time doing T/S extensions on a foam roller; place the roller across your back, cradle your head with your hands, and arch backward. Keep your stomach tight to minimize the arch in your low back, and keep the focus on your mid-back. You can work several spots throughout your mid-back, starting a little below your shoulder blades and working up to just above your shoulder blades. You can also work the rotation component by doing rotations. Start on all fours, and with your R arm, reach down and under your chest as far as you can to the L, hold for a few seconds, then bring your R arm back and reach up to the sky on your R, repeat several times, and then switch sides.

3. Rotator Cuff strength

Everyone has seen the classic internal/external rotation with bands — these are great and have their place but are not always the answer. Expand this by adding wall ball stabilizations by holding a ball against the wall and making small movements in multiple directions from the shoulder. I like doing star shapes or the alphabet to train your rotator cuff to work as one functioning unit to stabilize your shoulder joint in all plains. You can also do your internal-external rotations in different positions. The classic one is what we call a 90/90 where your arm is out to your side, elbow even to shoulder, and elbow bent to 90 degrees — now stabilize and rotate forward and backward here. I recommend starting this one lying down with the band around your opposite foot, staying within the range that your shoulder stays back on the table without rolling forward.

4. Scapular stability

“You can’t fire a cannon out of a canoe” is my favorite quote when it comes to rotator cuff strength. You can strengthen your rotator cuff all day long, but all 4 of the rotator cuff muscles attach to the scapula, so if that scapula is not stable, all your rotator cuff strengthening is useless. Do variations of rows, weight-bearing through your arms, and I’s/T’s to help stabilize your scapula in multiple planes.

Weight Bearing: this is where the classic push-up comes in but don’t be afraid to branch out, do different hand positions, wide, narrow, staggered, or try walking on your arms like a classic wheelbarrow from elementary school. Planks can also be great for this.

I’s/T’s: Lie on your stomach and put your hands down at your side, palms facing down and now squeeze your shoulder blades together and use your shoulder blades to lift your arms, holding for 2-3 secs. For T’s, do the same thing except bring your arms straight out to either side with your thumbs up and lift your arms from the shoulder blades.

5. Swim with good form

This one should be the most obvious, but many people tend to track the number of yards they swim when in reality, you should be looking at how well those yards swam. Make sure you are swimming with the best form possible to minimize stress/strain on structures not designed to take that load. Swimming with good form will also allow you to swim faster, which is everyone’s goal anyway.

Also, remember that physical therapy can also be a preventative approach! A licensed physical therapist can help evaluate and assess you for any mobility restrictions or muscular imbalances and recommend a proper program!

fjK_4mIJDBco-kg28nLDzXh1BH-GL6_m0llL3mUAFRVgs_jqMftR-r4SKjCTpya1I76Bxo0q6IUo0oP7xxM3BbuIcJlYbTtwQwrEUxxFcv6QBU2bFiXj8svnjEElo7vBqP1uiHeEymg8zHZKZQ

Clay Simons

clays@rauschpt.net

Did you know there’s no prescription needed from a doctor to see us – but we will communicate your progress and treatment to your doctor if you’d like us too! 

(949) 276-5401

RauschPT

Disclaimer — All the information that you find on our blogs and social media pages is for informational purposes only and is not intended to be used as your personal professional diagnosis, or treatment. Come and see us for your excellent, personalized care! https://rauschpt.net/

Understanding Turnout and Importance of Avoiding Forcing More


Kathryn Totheroh – Dana Point

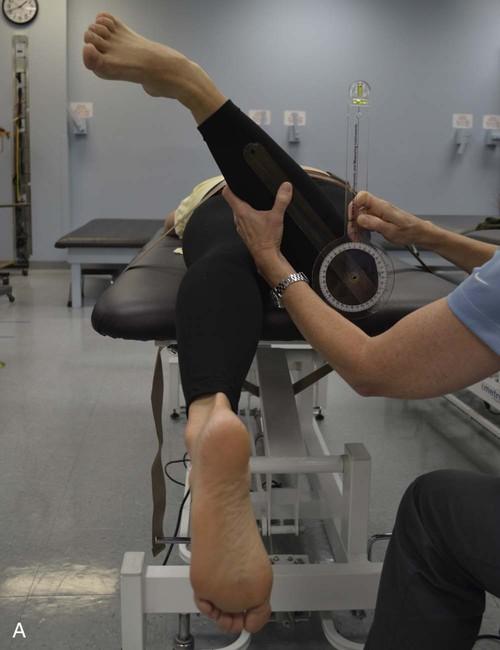
Every joint in the human body has a “normal” range of motion. For the hip in external rotation or turnout, that range is about 45 degrees. For dancers, especially ballet, we always aim for 90 degrees in each hip to reach that elusive 180 first position. Some lucky individuals will be born with the potential for extra range of motion in the hips, and the very rare few (less than 2% of professional ballet dancers) may naturally reach that 180. However, for the rest of us, it is critical to understand where our natural limitations are so that we can safely and effectively use the turnout each of us have. 

First, you must understand that this is a boney limitation; therefore, stretching will not work. Many teachers learned that stretching the hips while children are young (pre-puberty) can increase this natural range. While it may be possible to slightly increase mobility through the front of the hip joint leading to a marginal increase in turnout, several studies show that whatever a person’s turnout is going to be was predetermined before they were born.

It is simple for a physical therapist or athletic trainer to assess someone’s natural range of motion; this can give you/your students a clear understanding of what they should be aiming for in their standing leg. If someone is measured at 50 degrees at each hip, they are looking at a 100-degree first position. Anything more than their anatomical range is coming as compensation of the knee, ankle, and/or pelvis.

qZjZJP7qB9hKQeOkJs7JetuK2Kz1lDIjvoeDs0icKaOnOJ62QJ1pTb_mXnlDepxnGrz_-j7t-LWDVRllx3lObmqRydAs-tSBcvjntotpH2Jc_rucHxEV9WLiVzaab5gfgLIRulNb

These compensations will show up as ankle-foot pronation or collapsing arch, knees not tracking over the midline of the foot in plie, anterior pelvic tilt/ tail out, or any combination of the three. Over time these compensations can lead to serious injuries such as torn ligaments, torn muscles or tendons, joint instability, or impingement. These injuries can easily lead to the end of someone’s dance career, along with chronic pain. Therefore, it is critical to work within a natural range of motion, avoid compensation techniques, and the forcing of excessive turnout.

If you have any questions or have been dancing with pain, get to your favorite physical therapist. We can assess your specific range of motion and how you are moving, and get you back to dancing pain-free.

Rausch Physical Therapy remains your caring team and can accommodate you with a specific, personalized plan that suits your needs and goals. Visit our Facebook page or call us at (949) 276-5401. 

8fFDsBLJCHCRyAjGWU0hJqIY2aWetWOvEXJynW0paNkM9UbM2R6rSdIYyYzlMQy-zZ-UResDFVn6SaGihNZUsFYdg1Ivq_YWz3KJukpxXZg102tvh1XR7hVv1XO2_EouVFlbn-e1

4 Most Common Cycling Injuries – and How to Avoid Them

Cycling improves overall function in your lower body and strengthens your leg muscles without overstressing them. It targets your quads, glutes, hamstrings, and calves. Although it’s inherently a low-impact exercise on your joints, there are some precautions people should take. Check out the four most common cycling injuries – and, most importantly, how to avoid them! Need our guidance and support? We are here!

Cycling – whether indoor or outdoor – gets a reputation as a pretty “easy on the body” venture.

After all, while cycling is a great way to strengthen your heart and lungs, it’s inherently low-impact on your joints.

It’s also scalable, making it an excellent workout for cardio newbies and endurance veterans alike.

That said, just like with any exercise, if your technique isn’t on point, cycling injuries are more likely to hit your body.

We’re not just talking about traumatic injuries like a pulled muscle or broken bone from falling off of your bike.

Incorrect set-up and riding mechanics can lead to overuse (aka wear-and-tear) injuries that can very quickly drain the fun from your workouts — or halt them altogether.

Here, experts share the four most common cycling injuries, along with the best ways to prevent aches and pains while cycling.

4 Most Common Cycling Injuries – and How to Avoid Them 21. Saddle Sores

Every cyclist knows the literal pain in the butt that starting a biking routine can be.

But sometimes, it’s not just general groin soreness that’s a problem.

Many riders can develop straight-up saddle sores when cycling.

What are saddle sores?

They are patches of skin on the buttocks or groin that, due to friction against the bike seat, get irritated, inflamed, and if they open, can even get infected, explains professional cycling coach Garret Seacat, CSCS.

How to Avoid Them

As common as saddle sores are, they are not OK, or something to just accept will happen.

When getting started with a new bike – or if you have any discomfort – Seacat recommends going to a specialty bike shop to get fitted for a bike seat.

“There is often a device you can sit on that will measure where your sitz bones are,” he says.

When riding, you should be perched on top of these sitz bones (aka the ischial tuberosities) and not scoot back and forth.

Seacat says that when people have rear-end pain, they often look for a wider seat, but a narrower one may actually be what enables you to get into a correct, more comfortable position.

And while you’re at it, buy special cycling shorts.

“When you’re cycling, without a doubt, the best investment you can make is the bike itself, but close behind are cycling shorts,” Seacat says.

Look for a pair ergonomically cut for your biological sex, he says.

Resist the urge to wear underwear with them; doing so increases your risk of chafing.

2. Knee Pain

There’s a reason that patellofemoral syndrome – pain at the front of the knee, around the kneecap – is sometimes called “cyclist’s knee.”

“People who cycle tend to get a lot of knee injuries due to muscular imbalances,” says kinesiologist Jake Harcoff, C.S.C.S.

One primary reason: Cycling develops the quads and hip flexors while keeping them in a shortened, flexed position.

“The quads can get so tight they pull on the tendon that goes over the top of the kneecap,” he explains.

It’s also common for cyclists to have their seats incorrectly positioned, which can dump more stress into overly tight, overworked tendons and ligaments, he says.

How to Avoid It

For immediate relief, check your bike seat’s height. When you stand next to the bike, it should be at hip height.

And when you’re cycling, your knee should never completely straighten, Seacat explains.

(Remember, you should pedal through the balls of your feet, not your heels.)

Over the long-term, focus on integrating posterior-chain-strengthening exercises like deadlifts, hip thrusts, and reverse lunges into your workout routine.

Doing this will strengthen the muscles that connect to the back of your knee, helping to balance out your leg musculature and reduce your risk of cycling injuries, according to Harcoff.

3. Lower Back Pain

Tight hip flexors can make more than your knees ache. They can also throw your lower back out of whack, Harcoff says.

He explains that it’s common to see cyclists have what’s called an anterior pelvic tilt.

With such a tilt, the hip flexors pull the front of the pelvis toward the floor, angling the buttocks upward and making the lower back arch excessively.

That can stress both the spine and the muscles and tissues that help support it.

How to Avoid It

Cycling tightens the hip flexors, so you need to perform stretches dedicated to relaxing them.

Harcoff says one of the best stretches you can do to relieve tension in the front of your hips is the couch stretch.

To perform the couch stretch:

  • Get on one knee facing away from a couch.
  • Raise your back foot until your foot is directly above your back knee, then scoot back to brace your shin against the couch.
  • With your opposite foot on the floor in front of you, squeeze your glutes and breathe. You should feel a deep stretch in your back leg’s hip and thigh.
  • Work up to holding the stretch for 90 seconds or longer, and never push through the pain.

4. Elbow and Wrist Pain

While anyone who keeps their arms locked out or leans forward when cycling is likely to experience some upper-body joint pain, these cycling injuries are most common among people who take indoor cycling classes, Harcoff says.

Because indoor cycling classes typically involve a lot of upper-body movements that use the handlebars, many class-goers (and instructors) lean forward excessively when riding.

As a result, they can stress out their elbows and wrists.

How to Avoid It

You shouldn’t need to put a ton of pressure on your arms to keep from falling forward on your bike whether you’re sitting or standing.

If you’re unable to perform upper-body moves or hold onto the handles without dumping your weight into your hands or locking out your elbows, you likely need to spend the bulk of your time riding upright.

Then, between classes, you can work on developing the core strength necessary to take a more forward posture without potentially irritating your arms.

Focus on stability and anti-rotation exercises like the planks, dead bug, and Pallof press.

Regain strength and reclaim your mobility with Rausch PT. Your physical therapist will create a customized program just for you and your needs. Start your journey to recovery today — (949) 276-5401. Don’t forget to join us on our Facebook page.


You can contact  from https://www.trainabsolute.com to learn more about cycling and endurance training!

Reference: [https://www.beachbodyondemand.com/blog/cycling-injuries]

5 Warm-Up Mistakes That Can Ruin Your Workout and Leave You Injured

Want a deeper warm-up? Our StretchFix assisted stretching sessions loosen tight hips, hamstrings and shoulders before you train.

What happens if you don’t warm up before exercise? Skipping or rushing a warm-up can leave your joints and muscles unprepared, increasing the chance of stiffness, soreness, reduced performance, and exercise-related injury. Before lifting weights or heading out for a long run, begin with light cardio and dynamic stretches that prepare your body for the movements ahead. Here are some tips for warming up the right way and to avoid injuries.

Warm-ups and cool downs are essential to your workouts. Done correctly, warming up may help reduce the risk of injury and improve your athletic performance and results, according to the American Heart Association.

Even though it only takes a few extra minutes, it’s easy to fall into the habit of skipping this essential step before your workout. So before your next sweat session, try a three- to 10-minute warm-up (depending on the length and intensity of your main workout) that includes light cardio to increase your heart rate and dynamic stretches that get your muscles ready to move.

Keep these five tips in mind, and you’ll give your body the best chance to stay healthy and free of injury.

1. Skipping Your Warm-Up Entirely

Avoiding a warm-up may be tempting, especially if you’re pressed for time, but it can do more harm than good.

“The main purpose of the warm-up is to raise the body temperature via increases in your heart rate and blood pressure and loosen tissues to perform work, as well as release hormones associated with exercise,” says Geoff Tripp, CSCS, head of fitness science at Trainiac.

With that in mind, Tripp says the warm-up should closely mimic the types of movements and intensities that you’ll be performing during your workout to prepare the body and brain for what’s to come.

“A short warm-up is better than nothing, but it should be specific, with some intensity to prepare your body for work,” he says.

2. Starting Off With Too Much Intensity

Slow and steady wins the race! A solid warm-up should mimic what you plan on doing in your workout but at a much lighter and gentler pace. Think of it as your workout in slow motion or at a lower intensity.

“We call this style of warm-up dynamic,” says Kelsey Decker, certified personal trainer and Education Coordinator for Stretch Lab. “You are preparing your body for an activity with movement that mimics what you will do in your workout or fitness activity but not at full capacity.”

When you do dynamic movements prior to a workout, Decker says you’re increasing oxygen consumption, blood flow and body temperature before diving straight into full activity.

“When the body is not properly warmed up, you have a higher chance of an injury happening, Decker says.” But if you spend time performing a good warm-up, your body will be ready for more intense activity, according to the American Academy of Orthopedic Surgeons.

3. Doing Static Stretches First

5 Warm-Up Mistakes That Can Ruin Your Workout and Leave You Injured 3

Stretching is vital to your fitness, but only when it’s the right kind of stretching. Decker says there’s a lot of misinformation about stretching and flexibility training, and most of it stems from confusion around the idea of stretching before exercise.

Static stretching (holding a stretch for 30 seconds or more) improves flexibility, increases range of motion and can help increase blood flow and oxygen distribution throughout the body, but it isn’t recommended for warm-ups, Decker says.

In fact, it might even hinder your workout performance. An April 2013 review published in the Scandinavian Journal of Medicine & Science in Sports found that static stretches can reduce muscle strength by nearly 5.5 percent (or more when a stretch is held longer!), cut muscle power by 2 percent and reduce power by nearly 3 percent.

4. Not Warming Up Long Enough

Most of us have been guilty of it at some point: Two minutes on the treadmill, and we’re done with our warm-up!

But the National Strength and Conditioning Association says that an effective warm-up should last between five and 10 minutes and consist of low-to-moderate intensity cardiorespiratory exercise, followed by less intense movements similar to the sport or activity about to be performed.

More specifically, Tripp says that the length of your warm-up is usually determined by a few factors such as the duration and intensity of the activity.

“We usually see that as exercise length increases, intensity lowers, so a less intense warm-up is needed. But as exercise length decreases, and intensity increases, a longer warm-up is beneficial,” he says.

5. Performing the Same Warm-Up for Every Workout

You generally wouldn’t do the exact same workout each day, and Tripp says we should approach the warm-up in a similar fashion. “A warm-up specific to your activity will better prepare your body for the work you need to perform,” he says.

Tripp looks at a warm-up as a very condensed version of the workout, since it prepares the mind and body for what is to come. An easy way to think about this, says Tripp, is that your warm-up is key for optimal performance, injury prevention and reductions in muscle soreness post-exercise.

Push your limits and elevate your performance with a customized physical therapy program.  Let us help you perfect your form and increase performance. Contact our experts today at (949) 276-5401 and join our Facebook community here. Remember, we also offer Rx Massage to enhance your PT treatments — and also to help when you get sore and to increase recovery from hearty exercise or race events.


Reference: [https://www.livestrong.com/article/13728066-warm-up-mistakes/]

Seven Scapula-Focused Exercises to Help You Swim Faster

Most overhead athletes, especially swimmers, know that strengthening the rotator cuff is important for performance. While rotator cuff strengthening is a vital part of maintaining shoulder joint stability and proper joint mechanics, many swimmers, unfortunately, overlook the shoulder blade, the scapula. All that work on stabilization at the shoulder joint/rotator cuff is pointless if the shoulder blade itself is not stable.

Understanding the Scapula

The scapula contains the glenoid fossa, where the humeral head sits and is actively anchored in by multiple structures, mainly the rotator cuff musculature. Because it does not have a direct articulation with the spine or ribs like a typical joint would, the scapula must be controlled by multiple muscles that anchor it to the axial skeleton to provide a stable platform for the humerus (arm) to move on.

Your posture has a big effect on scapular stabilization. For example, the common “forward head/rounded shoulder posture” forces the scapula to alter its path as it moves over a more rounded rib cage into a more forward position (adducted.) This causes the scapular stabilizers to sit in a stretched position, causing the muscles to fire outside of their optimal position and weaken them through the prolonged stretch.

Before you can start working to improve your scapular mobility for a stronger stroke, you first have to learn how to properly recruit the muscles of the scapula. I suggest reading my colleague Sean Swopes, PT, DPT, CSCS article, How to Activate Your Scapular Muscles to Alleviate Pain, to learn how to do this correctly and achieve optimal posture.

Seven Scapula-Focused Exercises to Help You Swim Faster

Once you understand exactly how the scapula needs to move, you can begin an exercise program that helps improve your scapular mobility and posture, creating a stronger platform for your shoulder to help you swim faster.

FR: T/S Extensions and Supine Angels
Serratus punches/push-ups
Rows (isometric scap)
I’s, T’s, Y’s
Prone 90/90s
While lying on the SB in the same position as for I’s, T’s, or Y’s, raise your arms to shoulder height with good scapular squeeze then rotate your shoulders 90 degrees so that your arms are even with your shoulders and hands up next to your head, hold this position for 2-3 sec then lower your hands down toward the floor and relax your arms. 3×10
SB walkouts
Step overs
Hold a good plank position with hands directly under your shoulders, step your hand sideways up onto a small step then step up with the other hand and down on the other side. 3×10


Seven Scapula-Focused Exercises to Help You Swim Faster 4

Clay Simons

clay@rauschpt.net

Did you know there’s no prescription needed from a doctor to see us – but we will communicate your progress and treatment to your doctor if you’d like us to!  (949) 276-5401

Disclaimer — All the information that you find on our blogs and social media pages is for informational purposes only and is not intended to be used as your personal professional diagnosis, or treatment. Come and see us for your excellent, personalized care! RauschPT.net

Seven Scapula-Focused Exercises to Help You Swim Faster 5

Pre-surf warm-up for Hips and Lower Back

Surfing requires a lot of flexibility and strength. Generating strength and power for turning requires joint mobility and muscle flexibility to transfer your momentum from your legs to your trunk and upper body. Joint mobility refers to how much your bone moves in the joint capsule before the slack is taken up by the surrounding capsule, ligaments, and tendons. Muscle flexibility refers more to muscle length and elasticity. Dynamic flexibility is your ability to actively move a joint through the full range of motion. Limitations in either joint mobility or muscle extensibility will affect your ability to move freely. 

A lack of muscle flexibility and joint mobility is a big risk factor in developing muscle injuries. When it comes to flexibility and mobility, you either use it or lose it. Since the majority of us work 5 days a week, most of us can’t surf every day. Sitting for 6-8 hours per day will certainly lead to muscle restrictions and joint stiffness through your hips and your back.

Spinal rotation and hip mobility are key to generating powerful turns. As you move through your turn, joint stiffness and muscle restrictions will limit the power of your turn. Turning requires a significant amount of joint mobility as well as flexibility through the hips and ankles which then transfers to your upper body through your lower back up your spine to your shoulders and neck. Forcing a restricted joint through a powerful turn can lead to injury. Tight hips can increase torque to your lower back or knees and overload the joints and muscles which can result in pain, injury, or instability. Similarly, a tight or stiff lower back may result in excessive strain on the surrounding muscles, joints, and discs. A warm-up specifically targeting your hips and back before surfing will help your body move freely and reduce the risk of injury while transitioning through powerful turns. 

Before getting in the water for a 6 AM dawn patrol Saturday morning, you want to make sure your body is moving freely to prevent injury. After 40 hours at the office during the week, take the time to spend 5 minutes before paddling out to free up the joints that have not been moving all week. 

Here are a few warm-up exercises to loosen up the hips and back to you moving before getting out in the water. You want to make sure your whole body moves freely before forcing it into a big hacking turn. 

Pigeon stretch

Start on hands and knees, bring the front leg into external rotation keeping the knee in line with the hip, aim to keep the shin perpendicular to the thigh. Keep the back leg straight with hips square with equal weight in both hips. Perform on both sides.  

This is a great stretch for the external rotators and hip flexors to open the hips. I do not recommend this stretch for anyone with a knee injury since it does put stress on the knee. This is easily modified to do in the water between sets, you can do it with your leg on your board or by crossing your leg over your knee in the water bringing your knee towards your chest while floating in the water. 

Bretzel stretch

Lay on the side, keep the bottom leg in line with the trunk with the knee bent 90º, the top leg bends 90º at the hip with the knee flexed 90º. Place your arms into a ’T’ to rotate your spine. Perform on both sides for 30″-1′. 

This is a great stretch for opening up the lumbar and thoracic spine as well as the shoulders. You may feel tighter on one side than the other. Doing 5-8 deep breaths while doing this stretch will help the body relax and enable the back and shoulders to open up. 

Low Lunge

Start in a push-up position, bring your right foot forward between hands, keep your knee stacked over the ankle. Keep left leg back extending while sinking the hips by driving your heel to the ground. Make sure to keep back flat and feet pointed forward. Perform a series of 5 on each leg alternating sides. 

Crescent Lunge Twist

From the low lunge position, move your right hand inside of the right foot, look up towards your raised left arm. Raise the left arm and gaze up while twist body to the left. Repeat on the opposite side.

The Low Lunge and Crescent lunge twist are good hip openers and provide dynamic mobility to the spine for standing up on your board. 

Downward dog to upward dog

Start on hands and knees with hands directly under shoulders and knees directly under hips. Lift your hips up and back to bring your body into an inverted ‘V’ while driving heels to the ground and keeping back flat. Press your hands to the floor pushing your shoulders away and gently rotating outward into your hands. Keep your head/neck relaxed. 

The transition from downward dog to a push-up position, hold for 2-3 seconds, then transition to upward facing dog position by shifting weight forward to lower the body while keeping elbows squeezed against the rib cage. Turn feet pointing down into plantarflexion, then press up keeping shoulders stacked over hands and squeezing shoulder blades together to open the chest. Legs should be engaged ‘hovering’ over the ground, not resting on it. Repeat this sequence 5 times.  

Be careful to avoid over-extending through your lower back, don’t move through pain. 

This sequence is helpful to mobilize the spine, wake up the shoulders and your core. 

Also, remember that physical therapy can also be a preventative approach! A licensed physical therapist can help evaluate and assess you for any mobility restrictions or muscular imbalances and recommend a proper program!


Pre-surf warm-up for Hips and Lower Back 6

Clay Simons

clay@rauschpt.net

Did you know there’s no prescription needed from a doctor to see us – but we will communicate your progress and treatment to your doctor if you’d like us to!  (949) 276-5401

Disclaimer — All the information that you find on our blogs and social media pages is for informational purposes only and is not intended to be used as your personal professional diagnosis, or treatment. Come and see us for your excellent, personalized care! RauschPT.net

RauschPT

Strategies for Ocean Swims

Assess the conditions

As summer approaches, many triathletes are swimming in open water to prepare for upcoming races. Training in the pool is great to work on distance and technique. It is important to incorporate ocean water training to be confident in the conditions on the day of the race. Practicing a few swims at the race site will help you prepare mentally by becoming familiar with the surrounding environment and potential hazards. The more experience you have swimming in different ocean conditions, the more prepared you will be for race day.

Assessing ocean conditions is critical for successful swimming. One week before your event, check out the surf report! It is important to mentally and physically prepare for your upcoming ocean swim. Surfline.com is a great site for accurate forecasts.

 Getting in the water before the race has several benefits. First, you can assess the bottom to look for any inshore holes or rocks to avoid while entering during your race, the last thing you need is to sprain your ankle or twist your knee. Second, you can assess the power of the waves while also assessing the strength and direction of the ocean current. Assessing the current is one of the most critical things to do before an open water swim. This will help you gauge where you start on the beach to make the best water entry to hit the buoy without having to swim up the current. Assessing the current takes time and experience in the water, spend time getting comfortable in the ocean and getting a ‘feel’ for it. Third, taking a quick dunk in the water will help to avoid that initial shock when you hit the water at the start of the race. Lastly, I suggest asking local lifeguards about any possible hazards to be aware of during your water entry and exit to avoid possible injury.

Water Entry

Arguably, one of the most important parts of a competitive ocean swim is your water entry, not the amount of time you put in swimming laps. A good water entry starts with gauging were to enter the water after assessing the current.

A quick and efficient water entry through the surf line will separate you from the rest of the pack. Use high knees when running out through the surf line. As it starts getting more difficult to run, you want to start ‘dolphining’ through the surf line. ‘Dolphining’ is a technique used to get through the ‘impact zone’ efficiently. Start  ‘Dolphining’ in waist-deep water by diving with both arms over your head, grab the sand bottom to pull yourself forward while bringing your legs underneath your body to explode out of the water through the surf. Continue ‘Dolphining’ until the water gets too deep, then begin your swim. Swim with your head up through the surf line to keep an eye out for waves. In the case of an approaching ‘set’ of waves, it is always safer to swim toward the wave than away from it. Once past the waves, periodically take a few strokes with your head up to keep your eye on the buoy marker.

Rip currents

Rip currents can make or break you. While we are all taught to ‘stay out of rip currents’, these currents can be used to your advantage in getting through the impact zone more efficiently. Swimming with the outgoing rip current can save time and energy to swim faster through the surf line where waves generally don’t break. This technique should only be used by experienced ocean swimmers with good ocean knowledge and awareness.

 Water Exit

Once you round the buoy, use landmarks on the beach to swim straight. Make sure to avoid any rip currents swimming towards shore, getting stuck in a rip will cost you time and energy. If you find yourself swimming in sandy or foamy water not making any progress, chances are you are in a rip current. Swim parallel to shore to the blue water, then continue swimming towards shore.

In the impact zone, keep your head on a swivel by turning on your back or looking over your shoulder to look for oncoming waves. Bodysurfing can save a lot of time and energy in the impact zone. This takes time and experience to learn but can be a huge asset at the end of a swim. Continue swimming until your hand hits the sand, then start with high knees to exit the water. Remember, running is faster than swimming. Don’t fight the current, it will be faster to run back than to fight the current swimming.

Tips for ocean swims

  •       Check conditions before your swim
  •       Minimize your time in the ‘impact zone’
  •       Use landmarks to help swim straight
  •       Avoid rip currents on your way to the beach
  •       Practice ‘ins and outs’ to have faster water entries and exits
  •       Always swim with a partner

Strategies for Ocean Swims 7

Clay Simons

clay@rauschpt.net

Did you know there’s no prescription needed from a doctor to see us – but we will communicate your progress and treatment to your doctor if you’d like us to!  (949) 276-5401

Disclaimer — All the information that you find on our blogs and social media pages is for informational purposes only and is not intended to be used as your personal professional diagnosis, or treatment. Come and see us for your excellent, personalized care! https://rauschpt.net/

RauschPT

Weightlifting: Knee Injuries and Pain

Overuse, injury, accident, or surgery – those are some causes of knee pain and injury. Whenever and wherever you have pain, physical therapy can help! Learn more about some common injuries related to knee pain and weight training by reading below. At Rausch PT, we will provide you with the best care possible so you can get back to doing what you love as soon as possible.

The lower back, shoulder, and knee are the big three “injury”‘ joints for active people. Even the inactive will inevitably have a mild or serious injury to one or more of these joints over a lifetime. However, adding regular weight training into your routine can improve knee strength and prevent injury. Safety is critical when weight training because strain and injury can occur.

Weight Training and Knee Injuries

While it may seem like weight training could contribute to knee injuries, this is not the case. Lifts like deadlifts and squats do place high forces on the knee joints, but these forces are applied mostly vertically and not horizontally or rotationally (twisting). The knees cope with vertical forces much better than high-impact horizontal and twisting forces.

While weight training is generally very safe for the knees, this is dependent on whether you practice proper form and follow the correct guidelines for each move. Even so, knee injuries do occur in weight training and in the very high forces of Olympic weightlifting, and if you have an existing knee injury from another activity, inappropriate weight training exercises could make it worse.1

In general, weight training is safe for the knees as long as proper form is practiced. The body is designed to manage vertical forces on the joints. However, sudden twisting movements, poor alignment, and pre-existing injuries may put you at risk for an injury.2

Common Knee Injuries

In each of the knee ligament injuries below, the damage can range from a sprain to a slight tear or a complete tear in the most serious cases. Here’s what you need to know.

Anterior Cruciate Ligament (ACL)

This ligament ties the femur bone of the thigh to the tibia or shin bone of the lower leg and controls excessive rotation or extension of the knee joint.3 Anterior means at the front. A rear (posterior) ligament is also present. ACL injuries are seen mostly in athletes. Severe damage to the ACL usually means surgical reconstruction and up to 12 months rehabilitation.

In the gym, be careful not to allow twisting knee movements under excessive load, intentionally or accidentally.

Posterior Cruciate Ligament (PCL)

The PCL connects the femur and tibia at different points to the ACL and controls any rearward motion of the tibia at the joint. The PCL is mostly injured with high-impact forces as a result of accidents and sometimes in sports activities where a sharp blow to the knee occurs.

Medial Collateral Ligament (MCL)

This ligament keeps the knee from bending too far to the inside (medially). Damaged MCLs mostly occur from an impact to the outside of the knee, or even from an accidental bodyweight force when the leg reaches an unusual angle.

Lateral Collateral Ligament (LCL)

This is the opposite ligament to the MCL. It’s on the outside of the knee and controls excessive movement outward. This ligament connects the fibula (the smaller bone of the lower leg) to the femur. Similarly the LCL is injured when a force pushes the knee outward.

Cartilage Injury

Cartilage prevents bones from rubbing together and cushions impacts. The two knee menisci (meniscus single) are cartilages that cushion the inside and outside of the knee joint. Other types of cartilage protect the ends of the thigh and shin bones. When cartilage is torn or damaged, surgery with an arthroscope may be necessary. (An arthroscope is an implement that allows a surgeon to see and fix cartilage injuries with a small incision.)

Tendonitis

Aggravated and overused tendons of the knee can cause disabling knee injuries. A related injury called “iliotibial band syndrome” (ITB) causes pain to the outside of the knee, often in runners, but it can occur in any overuse situation. Rest, stretching, and a short, two-week course of anti-inflammatory medication is often recommended. Longer duration of medication usage can result in more side effects than benefits. For pain lasting longer than two weeks, consult a physical therapist. Anti-inflammatory medication is often recommended for these types of injuries.4

Prevent Weight Training Knee Injuries

There are steps you can take to minimize your risk of knee injury and pain while weightlifting. If you have an existing knee injury, take the advice of your doctor or physical therapist in the first instance.

  • Avoid certain gym workouts. Gym exercises that may be best avoided are the isolation exercises like the leg extension machine, and the leg curl exercises, either standing or on a bench. Heavy loads or deep squats should mostly be avoided.
  • Deep squat with caution. On the other hand, if your knee was perfectly healthy, with accurate technique under expert supervision and gradually progressive training load, current research shows the deep squat is a great exercise to protect against lower leg injury.2

Other Causes of Knee Injury

Knee injuries, especially to the knee ligaments, are exceedingly common in sporting communities. Knee injuries can result in pain, swelling, and immobility from minor to severe effects.

For weight trainers and physically active men and women, the knee joints endure a wide range of stresses and strains. For the most part, in younger years, the knee joints serve us well. However, in sports with twisting movements—such as football, basketball, hockey, and many others—ligaments that bind the complex bones of the knee joint together can be damaged, often severely.

In addition, as we age, normal wear and tear can result in osteoarthritis of the knee joints.5 In this condition, the cartilage that provides cushioning between bones deteriorates and causes bones to rub together resulting in pain and stiffness.

Closing Thoughts…

Weight training, when performed correctly, is generally safe for the knees. However, if you are concerned or have experienced a prior knee injury, you should talk to your doctor before beginning a new workout routine. Working with a personal trainer can be helpful in learning the proper technique and weightlifting form.

Take advice from our exceptional physical therapists to get the most suitable treatment for your knee pain. We will help help you recover better and fast. You don’t need a doctor’s prescription to see us, but we would be happy to convey your treatment and progress with your doctor if you would like. Visit our Rausch PT Dana Point Facebook Page or call us at (949) 276-5401 to book an appointment. There’s no prescription needed to see a PT. 

Reference: {https://www.verywellfit.com/knee-pain-and-injury-in-weight-training-3498459}


Weightlifting: Knee Injuries and Pain 8

If you find yourself in discomfort or think you could benefit from a personalized exercise plan, talk to a Physical Therapist.

Let’s talk! We are here to help. Give us a call for a complimentary assessment. Did you know there’s no prescription needed from a doctor to see us? (949) 276-5401

Knee Hyperextension in Dancers

Hi, my name is Kathryn, and I’m the dance specialist at Rausch Physical Therapy. As a past professional dancer and teacher, I have seen many injuries related to misinformation and dangerous habits. It is my goal to help educate the dance community on preventing these injuries in the future. Today I want to talk about knee hyper-extension. I have heard both sides of the argument for and against allowing dancers to stand with knees hyper-extended. One side is dancers should fully extend their knees, and avoiding full available extension is essentially allowing their knees to be bent. While the other side is that over-exaggeration of hyperextension can be dangerous and lead to injury. So let’s clarify that both sides are saying the same thing without realizing it. 

A slight amount of knee hyperextension is reasonable and good, but when excessive can cause an injury. While a hyper-extended knee looks pleasing in arabesque, it can be a central contributing factor to knee or ankle pain and injury. When in a weight-bearing position or movement, there is a tendency towards reliance on knee ligaments, specifically the Posterior Cruciate Ligament (PCL), for support versus quad activation. Over time, with continued inactivation of quads, this may lead to quad weakness and ligament laxity or tears (think of a rubber band that has been stretched too far). Along with these physical changes, a dancer will become more reliant on calf musculature to do the work the quads should be doing. That leads to Achilles tendonitis, knee instability and pain, and general balancing difficulties.

So what about the correction that you shouldn’t be dancing on a bent knee? That is true! But note the following picture, what feels “bent” to someone who is naturally hyper-extended is good alignment!


So what do you do if you have naturally hyperextended knees?

Focus on individual alignment and quad activation of dancers. While you don’t want your knee bent, it should not be fully locked out in standing. Think about lifting your knee cap to engage quads. When in 1st position, heels should be together, not apart, to allow for feedback when knees reach neutral.


As always, if you do start to experience pain with movement, find a physical therapist to help you! We can get you back to moving pain-free and help avoid future injuries as well.


Wondering how to keep your knees healthy and prepared for your best performance? Experiencing any pain or discomfort while engaging in your workout? We are here to help. Schedule an appointment with a professional physical therapist for a complimentary injury screen to see if you’re a fit for physical therapy. Call us! (949) 276-5401.

Knee Hyperextension in Dancers 9

If you find yourself in discomfort or think you could benefit from a personalized exercise plan, talk to a Physical Therapist.

Let’s talk! We are here to help. Give us a call for a complimentary assessment. Did you know there’s no prescription needed from a doctor to see us? (949) 276-5401

Injury Prevention in Our Young Athletes

One of the biggest questions in sports is always: “how can we prevent injury”? That is becoming especially true as our young athletes are returning to their sports after such an extended period off due to COVID-19 shutdowns. This season of sports has been predicted to have one of the highest injury rates. Unfortunately, there is not one key secret to preventing it. The best possible ways to avoid injury are through the following:

1.Sleep!

  • At least 7-9 hours! Kids are extremely busy with school pressure, sports (sometimes multiple), extracurriculars, and others, especially now that activities are starting up again. We are currently seeing our young athletes cutting back on their sleep to keep up with everything on their plates, which is not allowing for proper recovery of their growing bodies. Tired minds and bodies are not able to react and support themselves through their activities. Approximately 7-9 hours of sleep is crucial for the body to be able to perform optimally.

2.Hydrate!

  • A good starting point is drinking half the body weight in ounces of water, but the amount the body needs depends on each person’s body composition, activity level, and diet. An appropriate gauge on if you are drinking enough water is the color of your urine. Ideally, it should be a light yellow to clear. If urine is a dark yellow color, your body probably needs a higher water amount than you are currently drinking.

3.Proper nutrition

  • A balanced diet will give these young athletes the proper fuel to sustain the demands put on their bodies. It is easy to grab and go fast food and processed food, but a healthy, balanced diet will give your athlete the best chance to perform at their best.

4.Appropriate warm-up, sport-specific

  • A proper warm-up should mimic the activity the athlete is about to perform and contain more dynamic stretching over the commonly passive/static stretching. Passive/static stretching is holding a muscle stretch for a sustained time, usually 30-60 seconds. Dynamic stretching is where joints/muscles move actively through a full range of motion; examples include leg swings, walking leg hugs, arm circles, lunges with a twist, high kicks.

5.Not over-training

  • With sports being on hold for so long due to COVID-19, our young athletes are now dealing with multiple sports at once, various practices a day, and returning to the level of play they were at before the shutdown (sometimes higher than prior levels in an attempt to make up for lost time). That is leading to significant fatigue and injuries.

Also, remember that physical therapy can also be a preventative approach! A licensed physical therapist can evaluate and assess your young athlete for any mobility restrictions or muscular imbalances and recommend a proper program!

Time to get back to exercising! Rausch PT will set your kid up for success with a personalized program to boost their performance and prevent injuries for years to come. Keep them prepared, safe, and pain-free! For more info on how to keep them safe in the field, contact us today at (949) 276-5401. 


Rausch Physical Therapy remains your caring team and can accommodate you with a specific, personalized plan. Visit our Facebook page at https://www.facebook.com/rauschpt or call us at (949) 276-5401 to learn how we can help you.

RauschPT-logo

Let’s talk! We are here to help. Give us a call for a complimentary consultation. We would love to meet you.

Did you know there’s no prescription needed from a doctor to see us – but we will communicate your progress and treatment to your doctor if you’d like us too!
(949) 276-5401

Disclaimer — All the information that you find on our blogs and social media pages is for informational purposes only and is not intended to be used as your personal professional diagnosis, or treatment. Come and see us for your excellent, personalized care! https://rauschpt.net/

Injury Prevention For Gymnasts

There have been various practices, games, and competitions canceled or postponed due to the pandemic. Now, it has been delightful to see indoor and outdoor activities resume again. With sporting events starting up after a long hiatus, athletes can return more of a regular practice schedule in anticipation of games and competitions. However, with modified practices and the beginning of the season for many different sports, injuries are starting to occur. Jumping back into the full swing of things can be hard on the body, especially if athletes are not used to the regular grind after taking a long break. Since I have a passion for gymnastics, I want to talk about injury prevention for gymnasts and some ideas to avoid injury after taking some time off.

There is a high rate of injury in artistic gymnastics. This is partly due to the training time per week and the skills gymnasts perform, particularly the more advanced skills and the high impact nature of the sport. Gymnastics is very demanding on the body, and knowing some tips and tricks for injury prevention is extremely important. Many of the injuries can occur due to overuse. Being proactive about applying prevention into training regimes is crucial.

Correcting potential problems early on is critical, especially during puberty. Between the ages of 11 and 14, increased rates of growth occur. That can lead to open growth plates, which can be problematic because of the body’s reduced ability to accept high loads and stress to the areas. Understanding when taking a break or taking a step back if the pain starts to occur in that age range can prevent injury down the road. Improving proprioception is another crucial aspect of preventing injuries. Proprioception is the body’s ability to know where it is in space. In gymnastics, many skills involve a blind landing or the ability to understand where you are during a flipping. Practicing those skills into a pit or practicing parts of a skill multiple times can improve that muscle memory. Baseline cardio level, especially after a long break, is also necessary to support the routine and its demands. If you are not able to perform a routine or several skills in a row without the cardio to back you up, you are more likely to see an injury. Recovery is also an essential element. Taking care of your body outside the gym as sleeping enough, staying hydrated, and fueling your body with proper and sufficient nutrition will help prevent injury. 

Don’t be afraid of going back to the basics to work on specific techniques. That can be a critical element if a lot of time has passed since being in the gym. There is nothing wrong with returning to the basics and mastering more technical aspects of a skill. It will help in the long run and prevent potential injury down the road when you are putting skills together in a routine in preparation for the season. Also, speaking up about an injury or constant pain is crucial. Taking it easy for a few weeks, if necessary, will be beneficial in the long run.

With gyms having modified hours or being closed due to COVID, take time to get back into the full swing of things again and prepare well for practices and routines. Pay attention to your body and slow down if you start feeling pain. Taking the time now to prevent further injury will lead to a more successful season.

If you want a personalized exercise plan to help you prevent injuries and organize your way back to exercising safely, talk to a physical therapist. Give us a call for a complimentary consultation. We would love to meet you. Did you know there’s no prescription from a doctor needed to see us? Call us! (949) 276-5401.


Rausch Physical Therapy remains your caring team and can accommodate you with a specific, personalized plan. Visit our Facebook page at https://www.facebook.com/rauschpt or call us at (949) 276-5401 to learn how we can help you. Don’t forget: there’s no prescription needed to see a PT in California.

RauschPT-logo

Let’s talk! We are here to help. Give us a call for a complimentary consultation. We would love to meet you.

Did you know there’s no prescription needed from a doctor to see us – but we will communicate your progress and treatment to your doctor if you’d like us too! (949) 276-5401

Disclaimer — All the information that you find on our blogs and social media pages is for informational purposes only and is not intended to be used as your personal professional diagnosis, or treatment. Come and see us for your excellent, personalized care! https://rauschpt.net/