Recovering from a fracture doesn’t need to feel like a challenging process, especially with the guidance of Rausch PT. With proper care, patience, and a commitment to rehabilitation, it is possible to regain strength, mobility, and a sense of normalcy. We provide valuable information on the healing process and rehabilitation techniques to help you navigate your recovery journey and return to your daily activities.
If you’ve recently had a fracture, you’re probably eager to get back to your life. Osteoporosis doesn’t affect how quickly your bones heal. Most fractures are better in 6 to 12 weeks.Chances are, you’ll likely spend many of those weeks at home. Learning to get around can take time, but you can do some things to get back to your normal activities more quickly and stay healthy while you’re at it.
Be Patient
After a fracture, you have to learn how to move again. For example, if you had a spine fracture, you might need to bend and lift differently than you did before. Or if you broke your wrist, you may not be able to get dressed on your own right away.
No matter which bone you broke, it may take longer to do things like wash the dishes or get groceries out of your car. That’s OK. Your goal should be to do each thing safely, not quickly.
Ask for Help
It might sound like the opposite of what you should do, but one of the best ways to get back to doing things on your own is to let other people help you. If you push yourself too hard while you’re healing, your recovery can take longer. And it can make you more likely to have other problems, like another break.
During the first few weeks at home, you might need help shopping, cooking, cleaning, or getting dressed. You may need someone else to help you do the exercises your doctor or physical therapist recommended, too. Remember that you’ll get stronger each day.
If your doctor suggests something to help you, like a cane, walker, or reaching tool, use it. While it might seem that it keeps you from moving the way you want to, it can keep you safe and help you hurt less. And it can make it easier for you to move. That’s key: The more active you are, the better it is for your bones and overall health.
Work With a Pro
You probably won’t be able to do everything you used to, even if you’re not in a cast. Some tasks — like climbing a step stool or lifting something heavy — might be too hard for now. That’s where health professionals can help.
Your doctor may already have you working with a physical therapist (PT). They can help you learn to move your body safely to ease pain and lower the chances that you’ll have another fracture.A PT can also help you build muscle, which makes you stronger and “pads” your bones to help protect you from new fractures.You may want to think about working with an occupational therapist (OT), too. An OT helps you make changes to your living or work space and come up with smart ways to do everyday tasks. To find a therapist, visit the website of the American Occupational Therapy Association.
Share your goals with your physical and occupational therapists. They should be on the same page about what you’d like to be able to do again. Make sure they’re aware of any pain you feel. Bone and tissue pain can be an issue, even after your fracture has healed.
Prevent Future Problems
After you’ve had a fracture, it’s normal to worry about getting another one. But fear can keep you from being active and getting back into your life.
If you’re nervous, talk to your health care team about it. And take action. For example, if you’re more likely to get a hip fracture, your doctor might recommend that you wear a hip pad. Or if you’re worried about breaking another bone, your physical therapist may come up with a strength training plan that helps build muscle and bone mass.
With smart lifestyle changes and careful planning, you can stay healthy and lower your odds of future fractures.
Chances are you will also likely need to be started in the near future on anti-osteoporosis medication to reduce future risk of fracture especially if you have sustained a hip or vertebral fracture.
You also may find it helpful to talk to other people who have osteoporosis. They’ll understand what you’re going through, and you can exchange ideas and tips, too.
Take control of your recovery and get back to doing what you love. Our personalized physical therapists can provide expert advice and practical tips to help you heal and regain your strength faster. Call us today at 949-276-5401. For more tips, follow us on Instagram.
Knee pain can be debilitating, hindering your daily activities and overall quality of life. Physical therapy offers a comprehensive approach to address knee issues, from mild discomfort to chronic conditions. Physical therapists can help you regain strength, flexibility, and mobility through targeted exercises, hands-on techniques, and expert guidance. Here we explain to you how. Questions? Come on in and see us — we’re a knowledgeable and fun group to work with — and did you know we have StretchFix and RxMassage to support your healing and mobility?
Did you hurt your knee or have surgery? Or is it achy and stiff because of arthritis? Either way, you might feel like the last thing you should do is get on your feet and move your joint around. But often physical therapy (PT) is what your doctor suggests to get your strength back and put you on the road to recovery.
PT, or rehab as some people call it, can ease your muscle and joint pain. You’ll work with a physical therapist, a licensed professional who uses a variety of methods to help strengthen your muscles and make your body feel and move better.
Some things you might need are:
Stretches and exercises
Ice and heat
Ultrasound massage
Electrical nerve or muscle stimulation
When you get physical therapy depends on the cause of your pain. Sometimes it’s all you need for treatment. You might not need surgery.
If you do have an operation, your doctor will likely suggest at least a few weeks of therapy afterward to help you recover. They might recommend a specific physical therapy office, or you can find one near you by checking the American Physical Therapy Association’s website.
What Happens at the First Session?
You’ll work one on one with your physical therapist to come up with your treatment plan. They’ll discuss ways to rebuild the strength and movement in your leg and knee, so you can feel better and go back to doing the things you love to do.
At your first visit, your therapist will look at your leg and see how well your knee bends, straightens, and moves. They’ll also see if:
It’s hard for you to balance
You have pain in your knee
It hurts when you move your lower leg back and forth
It’s hard to stand on one leg
You have weak muscles in the front and back of your thigh, which support the knee
To figure out your trouble spots, they may ask you to hop on one leg or take a short walk on a treadmill. They may recommend you use crutches, a walker, or wear special shoes to prevent falls at home while you recover.
After the First Visit
You’ll start to work on making your leg muscles stronger, which takes some of the stress off your knee and cut your pain. Your therapist will give you exercises to do at home and show you how to practice them safely.
Strength training exercises are a key part of the PT workout. For instance, you may need to do some of these moves:
Hamstring curls
Single leg dips
Step-ups
Straight leg lifts
Wall squats
Balancing exercises
You usually start with just a few at a time and then do more as you get stronger. You may need to add weights to make your muscles work harder.
Tell your therapist if something hurts. You might have a little discomfort, but stop if you feel a lot of pain.
You could feel stiff or sore after your therapy, so plan ahead for some time to rest. Ask your doctor or therapist how to get relief from this achiness.Your physical therapist may also use electricity to help improve your leg muscle strength and knee movement. It’s a method called “TENS,” short for transcutaneous electrical nerve stimulation.They’ll put sticky patches called electrodes on the front of the thigh above your knee. A wire connects each one to the TENS machine. They turn it on, and when they do, tiny electrical signals tingle the nerves in your muscle. This boosts the flow of your blood and helps ease pain.
How Long Will It Take for My Knee to Get Better?
Your doctor or physical therapist will tell you how often you need to go to therapy. It might be several times a week for 6 weeks or longer. The amount depends on how much your knee hurts and whether or not you had surgery.
Your therapist will stay in touch with your doctor and discuss your progress. Together, the three of you can decide when you feel ready to scale back on sessions.
Regain your mobility and rediscover the joy of movement. Our personalized physical therapy programs can help you overcome knee pain and live life to the fullest. Call us today at 949-276-5401. For more tips, follow us on Instagram.
As we age, maintaining physical function and independence becomes increasingly important. Physical therapy offers a powerful tool as we age to improve mobility, manage pain, and enhance overall quality of life. Let’s explore how physical therapy can empower older adults to live life to the fullest. Age is just a number, and we’re here to help you keep moving, traveling, working, and playing—enjoying life with enhanced mobility and freedom from pain.
Donna Rice had a nagging pain in her hamstring. At 65, Rice, who lives in Scottsdale, Arizona, had been a runner for more than 40 years. Even when in pain, she didn’t like to stop running. It was key to her social life, sense of well-being, and overall quality of life.She rested, stretched, and got massages – things she thought she was supposed to do. Maybe, she thought, it would get better on its own.
But it didn’t. Even after 5 months, things hadn’t improved. Rice knew it was time to see a physical therapist. It’s something she has noticed more with age.
“Sometimes you can get away with ignoring things, but less so as you get older,” she says.
Her therapist prescribed a progressive exercise program that was specially designed for her injury. She gradually built strength without overloading her body. After a few months of consistent work, Rice was back to running.
Without it her recovery would have been far harder and may not have happened at all. That’s because physical therapists provide “fitness with clinical precision,” says physical therapist Gene Shirokobrod, DPT, of Elliott City, Maryland.
A good physical therapist doesn’t just ask where it hurts and give you some exercises, says Shirokobrod. They take the time to assess your particular movement patterns and create an individualized plan to help you increase strength and move better and without pain.In older adults, this may be especially helpful because physical therapists can catch problems that might not seem like a big deal, but could lead to bigger issues down the line.
As you age, your body changes. You start to lose more muscle and bone mass and may have trouble with formerly easy tasks like walking up stairs or standing up from your seat. Your sense of balance can start to get worse and you may feel more tired, weak, and achy.
“If you help people deal with aches and pains earlier, they’re less likely to lose strength and mobility. If they keep their strength and mobility, they can keep moving and active. You can help keep them safe and independent in their home,” says physical therapist Abby Bales, DPT, of Reform Physical Therapy in New York.
For example, Rice, the runner in Arizona, sought treatment for her hamstring injury. But she soon discovered a bonus effect of her regular physical therapy sessions: Her balance improved. And with better balance and strength, Rice is less likely to fall.
That’s more important than you might think. One in four older adults fall each year, according to the CDC. And every year falls cause broken bones, head injuries, and other problems, especially in older people. This can make it much harder to get around by yourself and live independently, especially as you age.
“Physical therapy can make a huge difference from a daily life perspective,” Rice says. “Your whole quality of life revolves around your ability to move around your house and do daily activities. It’s huge.”
You Don’t Have to Wait Until You’re in Pain
You may think physical therapy is necessary only after an injury or surgery, like a fall or knee replacement. However, physical therapy can assist with a wide variety of conditions.
Osteoporosis (brittle bones). More than half of people over the age of 50 have osteoporosis. Regular physical therapy can improve bone health and decrease bone loss.
Osteoarthritis. Your physical therapist can prescribe exercises and treatment that can lessen pain and increase your range of motion so you can do more things.
Vertigo (dizziness). A specially trained “vestibular physical therapist” can help you when you have problems with balance and dizziness such as vertigo, a problem in the inner ear.
Neurological conditions. These include conditions like Parkinson’s disease, Alzheimer’s disease, and multiple sclerosis. Physical therapy can help improve your ability to perform daily tasks and stay safe. “By working the musculoskeletal and neurological system together, you can improve function across the board,” says Bales.
Cancer. For some types of cancer pain, a PT program can lessen pain and keep you strong enough to continue in your home and work life. Physical therapist Cynthia Gormezano Suissa, a survivor of Hodgkin’s lymphoma (a type of cancer), is waiting for a double lung transplant. In her weak state, she says, it’s even more important for her to do her PT exercises so she can continue to take care of herself for as long as possible.
Incontinence. As people age, it’s more common to leak urine or always feel the urge to go. It can be embarrassing, unpleasant, and inconvenient, leading you to socialize and exercise less, which could worsen both your physical and mental health. Physical therapists with specialized training can teach you to contract, relax, and coordinate the muscles of the pelvic floor so that you can keep this problem to a minimum.
How Family and Friends Can Help
It can be tricky to navigate a new PT program for an older loved one. Start by being as supportive as you can, but try not to intrude more than necessary.
If need be, help them choose a physical therapist who understands their goals and physical needs, Bales says. You can also help guide them through Medicare or other payment options.Offer, but don’t insist, on going to the first appointment together, she says. If you do go, you can help keep track of their questions and write down information the therapist provides.
Beyond that, you can try gentle reminders to help loved ones stay accountable and consistent with their PT appointments and exercises. It’s fine to ask if they need help with their exercises. If a walk is part of the prescribed program, you could offer to join them. And if transportation is a problem, you can offer to drive them.
But, experts say, there’s a fine line between helping and pushing. Try not to nag or coddle them because that can sometimes backfire and have the opposite effect.
Where to Find a Physical Therapist
If you think you or a loved one might benefit from physical therapy, talk to your doctor. They can suggest some clinicians who are able to treat your specific needs. Ask a friend or colleague, too, if they have recommendations. The American Physical Therapy Association (APTA) has an online tool to find a physical therapist near you. In some states, you can see a physical therapist without a referral from your doctor.
Ready to help your loved ones live a more active and independent life? Our physical therapy programs can be designed to empower older adults and improve strength, balance, and mobility. Call us today at 949-276-5401. For more tips, follow us on Instagram.
Are you dreaming of conquering a 5K but the couch seems more inviting? The good news is anyone can bridge the gap from screen time to stride time. With a smart training plan and a little dedication, that 5K finish line can be yours. Have an injury slowing you down or need help with your training? That’s where we come in!
Need a little motivation and structure to ramp up your walking routine? Want to wake up your workouts but not quite ready for a mud run? Consider trying a couch-to-5K program.
Dr. Adam Tenforde, medical director of the Spaulding National Running Center at Harvard-affiliated Spaulding Rehabilitation Network and a sports medicine physician at Mass General Brigham Sports Medicine, shares tips on what to know and do before lacing up your sneakers.
What is a couch-to-5K program?
These free or low-cost coaching plans are designed to help would-be runners train for a 5-kilometer race, which is about 3.1 miles. The programs are available online, or as apps or podcasts. They typically feature timed walking and running intervals that gradually phase out the walking over a period of about nine weeks.
Why try a couch-to-5K program?
“One purpose of a couch-to-5K program is to give you time to acclimate and start to enjoy the benefits of running and the sense of accomplishment of completing a distance safely,” says Dr. Tenforde. Running provides many cardiovascular benefits, such as lower blood pressure and a reduced cholesterol level, as well as an enhanced sense of well-being, he adds.
What’s more, adding even short bursts of running or other vigorous physical activity to a workout — a practice known as high-intensity interval training or HIIT — appears to help improve mental health, according to a study that pooled findings from 58 randomized trials of HIIT.
Are you ready to tackle a couch-to-5K?
Even though the couch-to-5K programs sound as though they’re geared for completely sedentary couch potatoes, that’s not necessarily true, Dr. Tenforde cautions. These programs often assume you can walk continuously for 30 minutes, which doesn’t apply to everyone.
For some people, an even easier, more gradual training regimen may be more appropriate. Also, keep in mind that you don’t have to run to do a 5K. Many of these races also encourage walkers to participate as well. You’ll still reap the other rewards from committing to a race, such as being more challenged and motivated — and possibly more connected to your community. Many charitable “fun runs” benefit local schools or needy families. Some are in memory of people affected by illness or tragedy. Visit Running in the USA to find 5K races near you.
What to do before you start
If you’re planning to walk or run your first 5K, get your doctor’s approval before you start training. That’s especially important if you have heart disease or are at risk for it.
Comfortable walking or running shoes are a wise investment. Shoes that are too old or too tight in the toe box can cause or aggravate a bunion, a bony bump at the outer base of the big toe. Despite suggestions that people with flat feet or high arches need specific types of shoes, studies have found that neutral shoes (designed for average feet) work well for almost everyone. Walk or jog around the store when you try them on to make sure they feel good and fit properly.
You don’t need to buy special clothes; regular sweat pants or comfortable shorts and a t-shirt will suffice. Women should consider getting a supportive sports bra, however.
Go slow and steady when training
Always include a warm-up and cool-down — a few minutes of slow walking or jogging — with every exercise session.
If you haven’t been exercising regularly, start by walking just five or 10 minutes a day, three days a week. Or, if you’re already a regular walker, add some short stints of jogging to each walking session.
Gradually add minutes and days over the following four to six weeks.
Once you’re up to 30 minutes a day, check how far you’re traveling. Keep increasing your distance every week until you reach 5 kilometers. Then slowly phase in more jogging and less walking over your route if you like.
Remember that you can always repeat a week. You’re less likely to sustain an injury if you make slow, steady progress. Pay close attention to your body and don’t push yourself too much, Dr. Tenforde advises. Former athletes who haven’t run in years may think they can pick up where they left off, but that’s not a smart move — they should also start low and go slow.
For a good couch-to-5K guide, try this beginner’s program from the United Kingdom’s National Health Service.
Train smarter, not harder! Schedule a PT consultation to prevent injuries and reach your running goals. Call us today at 949-276-5401. For more tips, follow us on Instagram.
Weaker bones shouldn’t hold you back from an active life! Regular physical therapy can strengthen your bones, improve your balance, and reduce your risk of fractures if you suffer from osteoporosis. Read more and unlock the power of movement for a stronger, more confident you!
Osteoporosis is a condition that develops from decreased bone mineral density that causes bones to become thin, brittle, and more susceptible to fractures.
While people with osteoporosis should be cautious with everyday activities to avoid breaking a bone, exercising regularly is crucial for increasing bone and muscle strength.
This article will discuss the benefits of physical therapy for osteoporosis, beneficial exercises, what exercises to avoid and finding treatment.
Does Exercise Impact Bone Density?
Bone cells get thicker and stronger in response to beneficial stress from exercise. This response in bone cells is stimulated by:
Joint reaction forces: Forces from contracting muscles that pull on the bones they are attached to
Ground reaction forces:Forces through bones (primarily the leg bones) from contact with the ground when standing and moving on your feet, and also in response to completing pushups (for arm bones)
Physical therapy for osteoporosis will involve a selection of therapeutic exercises tailored to your individual needs. These exercises are designed to strengthen key muscle groups that support and stabilize areas of weakness. These exercises protect your bones and improve your balance to decrease your risk of falls.
Misconceptions Regarding Exercise
Pain, fear of falling, and lack of interest are some of the main reasons that prevent people with osteoporosis from exercising but avoiding exercise and physical activity can worsen osteoporosis and increase your risk of breaking bones.
Not being active causes muscle stiffness and atrophy (breakdown), resulting in muscle weakness. This also leads to poor balance and bone weakness, which accelerates bone mineral density loss. Exercise and physical activity are crucial to rebuilding muscles and maintaining adequate bone health.
Who Can Benefit from Physical Therapy?
Bone density naturally decreases over time with aging, especially in people over the age of 65, increasing the risk of developing osteoporosis. Because the female hormone estrogen protects bone cells, the natural decline in estrogen levels that occurs in postmenopausal women also significantly increases osteoporosis risk.
Other risk factors for osteoporosis include:
Low body mass
Certain medications, especially prolonged use of corticosteroids
Low testosterone in males
Smoking
Malnutrition
Vitamin D deficiency or insufficiency
Excessive alcohol use
Family history of osteoporosis
People with the lowest bone mass and the lowest level of previous exercise are likely to benefit the most from increased exercise loading (the amount of exercise you’re doing) to strengthen bones.
Physical Therapy Exercises for Osteoporosis
A physical therapist will be able to provide you with an individualized exercise plan tailored to your specific needs following a physical examination.
Although there are no definitive guidelines for the exact amount, intensity, and duration of exercises to increase bone strength, weight-bearing exercises that work multiple muscle groups are generally the most beneficial. Setting goals and choosing exercises you like will help you stick with your workouts over the long term.
Weight-Bearing Exercises
Weight-bearing exercises are important for slowing bone loss and improving bone mineral density. Weight-bearing exercises also significantly strengthen muscles to work together to stabilize and support joints.
Specific weight-bearing exercises that can increase muscle and bone strength include squats, step-ups, lunges, and jumping rope. Other weight-bearing activities include jogging, hiking, and stair climbing. Note that if you have osteoporosis, you will need to work up to higher-level exercises, such as plyometrics, jogging, and jumping rope.
Participate in any weight-bearing activity you can tolerate, even if you aren’t able to progress to high levels like jogging.
Because bone cells adapt to repeated patterns of loading, such as the force from running, changing your movements and exercises is beneficial. Doing exercises like squats and lunges, changing the weight and angles, can help build bone mass density.
Non-Weight-Bearing Exercises
Non-weight-bearing exercises are those in which your limbs can move freely without being in contact with the ground. Non-weight-bearing exercises isolate specific muscle groups to help improve balance and stability.
Specific non-weight-bearing exercises that can help strengthen the muscles of the legs and arms include:
While non-weight-bearing activities like swimming and cycling are good for improving cardiovascular fitness and general health, these types of activities are not specifically recommended for patients with osteoporosis since they don’t do much to improve bone mineral density.
Balance and Flexibility
Good balance is crucial for people with osteoporosis to prevent falls and subsequent risk of fractures. Balance exercises include:
Standing on one foot
Standing on an unstable surface
Sidestepping
Backward walking
Forward and lateral step-ups
Weight shifting in different directions
Flexibility is also important to allow muscles to contract properly within their range of motion, improved range of motion, and joint health. Key muscles to stretch to prevent imbalances and improve strength include hip flexors, hamstrings, quadriceps, and calf muscles.
Movements to Avoid
Avoid exercises that involve repetitive bending and twisting, especially when carrying an object, such as sit-ups and crunches, lifting with a bent spine, certain yoga poses and dance movements, and strenuous house and yard work.
These positions increase pressure and friction within the spine, which can cause a fracture. Compression fractures of the spine are also more likely to occur when your abdominal muscles are weak and cannot properly stabilize your spine. High-impact exercises like golfing and tennis, which require forceful twisting motions, are also best avoided.
Where to Find a Physical Therapist
While you may be able to get direct access to physical therapy services without a prescription from a referring doctor, some facilities, especially hospitals, still require a prescription from a healthcare provider to treat you at their facility.
Outpatient physical therapy, which is carried out in private clinics, hospitals, and healthcare providers’ offices, is generally appropriate for most people with osteoporosis, especially for fall prevention or following a bone fracture.
Outpatient centers typically see a high volume of patients, so you must be able to have some level of independence to complete exercises and activities with supervision. If you have difficulty and limitations with mobility preventing you from going to an outpatient center safely, home care services may be a better option for you.
Financial Costs
Physical therapy costs will vary depending on your insurance coverage. The sessions generally are two to three times a week for four weeks. After one month of physical therapy, you will be reevaluated to determine if you need more treatment. Coverage for physical therapy services is typically based on medical necessity.
Additional Support
Having a sedentary (inactive) lifestyle involving sitting or lying down for long periods of time leads to weakness and muscle atrophy, poor balance, decreased bone mineral density, and increased risk of falls. It is important to do something physical every day, even if it is just a light activity like walking around your home, cooking, or cleaning.
Relying on friends and family for social support can keep you motivated to stick to an exercise routine. Starting your exercise routine with the help of a physical therapist can give you encouragement.
Don’t let osteoporosis limit your life. Take control of your health and embrace an active future with physical therapy. Remember, we also offer Rx Massage support if you need it for recovery and healing. Call us today at 949-276-5401. For more tips, follow us on Instagram.
Aches, pains, and injuries can sideline you from the activities you love. But physical therapy offers a path back to movement and well-being. Here, we present you with a range of techniques, from hands-on therapy and therapeutic exercises to modalities like heat and electrical stimulation. By understanding these treatments, you can approach your physical therapy journey with confidence.
Physical therapists have a range of modalities, or treatment methods, they can choose from to help reduce pain and inflammation, as well as improve your endurance, strength, and range of motion as you rehab from a musculoskeletal injury or movement dysfunction.
Heat application, electrical stimulation, traction, and massage are just a few of the physical therapy modalities that may be used at different stages of your recovery. While some modalities may only be able to be used during a treatment session, others can also be done at home.
This article explores 12 common physical therapy modalities, including how and why they are used. If your therapist recommends one for you, they should be prepared to explain the reason for using the modality and what to expect from treatment.
Exercise
Exercise is a controlled physical stress applied to the body to help improve strength, range of motion, or flexibility.
Exercise can be passive or active.
Passive exercise is one that requires you to simply relax while another person, like a physical therapist, applies the stress. One example of this is a hamstring stretch where a person lifts your leg to elongate the hamstring muscle on the back of your thigh.
Active exerciseis exercise that you perform under your own power. Walking on a treadmill, hip strengthening exercises, or straight leg raising exercises are all active exercises.
If you attend physical therapy in a clinic, at home, or while in the hospital, you will likely be engaged in some form of exercise to help improve your mobility. Home exercises are often also prescribed.
The home program is a group of exercises that you perform on your own. They can be very important to helping you return to normal function.
Ultrasound
Ultrasound is a deep heating treatment used to treat many musculoskeletal conditions like sprains, strains, or tendonitis.
Ultrasound is administered by your physical therapist using an ultrasound machine. A wand called a sound head is pressed gently against your skin and moved in small circular sweeps near the site of injury. A small amount of gel is used so the ultrasound waves are absorbed into the skin and muscles.
Electrical Stimulation and TENS
Electrical stimulation is occasionally used in physical therapy to help decrease pain around injured tissue.2 Transcutaneous electrical neuromuscular stimulation (TENS) is one well-known form.
There are two theories about how the stimulation works: the gate theory and the opiate theory.
Other forms of electrical stimulation may be used to contract muscles. This is called neuromuscular electrical stimulation (NMES) and is used to help your injured muscles “relearn” how to function properly.
Traction
Traction is used in the treatment of low back pain and neck pain to help decrease pain and improve mobility in the spine.
To use lumbar traction, you must be strapped into a mechanical machine. There is a vest that helps support your ribs and another device that wraps around your pelvis. The vest and pelvic device are stabilized with straps, and a mechanical force is applied with a machine.
Cervical traction is applied in either the sitting or lying position. If sitting, a harness is attached to the head and a pulley system is used with a small weight attached. The weight provides the traction force while you sit comfortably in a chair.
In lying, or supine, traction, a specific device is used. You must lie down on your back and strap your forehead into the device. Then, a pneumatic pump is used to help provide the traction force to your neck.
Theoretically, traction helps to separate the joints and disc spaces in the low back or neck, which in turn helps to decrease pressure on spinal nerves.
Joint Mobilization
Joint mobilization occurs when your physical therapist passively moves the joints of your body in specific directions. This can help to decrease pain and improve mobility.
While you may think of your joints moving as hinges, there is a gliding motion that also occurs between the joints of the body. This gliding motion is increased during joint mobilizations. The degree to which your therapist moves each joint depends on the amount of pressure and the direction of force applied to the joint.
While joint mobilization is a passive treatment, your physical therapist can teach you self-mobilization techniques so you can manage your problem independently. This can help you return to normal function quickly and offer you a strategy to prevent future problems.
Massage
Massage is using the hands to knead the injured tissues of your body to help decrease pain, improve circulation, and decrease muscle tension.
There are many massage techniques, including effleurage, petrissage, and trigger point massage.
Heat
Moist heat, or hot packs, may be applied to your body if you have an injury or after physical therapy exercises. The heat helps to increase circulation to the injured tissues, relax the muscles, and provide pain relief.
In a physical therapy clinic, hot packs are kept in a device called a hydrocollator. This is a large tank of hot water. The hot packs are cloth packs filled with a sand, clay and silica mixture. They absorb the hot water and are wrapped in terry cloth covers and towels before being applied to your body.
The hot pack is usually kept on the injured body part for 15 to 20 minutes.
Caution must be used when using hot packs as the skin may suffer burns if insufficient toweling is used during the application of the heat.
Ice
If you have an injury, cold packs or ice may be applied to your body to help decrease pain and control inflammation. Ice is usually used during the acute or initial phase of injury to limit localized swelling around tissues.
Cold packs are usually applied for 15 to 20 minutes. Like hot packs, care must be used to prevent skin damage from getting too cold.
Iontophoresis
Iontophoresis is a form of electrical stimulation that is used to deliver medication across the skin to inflamed or injured tissues.
Most often, a steroid like dexamethasone is used in the treatment of inflammation. This steroid can help decrease pain and swelling of tissues that occurs when they are inflamed.
Iontophoresis can be used in the treatment of other conditions as well, depending upon the medication that is used during treatment. It is not a replacement for active physical therapy, but can be added as part of an overall plan.
Laser or Light Therapy
Light therapy involves using light at a specific wavelength to help improve the healing process of injured tissues.8 The treatment is painless and usually lasts for approximately one to three minutes.
To apply light therapy, your physical therapist will hold the light-emitting wand directly over your injured body part and press a button to activate the light.
Light therapy can be used in the treatment of chronic pain, inflammation, or wound healing.
The theory behind light therapy is that photons of light carry energy, and this energy applied to injured tissues can help improve cellular processes and speed healing or decrease pain.
Kinesiology Taping
Kinesiology taping, or K-tape, is often used by physical therapists to augment your rehab program. The tape is made of a flexible fabric that stretches and pulls as you move.
Kinesiology tape is applied to the skin, and it can be kept in place for a few days.
It may be used for various purposes, including:
Muscle inhibition
Muscle facilitation
Bruising and swelling management
Pain relief
Since K-tape is a newer treatment modality, it has yet to be fully tested, and gains made with it may be due to the placebo effect.
Whirlpool
Whirlpools are a form of hydrotherapy and are used to help improve circulation, maintain clean wounds, or control inflammation.
Whirlpools can be hot or cold. The usual temperature for a hot whirlpool is between 98 and 110 degrees Fahrenheit. A cold whirlpool bath is typically 50 to 60 degrees Fahrenheit.
Whirlpool baths have a motor or agitator that helps move the water around the body part that is being treated. This motion can have a soothing effect, and can also be used in the treatment of wound debridement.
A typical whirlpool session involves placing your body part to be treated into the water and relaxing while the water swirls around it. Gentle exercises can be performed to help improve motion around the body part while it is in the whirlpool.
Care must be taken to ensure that the whirlpool bath is not too cold or hot, as temperature extremes can damage your skin during treatment.
Understanding your treatment options is key to a successful recovery. Our experts are here to offer you a personalized plan to address your specific pain. Call us today at 949-276-5401. For more tips, follow us on Instagram.
Forearm pain can be a constant companion, hindering everything from work tasks to your favorite hobbies. Here is all the information you need to understand your forearm pain and take charge. If you’d like a personalized look at what’s going on with your pain — we are here for that, along with a customized solution to make it go away! Don’t forget — you don’t have to live with pain! Sometimes we get used to it and think its a normal part of aging or injury — not so!
What To Know and Do About Forearm Pain
Your forearm is the part of your arm that extends from your elbow to your wrist—and pain in this area can disrupt your daily life and functioning.1 Whether it feels like a dull ache or sharp twinge, forearm pain can make simple tasks like carrying grocery bags, walking your dog, or opening a glass jar excruciating.
Sudden or repetitive injuries to muscles, ligaments, nerves, joints, or bones are the most common causes of forearm pain. Sometimes, forearm pain is a sign of an underlying condition like arthritis. If you have forearm pain, seeking medical attention for diagnosis and treatment is the best way to prevent complications and promote healing to restore the function and use of your forearm.
How Forearm Pain Presents
Understanding all the components that make up your forearm can help you determine which part of your forearm is painful. Your forearm is the part of your arm between the elbow and wrist, which contains:
Bones: Two bones are in the forearm, including the radius and ulna. If you turn your arm with your palm facing up, the radius is closest to your thumb, and the ulna is closest to your little finger. The radius is slightly shorter and helps your forearm rotate at the wrist joint.4 The ulna provides stability for your forearm muscles.
Muscles: There are twenty muscles in the forearm that work together. These muscles allow you to move your wrists, elbows, and fingers to grip objects and bend your hand.
Ligaments: Your ligaments are fibrous (made of fibers) tissues that connect the forearm bones and stabilize joints.
Tendons: Strong, fibrous connective tissues in the forearm that connect your muscles to your bones and support movement of the fingers, wrists, and elbows.
Joints: Where the two bones meet together and help facilitate stability and movements like wrist rotation.
Nerves: Forearm nerves supply sensation to the hands, fingers, and forearm and support your muscle movements.
Forearm pain can vary and will often depend on which part of your forearm is hurting and the underlying cause of the pain. Symptoms of forearm pain may feel like:
Dull aches
Sharp or stabbing pain
Burning
Tingling
Numbness or loss of sensation in the forearm or hand(s)
Electric “shocks”
Stiffness
With forearm pain, you may also experience a limited range of motion in your elbow or wrist, swelling, or difficulty grasping or gripping objects.
Potential Causes of Forearm Pain
There are many possible causes of forearm pain, ranging from acute injury to underlying medical conditions.
Acute Injury
Forearm pain is often due to acute (sudden) injury to one or more musculoskeletal structures in the forearm. Injuries often occur after a fall, direct blow to the forearm, or accident. Common acute injuries that cause forearm pain include:
Fractures: A broken bone (e.g., ulna or radius) can cause intense pain, swelling, and bruising in the forearm.
Sprains: A stretched or torn ligament can cause pain, swelling, bruising, and the inability to rotate your wrist. Some people hear a tear or pop when a sprain occurs.
Strains: A torn or stretched muscle or tendon can cause pain and tenderness, muscle spasms, swelling, and limited mobility in the forearm.
Overuse Injury
Overuse injuries (also called repetitive use injuries) are common causes of forearm pain. People who perform repetitive motions or engage in strenuous sports or work activities can develop this type of injury due to overusing the forearm. Some examples of overuse injuries in the forearm include:
Tendinitis: Inflammation of the forearm tendons (tissue that connects muscles to bones) can cause pain and tenderness that worsens with movement, night pain, and morning stiffness. 15 Tendinitis is sometimes called different names, depending on the cause (e.g., tennis elbow or golfer’s elbow).
Carpal tunnel syndrome (CTS): Repetitive hand and wrist movements (such as typing) or working with vibrating machinery can lead to compression of the median nerve, which runs through the forearm to the palm. Numbness, tingling, and pain in the fingers and hands are common with CTS, which sometimes travels from the hand up to the forearm.
Bursitis: Inflammation of the bursae (which are fluid-filled sacs that cushion bones and soft tissues) can cause swelling, redness, and forearm pain when the bursae in the elbow become irritated and inflamed. It may also be difficult to bend your elbow or rotate your forearm with bursitis.
Arthritis
Arthritis causes inflammation of the joints. Developing this condition in the elbow or wrist can lead to stiffness, swelling, and pain in the forearm. Several types of arthritis can affect the wrists and elbows and cause forearm pain, including:
Osteoarthritis: Occurs when cartilage (cushions at the end of your bones where joints form) breaks down, causing bones to rub together. Symptoms include limited range of motion in the affected joints, stiffness, and pain.
Rheumatoid arthritis (RA): A form of inflammatory autoimmune arthritis that commonly affects the elbows and other joints. RA causes joint pain, swelling, redness, and limited range of motion in the affected joints. Some people with RA may develop subcutaneous rheumatoid nodules, which are firm lumps under the skin that can appear outside the forearm near the elbow.
Psoriatic arthritis (PsA): Another type of inflammatory arthritis that often occurs alongside psoriasis (an autoimmune disorder that causes patches on the skin). When PsA affects the elbow, pain can radiate from the elbow to the forearm.
Nerve Compression
Forearm pain can occur when a nerve in the arm or neck becomes compressed or “pinched.” Common causes of nerve compression include:
Cervical radiculopathy : This compression of a nerve in the neck, often from a herniated (slipped) disc or age-related “wear and tear” on the neck’s discs and bones, can cause pain and numbness that radiates down one or both of your arms. Some people may also have a limited range of motion or weakness in their arms with this condition.
Cubital tunnel syndrome: Compression of the ulnar nerve, which runs from your neck down through the muscles in the forearm to your hand, causes symptoms like tingling, numbness, and weakness in the arm and hand.
Median nerve compression: Occurs when the median nerve, which runs along the inside of the arm, becomes compressed or irritated. Common symptoms include forearm pain, numbness, and muscle weakness that may make it difficult to grip objects.
Infection
While less common than other causes of forearm pain, infections of the bones or soft tissues (e.g., skin) can contribute to forearm discomfort. Some examples of these infections include:
Osteomyelitis : Infection in the bones or joints in the forearm can develop due to injury or trauma. Symptoms include deep pain in the affected bone that worsens with movement, fever, sweating, swelling, redness, and warmth over the affected area.
Cellulitis: A bacterial infection in the deeper layers of the skin can also affect the forearm, causing redness, swelling, warmth, muscle aches, and joint pain. This condition often occurs when bacteria enter a break in the skin, such as from a scratch, wound, or bug bite.
Pyomyositis : Another type of bacterial infection in the forearm muscles, which can sometimes cause an abscess (collection of pus). People with weakened immune systems (such as those with diabetes, cancer, or HIV). This condition often causes symptoms like fever, redness, swelling, and pain in the forearm.
When To Contact a Healthcare Provider
While some forearm pain may resolve on its own with rest and self-care methods, it’s best to see a healthcare provider for proper diagnosis and treatment if:
The pain is severe, persistent, or worsens despite at-home treatments
You experience significant swelling, bruising, or deformity in your forearm
Numbness, tingling, or weakness accompanies forearm pain
Forearm pain develops after a recent fall or accident
You’re experiencing a fever alongside pain symptoms
How Providers Diagnose Forearm Pain
Diagnosing the cause of forearm pain typically involves reviewing your medical history, conducting a physical examination, and ordering diagnostic tests. At your appointment, you can expect your provider to ask:
When the pain started
What the pain feels like
If you recently experienced an injury or infection
Which activities worsen or relieve the pain
What you do for work (which may cause an overuse injury)
Whether you play sports or participate in other strenuous activities
During the physical exam, your healthcare provider will examine your forearm to check for swelling, tenderness, and redness. They may ask you to move your arm or hand in certain ways to check your arm’s range of motion and test your grip strength and sensations in your arms, hands, and fingers.
If necessary, your healthcare provider may order tests to determine an accurate diagnosis. These tests include:
Imaging tests: X-rays, ultrasounds, or magnetic resonance imaging (MRI) scans can help visualize the bones, connective tissues (e.g., ligaments, tendons), and soft tissues to look for abnormalities like fractures, tendinitis, bursitis, or nerve compression.
Electromyography (EMG) and nerve conduction studies: These tests assess your nerve function and your muscles’ electrical signals to help diagnose muscle or nerve problems.
How To Treat Forearm Pain
Your exact treatment plan will depend on the severity of your pain and the underlying cause of your symptoms. Treatment may include at-home remedies, medical treatments, physical therapy, and complementary methods.
At-Home Remedies
When minor injuries cause forearm pain, at-home remedies may be enough to manage the pain and promote healing. These treatments may include:
Rest: Avoiding physical activities for a few days can help relieve pain sooner
Ice therapy: Applying ice packs wrapped in a towel for up to 20 minutes at a time, several times a day to reduce inflammation
Over-the-counter (OTC) pain relievers: Medications like Advil (ibuprofen) or Tylenol (acetaminophen) can help manage pain and discomfort
Compression support: Wearing compression socks can stabilize the forearm and minimize pain during movement
Medical Treatments
Your provider may prescribe medications or recommend other treatments, depending on the cause of forearm pain. This may include:
Prescription medications: Stronger pain relievers like prescription-strength nonsteroidal anti-inflammatory medications (NSAIDs) like Aleve (naproxen) or corticosteroid injections in the forearm can help reduce inflammation and pain3738
Immobilization: Serious forearm injuries may require splints or casts to immobilize the forearm and promote healing.
Surgery: In some cases, surgery to repair damaged tendons, ligaments, nerves, or bones is necessary.
Physical Therapy
Your healthcare provider may refer you to a physical therapist for a forearm injury or underlying condition that is causing pain, limiting your range of motion, or affecting your daily functioning. A physical therapist will develop a personalized exercise and stretch program to improve strength and flexibility and prevent future injuries.
Complementary Methods
Some people opt for complementary therapies to help manage forearm pain. These therapies are not meant to replace conventional medical treatments but may help manage certain types of forearm pain.
Massage therapy: Putting gentle pressure and massage techniques on the affected area can reduce muscle tension and induce relaxation, which may help offer short-term pain relief.
Ultrasound therapy: Applying sound waves to the forearm to help reduce inflammation, relieve pain, or manage certain types of forearm pain, such as tendinitis.
Acupuncture: A Traditional Chinese Medicine (TCM) practice that involves inserting thin needles into specific points on the body. Some studies suggest acupuncture provides short-term pain relief for muscle pain and arthritis.
A Quick Review
Whether forearm pain is persistent or comes and goes, it can affect your daily activities. There are many possible causes of forearm pain, including acute injuries, overuse injuries, nerve compression, and underlying health conditions like arthritis.
While self-care measures like rest, ice, and OTC pain relievers can help manage mild pain and promote healing, it’s important to see a healthcare provider for a proper diagnosis and treatment if your pain worsens or persists. Pushing through the pain can cause further damage or worsen your pain. With the help of your healthcare provider and treatments like medication and physical therapy, you can find much-needed relief and improve your quality of life.
Need a personalized plan to address your specific forearm pain? Schedule a consultation with our licensed physical therapist and get started on your path to recovery! Call us today at 949-276-5401. For more tips, follow us on Instagram.
Ready to unlock your inner strength and build a healthier you? Weight training isn’t just for bodybuilders anymore! Whether you’re a complete novice or someone curious about adding weights to your routine, here is a roadmap to success. If you have a pre-existing concern or want to know how to work this into your routine, we are here to guide you through and ensure you’re at your healthiest every step of the way!
A Beginner’s Guide to Weight Training
Some exercises, including bicep curls and squats, can support weight training at home or the gym. You can use free weights or your body weight with certain exercises to provide resistance.
Whether your goal is to build muscle mass or achieve a fitter, more toned body, lifting weights can help you get there.
Weight training, also known as resistance or strength training, builds lean, stronger muscles, strengthens your bones and joints, and can help keep your metabolism in a healthy state — meaning you’ll burn more calories even when you’re resting.
And the benefits of lifting weights aren’t just for young people. Weight training as we age can help fight the loss of muscle mass and mobility, as well as improve psychological well-being.
So even if you’ve never done any kind of weight training before — it’s never too late to start!
What’s more, you don’t even need to belong to a gym. You can simply use your body weight for many exercises or use free weights, resistance bands, or other home fitness equipment to get results.
This article will walk you through how to get started with weight training and provide suggested exercises and training advice for beginners.
What do you need to start weight training?
If you’ve never lifted weights before, consider starting out with the help of a certified personal trainer. They’ll be able to teach you the proper form for specific exercises and set up a strength training program tailored to your needs.
Many gyms or fitness centers offer introductory training sessions at little or no cost, or they have trainers available if you have questions. Additionally, there are many personal trainers who train clients online, through video platforms.
While most gyms have a combination of resistance machines and free weights, such as dumbbells and barbells, you can also get a comprehensive weight training workout at home with basic equipment.
Equipment options
You don’t necessarily need weights to build lean muscle mass and tone your body. As an example, for some strength training exercises, like pushups or lunges, you only need your body weight to provide resistance.
You can expand your at-home workout options with dumbbells. A beginner’s set of adjustable weight dumbbells starts at about $50, but the price increases as you add more weight.
Kettlebells, which are weighted balls with handles, are another popular option. Many kettlebell exercises work several muscle groups at once, which makes them effective for a full-body workout, especially if you’re short on time.
Resistance bands are also a helpful addition to your workout equipment. These color-coded elastic bands provide varying levels of resistance when pulled and stretched.
A set of resistance bands can be purchased for $10 to $60. Because they’re light and portable, you can take them with you when you travel.
What to know before you begin
Once you’re ready to get started with a weight training program, keep the following tips in mind.
Weight lifting tips for beginners
Warm up. Some aerobic activity, such as a 5-minute jog or brisk walk, will increase blood flow to your muscles and prime them for a good workout. Skipping rope or doing jumping jacks for a few minutes are also good warmup options.
Start with lighter weights. You want to start with a weight that you can lift 10 to 15 times with proper form. Begin with 1 or 2 sets of 10 to 15 repetitions, and slowly progress to 3 sets or more.
Gradually increase the weight. When you can easily do the recommended number of sets and reps, increase the weight by 5 to 10 percent. Check to make sure this is the right weight for you before doing a full workout.
Rest for at least 60 seconds in between sets. This helps prevent muscle fatigue, especially as you start out.
Limit your workout to no longer than 45 minutes. You can get the workout you need in this time frame. Longer sessions may not lead to better results and may increase your risk of burnout and muscle fatigue.
Gently stretch your muscles after your workout. Stretching can help boost your flexibility, ease muscle tension, and reduce your risk of injury.
Rest a day or two in between workouts. Resting gives your muscles time to recover and replenish energy stores before your next workout.
Exercises for beginners
You may be especially interested in building your biceps or toning your legs, but the best resistance training program works all the major muscle groups in your body.
In fact, overworking one muscle group at the expense of another could raise your risk of injury.
For a solid all-over workout, you may want to start off with the following exercises. Including these exercises in your weight lifting routine will work most of the large muscle groups in your body.
SETS AND REPS
Start off by doing 10 to 15 reps of each exercise. Aim for 1 to 2 sets to start. As you build strength, you can add extra sets, and also increase the weight.
What is a rep? A repetition (rep) is one complete exercise movement.
What is a set? A set is a certain number of reps. For instance, 10 to 15 reps make up 1 set.
Dumbbell single-arm rows
Targeted area: Your back and upper arm muscles.
How to do this exercise:
Place your left knee on the end of a sturdy bench and place your left hand palm-down on the bench for balance.
With your back parallel to the ground, reach down with your right hand and grab a dumbbell with your palm facing the bench.
Slowly bring the dumbbell up to your chest. Squeeze your back and shoulder muscles and slowly straighten your arm to the starting position.
Finish 1 set, then switch arms and do 1 set with your right knee and right hand on the bench.
Dumbbell shoulder press
Targeted area: Your shoulder muscles.
How to do this exercise:
Sit or stand with a dumbbell in each hand, your palms facing forward, and your elbows out to your side at 90-degree angles.
Without leaning back or arching your back, press the dumbbells up over your head until your arms are almost straight.
Slowly return them to the starting position.
Dumbbell chest press
Targeted area: Your chest muscles.
How to do this exercise:
Lie flat on a bench with a dumbbell in each hand and your palms facing forward.
Slowly press the dumbbells upward until your arms are directly over the shoulders. Be careful not to lock your elbows.
Slowly lower the dumbbells to the starting position. Your elbows should be a little lower than your shoulders.
Bicep curls
Targeted area: Your biceps (muscles in the front of your arms).
How to do this exercise:
Sit or stand with a dumbbell in each hand in front of you, your elbows at your sides, and your palms facing up.
Curl the dumbbells up toward your shoulders by bending your elbows but keeping them stationary at your sides.
Reverse the curl to the starting position.
Triceps extensions
Targeted area: Your triceps (muscles in the back of your arms).
How to do this exercise:
You can do this exercise sitting on a bench or standing with your feet about shoulder-width apart.
Place both your hands around the dumbbell handle.
Lift the dumbbell up over your head so that your arms are straight.
Keeping your elbows by your ears, bend them to a 90-degree angle, lowering the dumbbell behind your head.
Slowly straighten your arms so that the dumbbell is above your head again.
Resistance band pull apart
Targeted area: The muscles in your back, shoulders, and arms.
How to do this exercise:
Stand with your arms stretched out in front of you at chest height.
Hold a resistance band parallel to the ground and grasp it tightly with both hands.
Keeping your arms straight, pull the band toward your chest by moving your arms outward, away from your body. Use your mid-back to initiate this movement.
Keeping your spine straight, squeeze your shoulder blades together and “downward,” and then slowly return to the starting position.
Lunge
Targeted area: Your leg muscles, including your quadriceps, hamstrings, and calves, as well as your glutes (buttocks). If you include a dumbbell, you’ll work your biceps, too.
How to do this exercise:
Stand tall with your feet shoulder-width apart (a dumbbell in each hand for the more advanced).
Take a big step forward with your left leg so your heel touches down first.
Lower your body so your left thigh is parallel to the floor.
Pause for a second (curling the dumbbells up toward your chest and lowering them again to the starting position for the more advanced).
Push off your heel and return to the starting position.
Repeat, but lead with your right leg.
Squats
Targeted area: Your leg muscles, including your quadriceps, hamstrings, and calves.
How to do this exercise:
Squats can be done with or without weights.
Stand with your feet shoulder-width apart and slowly bend your knees, so your thighs are almost parallel to the floor.
Slowly rise to your starting position.
To add resistance, hold a dumbbell or kettlebell close to your chest with both hands.
Calf raises
How to do this exercise:
Stand on the edge of a step with your feet parallel to each other.
Slowly raise your heels a few inches above the step and hold for a few seconds.
Slowly lower your heels below the edge of the step and hold for a few seconds. You should feel a stretch in your calves.
You can add resistance by holding a light dumbbell in each hand down by your sides.
Plank
The plank works your entire body, but specifically targets your core. It also strengthens your arms, shoulders, back, glutes, and legs.
Start on all fours, with your hands below your shoulders and your knees below your hips.
Straighten your legs behind you, keeping your feet hip-width apart. Tighten your core.
Hold for 10 to 30 seconds.
As you get stronger, increase to holding it a minute or more
To make this exercise easier, place your knees on the floor.
Weight training schedule
If your goal is to mainly build strength, three weight training workouts a week will likely provide the results you need.
According to a 2019 studyTrusted Source, doing a weight training routine 3 times a week is as effective as more frequent workouts for strength building.
However, if you want to build up muscle mass, you’ll need to do more repetitions and more frequent workouts.
You can work all your muscle groups during a workout, doing 1 or 2 sets of each exercise to start, and working your way up to more sets or heavier weights as the exercises get easier.
Or, you can focus on certain muscle groups on specific days. For example:
Weekly weight training schedule
Monday: Chest, shoulders, triceps, and core
dumbbell chest press
dumbbell shoulder press
dumbbell triceps extension
plank
Wednesday: Back, biceps, and core
dumbbell single-arm rows
bicep curl
resistance band pull apart
plank
Friday: Legsand core
lunges
squats
calf raises
plank
As you become more comfortable with weight training, you can mix up the exercises you do for each muscle group. Be sure to add weight and more sets as you build up your strength.
Safety tips
It’s important to focus on safety when you start a weight training routine. Pay close attention to your body and resist the urge to push yourself too quickly.
To stay safe while weight training, remember to:
Wear proper clothing for weight lifting, like closed-toe shoes and weight lifting gloves if needed.
Perform each exercise slowly, paying attention to proper form.
Use a spotter to help you with heavier lifts, especially those that go above your head.
Stay hydrated throughout your workout.
Inhale before your lift and exhale during the lift. Never hold your breath when working out weights.
Stop your workout if you feel sharp or stabbing pain. If the pain doesn’t go away when you stop exercising, seek medical attention.
If you have a health condition, talk with your doctor about a weight training and exercise program that’s safe for you.
The bottom line
Weight training is also known as resistance or strength training. It involves moving parts of your body against some kind of resistance, like weights, resistance bands, weight machines, or even your own body weight.
Weight training is an excellent way to build muscle mass and make your muscles stronger. It can also keep your metabolism chugging, strengthen your bones and joints, improve your muscle tone, help you burn more calories, and keep you healthier as you age.
To make the most of your weight training routine, start with lighter weights until you master the proper form. Then increase the weight or resistance slowly to avoid injury. Be sure to work all your muscle groups for optimal strength and fitness.
Not sure where to start? Explore our qualified physical therapists who can help you embark on your weight training journey safely and effectively. Contact us today at 949-276-5401. For more tips, follow us on Instagram.
The kneecap is the hardworking little hero of the leg joint, bearing the brunt of our every step and jump. If you’re currently navigating the world of knee woes, you’re not alone. Knee pain is a common complaint, affecting millions of people worldwide. But we are ready to help you decipher the messages your kneecap is sending.
What’s going on with my kneecap?
If your kneecap pops or slides to the outside of your knee, you’ll definitely know that something’s going on. Typically, that “something” is a partial or full dislocation, which means the kneecap, also known as the patella, has slipped partly or all the way out of its groove over the knee joint.
Dislocation can be caused by a sudden blow, such as taking a hard hit playing a contact sport like football or hockey, or by a chronic condition like a stretched ligament. Some people have a particular knee anatomy that makes it more common. In those cases, a dislocation could be caused by something as simple as normal walking or standing up from a chair. With chronic dislocation, it may feel as though your knee is buckling or giving way. There’s often no pattern or regular causes of the dislocations.
What happens when a kneecap dislocates
When the kneecap dislocates, it’s painful and the knee area may swell. Whether it happens from an acute or chronic situation, dislocation can damage the cartilage of the groove that the kneecap sits in or the cartilage underneath the kneecap.
Acute or chronic dislocation indicates you have a stretched or torn medial patellofemoral ligament, or MPFL, a tough band of tissue that connects to the inside of the kneecap and prevents it from sliding to the outside of the knee.
Treating acute dislocation
If the dislocation is caused by an acute injury, you may be able to ease the kneecap back into place, or you may need to go an emergency department where health care professionals can correct the dislocation and evaluate if there’s additional injury to your knee. Following the dislocation, you should see an orthopedic specialist.
An X-ray provides an overall view of the anatomy of the kneecap and knee joint. The orthopedic specialist can determine if there is damage to the groove the kneecap rests in, how high the kneecap sits above the joint and if the patellar tendon, which connects below the kneecap, is pulling to one side.
If this is the first time your kneecap has dislocated, the X-ray also can help determine if you’re at risk of it happening again. Your orthopedic specialist also may order an MRI to check if a piece of the cartilage has broken off.
Younger patients may need to undergo surgery to remove or fix a cartilage piece that has broken off and reconstruct the MPFL. Recovery following surgery typically involves wearing a brace, physical therapy and limited weight bearing to give the cartilage the best chance to heal. It may take up to six months before you’re able to fully return to sports.
For older patients, cartilage is less likely to heal, so surgery isn’t always recommended. However, if you’re experiencing a catching sensation in your knee, an orthopedic surgeon may decide to surgically remove the piece of cartilage. Rehabilitation will include limited weight bearing, using a brace and physical therapy.
Treating chronic dislocation
The first time your knee dislocates — unrelated to an injury — it may slide back into place on its own. However, you should see an orthopedic specialist who can evaluate if there has been any injury to the cartilage and determine your risk for dislocations happening again. If there isn’t any cartilage damage, the orthopedic specialist may order physical therapy to strengthen your hip and quadricep muscles. This can help overcome any stretch in the MPFL ligament and stabilize your kneecap, as well as decrease the risk of arthritis over time.
However, you eventually still may require surgery to reconstruct the MPFL, as well as other procedures to correct chronic dislocations. These include deepening the groove where the kneecap sits or moving the location where the patellar tendon connects.
Recovery from MPFL reconstruction may take several months before you’re able to return to normal activities and regain your range of motion. Overall recovery for more complex surgeries may take four to six months.
Preventing kneecap dislocations
The best way to lessen your chance of acute and chronic kneecap dislocations is to maintain overall leg, quadricep and hip strength. For chronic dislocations, learn what tends to cause them, such as twisting, and avoid those motions. A physical therapist also can teach you how to correct a kneecap dislocation on your own.
For athletes who have suffered an acute dislocation, prompt care, possible surgery and rehabilitation can get you back to playing again.
Take control of your body and reclaim your active lifestyle. Your PT will assess your unique situation and design a personalized program targeting the root cause of your pain. Remember, we also offer Rx Massage to support your healing where you need it. Contact us today at 949-276-5401. For more tips, follow us on Instagram.
As we step into a new year filled with resolutions and aspirations, prioritizing our health is more crucial than ever. And few things are as fundamental as maintaining a healthy back. Join us at Rausch PT as we kick off the year by debunking eight myths about back pain. We can offer you solutions to alleviate and prevent back pain, with targeted exercises, therapeutic techniques, and expert guidance to restore mobility, strengthen muscles, and promote a pain-free, active lifestyle. All supported with Rx Massage, should you so desire!
8 common myths about back pain
Back pain is more common than homeownership in the U.S. While about 65% of adults own a home, nearly 80% of adults will have back pain at some point. Despite how common this type of pain is, some myths persist.
Get the truth about these eight common back pain myths:
Myth: Lifting heavy objects is the primary cause of back pain.
Fact: While lifting heavy objects with poor form can certainly contribute to back pain, it’s not the sole cause. Sedentary lifestyles, poor posture, obesity and genetic factors can all play a role in the development of back pain.
Myth: Bed rest will make my back pain better.
Fact: Probably not, but it depends on the cause of your pain. If your back pain is due to a muscle strain, taking it easy for a few days may help. However, in other cases, bed rest can make back pain last longer or even worsen it. If your pain is nerve compression, a disc issue or joint degeneration, inactivity can lead to tightening of muscles and worsening pain, the loss of physical condition and more debility. In those cases, I recommend that people modify their activities, switch to low-impact exercises like walking and swimming, and avoid movements that could worsen pain like bending, twisting or lifting.
Myth: Back pain is caused by sitting on a fat wallet.
Fact: Frequently sitting with a large wallet in your back pocket can cause leg or hip pain and numbness, but it doesn’t usually cause back pain. A large wallet can compress your sciatic nerve and tilt your pelvis. The sciatic nerve is the largest in your body, and it branches from the lower back through your hips, buttocks and down each leg. Compression of the nerve causes pain or numbness while sitting or driving. After sitting for a long time, you may find walking difficult or feel pins and needles in your leg. If you’re bothered by symptoms, take over-the-counter anti-inflammatory medications and remove your wallet from your back pocket. Many times, these steps resolve the issue.
Myth: Back pain is always due to a serious underlying condition.
Fact: Back pain is usually caused by muscle strains or sprains, not by a serious condition like a disc or vertebrae issue. Most back pain resolves on its own without requiring extensive medical intervention.
Myth: Exercise should be avoided when experiencing back pain.
Fact: In most cases, exercise and physical activity are recommended for managing and preventing back pain. Strengthening the core muscles, improving flexibility and maintaining a healthy weight can all contribute to a healthier back. Again, modification of these activities may be required depending on your pain. Listening to your body is important. You know your body best. If something is progressively worsening or not getting better and you’re worried, always contact a health care professional to get evaluated.
Myth: Surgery is the only solution for chronic back pain.
Fact: Back pain is often caused by issues that aren’t relieved with surgery. Non-surgical treatments like physical therapy, medications, injections and lifestyle modifications are often effective in managing and reducing chronic back pain.
Surgery may be necessary if you have pain that:
Intensifies, especially at night or when you lie down.
Spreads down one or both legs.
Causes weakness, numbness or tingling in one or both legs.
Occurs with new bowel or bladder control problems.
You should seek an immediate medical evaluation if you have weakness, numbness, pain or are losing control of your bowels or bladder.
Myth: A firm mattress is the best for alleviating back pain.
Fact: The ideal mattress firmness varies from person to person. Some people may find relief with a firm mattress, while others may prefer a medium or soft mattress. When shopping for a new mattress, look for one that provides proper support and comfort based on your preferences and needs. Also, many companies offer generous return policies so you can try a mattress for a few weeks, or even a few months, before deciding if it’s right for you.
Myth: Poor posture doesn’t contribute to back pain.
Fact: Many people spend hours staring at a computer while slouching rather than sitting at attention, or focused on cellphones that draw the eyes down and curve the neck. These habits can strain muscles and joints, causing body pain over time. Practice good posture habits and take advantage of ergonomic office equipment to help prevent and alleviate back pain.
Some back issues can’t be avoided, like those caused by injuries, arthritis or genetics.
Yet, there are things you can do to preserve the health of your back, including:
Maintaining an ideal body weight.
Excess weight causes increased stress on all joints, including the spine.
Strengthening your core.
Stronger core muscles, including abdominal and intrinsic back muscles, can help offload stress on your spine.
Staying active.
Regular movement is essential for keeping your body active.
Make this your healthiest year. Get rid of your back pain with our expert fitness and PT insights. Contact us today at 949-276-5401 to set you on the path to a stronger, pain-free 2024. For more tips, follow us on Instagram.
Dancers put their bodies through incredible feats of strength, agility, and flexibility. However, these demanding movements can also lead to a variety of injuries. As PTs, we understand the importance of maintaining peak performance while staying injury-free. Take a look at our valuable insights into prevention strategies and techniques to help dancers recover and thrive.
Dance may look effortless, but it requires a lot of strength, flexibility and stamina. It also comes with a high risk of injuries. Whether you are a dancer, the parent of a dancer or a dance teacher, you should be aware of the most common dance injuries and learn how to avoid them.
Johns Hopkins performing arts physical therapists Andrea Lasner and Amanda Greene share valuable information about dance injury treatments and prevention tips. Lasner and Greene, both dancers, have turned their love for the art into a means of helping injured dancers.
What are some common dance injuries?
A few studies that looked into dance injuries found that injuries from using your joints and muscles too much (overuse injuries) are the most common in dancers. The majority of these overuse injuries involve an ankle, leg, foot or lower back. Some common dance injuries are:
Hip injuries: snapping hip syndrome, hip impingement, labral tears, hip flexor tendonitis, hip bursitis and sacroiliac joint dysfunction
Foot and ankle injuries: Achilles tendonitis, trigger toe and ankle impingement
Knee injuries: patellofemoral pain syndrome
Stress fractures: metatarsals, tibia, sesamoids and lumbar spine
Dancers are also likely to develop arthritis in the knee, hip, ankle and foot
Generally, dancers have a much lower rate of anterior cruciate ligament (ACL) injuries than other athletes. One explanation could be that dance training involves much more intense jumping from an earlier age than other sports, which helps improve muscle control.
How do I know if the pain is from an injury?
In most cases, the pain you experience after dancing is muscle soreness that usually subsides within 24 to 48 hours. Sometimes, it takes a few days for muscles to get sore, which is also normal. However, if you experience the following types of pain, you may have suffered an injury:
Pain that wakes you up at night
Pain that is present at the start of an activity
Pain that increases with an activity
Pain that makes you shift your weight or otherwise compensate your movements
If you experience such pain, consult with a medical specialist — preferably a physical therapist or physician with experience in treating dancers. They will be able to determine whether additional testing is needed and will formulate an appropriate treatment plan.
Why do dance injuries happen?
Dance is a physically demanding activity. Dancers perform repetitive movements for several hours a day. Studies have shown that dancing five hours a day or longer leads to an increased risk of stress fractures and other injuries.
On top of the intensive training, many dancers get little time to recover between the sessions and have no “offseason.” Restrictive diets and unhealthy body weights may also contribute to dance injuries. Proper nutrition is important for dancers of all ages.
How do dancers get ankle sprains?
Ankle sprains are the number one traumatic injury in dancers. Traumatic injuries are different from overuse injuries as they happen unexpectedly. When an ankle is sprained, ligaments on the inside or outside of your foot get twisted or overstretched and may experience tears. Ankle sprains often happen due to improper landing from a jump, misaligned ankles (when they roll in or out) or poorly fitted shoes. Torn ligaments never heal to their preinjury condition. Once you’ve sprained your ankle, you are at risk of doing it again. It’s important to build muscle strength to prevent further injuries.
Dance Injury Prevention
How can dance injuries be prevented?
The majority of overuse injuries and even some traumatic dance injuries can be prevented. Follow these guidelines to reduce your risk of injury:
Eat well and stay hydrated before, during and after class.
Get enough rest and avoid overtraining.
Do cross-training exercises to build strength and endurance in all parts of your body.
Always wear proper shoes and attire.
Always warm-up before training or performances.
Lead a healthy lifestyle and get to know your body.
When injuries happen, address them immediately and get advice from a doctor or physical therapist.
What are good cross-training exercises for dancers?
Core and hip strengthening exercises like Pilates and stability-based yoga are great for dancers. And so are aerobic and cardiovascular activities, such as running, swimming or biking. They get your heart rate up and help build stamina for long performances.
Many dancers don’t do enough cardio during their regular training. Just 30 minutes three to four times a week is usually enough to improve your endurance. As always, do this in moderation and in short intervals to avoid stressing your joints. Being screened by a physical therapist with experience treating dancers will help you identify individual areas of weakness to address with specific exercises.
How much rest should a dancer get?
While many experts stress the importance of proper rest, there are no specific guidelines on the frequency and amount of rest. However, we know that dancing five hours a day or longer is linked to an increased risk of injury. It is also known that intense activity leads to microdamage, which peaks in recovery 12 to 14 hours after a workout. So it would make sense to take the next day off after a high-intensity activity. Dancers should work at their highest intensity a couple of times per week and then take at least two days off, preferably in a row. Also, a three- to four-week period of rest after the season is ideal for recovery.
Dance Injury Treatment
Should I ice or heat after a dance injury?
If it’s a sudden injury, it’s best to apply ice first to reduce swelling and inflammation. RICE treatment is a common approach that involves rest, ice, compression and elevation. After a few days, you can switch to heat to increase blood flow to the area and promote healing. However, every person is different. If you feel that ice helps you better than heat, then there is nothing wrong with continuing to ice. But be careful not to ice before dancing or stretching, because you want those muscles to be warmed up to prevent re-injury.
What are my treatment options for a dance injury?
It depends on the type of injury, your level as a dancer and many other factors. For example, for traumatic injuries like ankle sprains, your doctor may recommend RICE, joint protection and physical therapy. For stress fractures you may need to limit weight on your foot by using crutches, wearing a leg brace or walking boots. Surgery is typically used as the last resort. It is best to discuss your treatment options with a doctor who specializes in dance injuries. And if you are working with a physical therapist, make sure he or she is experienced in treating dancers. A big part of physical therapy is correcting the training technique that led to the injury. Otherwise, you risk hurting yourself again by making the same mistake.
What should be in the first aid kit for dance injuries?
Your regular first aid kit might already have many of the essentials for handling a medical emergency. However, when it comes to common dance injuries, you may want to include a few additional items, such as:
Instant cold pack
Pre-wrap and athletic tape (if qualified providers are available to apply)
Elastic bandages (to be used only for compression, not support while dancing)
Crutches
Topical pain reliever
Rausch PT is here to help you achieve your best performance. Our personalized PT programs can keep you moving with grace and confidence. Don’t let injuries steal the spotlight. Contact us today at 949-597-0007. You can follow us on TikTok and Instagram for more inspiration and tips.
Pelvic organ prolapse (POP) is the descent of one or more organs such as the uterus, bladder, or rectum into the vaginal wall. It is most commonly referred to as herniation.
Pelvic organ prolapse happens when the pelvic floor muscles are no longer able to support pelvic organs, resulting in a drop of the organs.
Types of prolapse:
Cystocele is when the bladder bulges into the vaginal space. It can also be called anterior wall prolapse.
Recotcele happens when the rectum prolapse or herniates into the vaginal space. It can also be known as posterior vaginal prolapse.
Uterine prolapse is when the uterus bulges into the vaginal space and can be called anterior wall prolapse.
Now let’s talk about causes for prolapse.
Pelvic Organ Prolapse is mainly caused by pregnancy and vaginal childbirth. Pelvic organ prolapse happens when pelvic floor muscles (PFM) are weak and unable to support the organ. Pelvic floor muscles need to be strong to be able to support the weight of the fetus. After childbirth, pelvic floor muscle starts to fatigue and dysfunction starts to occur.
Prolapse risk factors include:
Laceration, tearing, or stretching can affect the integrity and function of the pelvic floor. Forcep or vacuum-assisted delivery increases the risk of pelvic floor injury.
Grades of pelvic organ prolapse:
Pelvic organ prolapse is rated on a scale of 0-4. Each grade specifies the intensity of the prolapse.
Stage 0 is absent or non
Stage 1: > 1 cm above hymen
Stage 2: 1 cm above or beyond the hymen
Stage 3: > 1 cm beyond hymen
Stage 4: complete eversion
Symptoms of pelvic organ prolapse
The most common symptom of all types of vaginal prolapse is the sensation that tissues or structures in the vagina are out of place or feeling that something is coming down. You might also feel pressure or pain in the perineum. Some patients may also feel pelvic or abdominal pain.
Symptoms may be exacerbated with standing or bearing down with bowel movements.
Management of pelvic organ prolapse:
Pelvic floor physical therapy to assess and treat pelvic floor muscle, core strengthening, stabilization exercises, and hip strengthening.
Avoid intra-abdominal pressure by managing constipation. Avoid bearing down.
Proper lifting mechanics. Always exhale while lifting heavy items.
Weight loss. Increased intra-abdominal pressure can increase prolapse.
Use of pessary. A pessary is a removable device placed into the vagina to aid in supporting pelvic organs.
Loose clothing and supportive garments. Avoid tight and fitted pants as they can increase intra-abdominal pressure.
NO REFERRAL NEEDED
Personalized PT.
Built around your goals.
DIRECT ACCESS PHYSICAL THERAPY
YOU CAN START PT WITHOUT A REFERRAL
You do not need a doctor’s referral to schedule physical therapy with our team. If pain is getting in the way, we are here to help you move forward with personalized care built around your goals.
Get started today and take the first step toward moving with less discomfort, recovering with confidence, and getting back to the activities you love.

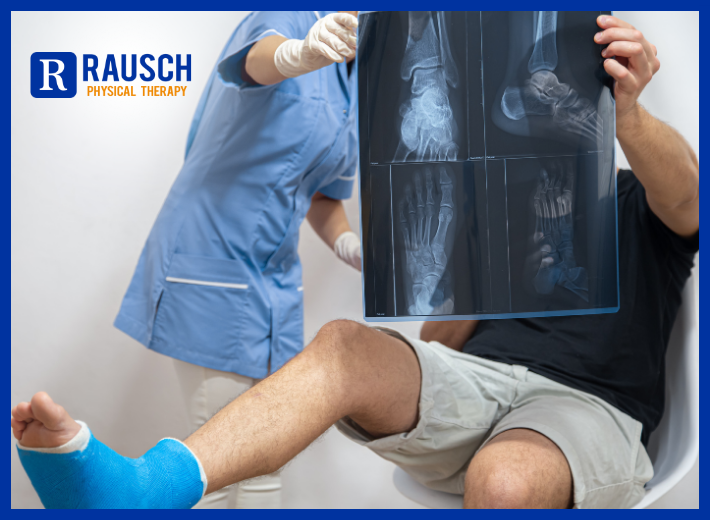
 If your doctor suggests something to help you, like a cane, walker, or reaching tool, use it. While it might seem that it keeps you from moving the way you want to, it can keep you safe and help you hurt less. And it can make it easier for you to move. That’s key: The more active you are, the better it is for your bones and overall health.
 Take control of your recovery and get back to doing what you love. Our personalized physical therapists can provide expert advice and practical tips to help you heal and regain your strength faster. Call us today at 949-276-5401. For more tips, follow us on Instagram.
 You’ll start to work on making your leg muscles stronger, which takes some of the stress off your knee and cut your pain. Your therapist will give you exercises to do at home and show you how to practice them safely.
 Regain your mobility and rediscover the joy of movement. Our personalized physical therapy programs can help you overcome knee pain and live life to the fullest. Call us today at 949-276-5401. For more tips, follow us on


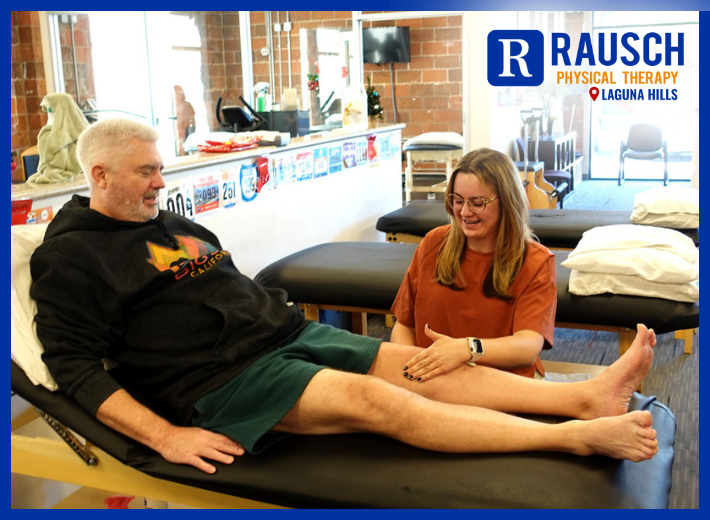
 Train smarter, not harder! Schedule a PT consultation to prevent injuries and reach your running goals. Call us today at 949-276-5401. For more tips, follow us on




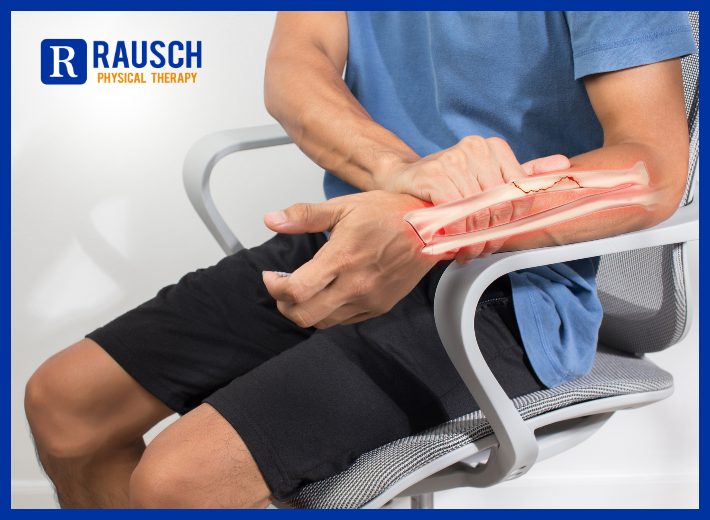
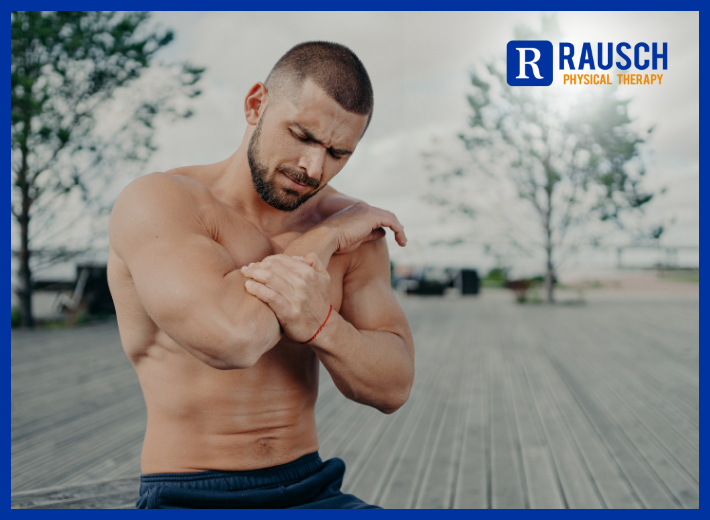
 Equipment options
 Safety tips