rauschpt, Author at Rausch Physical Therapy & Wellness - Page 3 of 30

Blog

This Soft-Tissue Maintenance Routine Will Keep You On Your Bike Longer

By Dustin Hancock, DPT, PT
Rausch Physical Therapy & Sports Performance

The “Mountain Bike-PT” Dustin Hancock explains how introducing a soft-tissue mobilization maintenance program can help you avoid limiting aches and pains so you can stay on the bike longer, train harder, and reduce your recovery time.

—

A great friend and old patient of mine recently forwarded this great quote to live by:

“Life’s journey is not to arrive at the grave safely in a well preserved body, but rather to skid in sideways, totally worn out, shouting, “Holy [bleep]! What a ride.”

While I absolutely love to live by this quote, I’ve worked as a physical therapist long enough to have seen my fair share of athletes whom lack a maintenance program and arrive in the clinic destroyed. They have neglected treating some injuries and wore out their body before its time. So the question is, how do you want to live your life? Do you want to feel stiff and old, or flexible and healthy?

Whether your goal is to avoid injury, place at Over the Hump, or just shave some seconds off your Strava time, you need to start introducing a mobility program to maintain balance, otherwise you will wear out parts on your body that can’t be replaced. Introducing soft tissue mobilization in some fashion on a regular basis will help keep you on the bike, train without the limiting aches and pains, and reduce your recovery time.

Rigid Things Break

With my patients at Rausch Physical Therapy & Sports Performance, I use an analogy between two types of bridges to explain how important the balance between flexibility and rigidity is to the body. First think of a suspension bridge, which can not only hold up to the force of thousands of cars on a daily basis, but also the power of an earthquake thanks to its mobility. Now, a rigid-frame bridge will also hold up to thousands of cars on a daily basis, but it’s less likely to tolerate the shearing forces of an earthquake due to its stiffness.

One of my favorite words is “tensegrity,” which means something has both great stability and mobility, like a suspension bridge; similar to a suspension bridge, us mountain bikers need tensegrity to stay intact. Between strength and endurance training, long rides, poor posture, old injuries, and the beautiful aging process, we put our bodies through a lot. This can cause global muscle stiffness, and remember: rigid things break. Understanding the importance of tensegrity can help you avoid body breakdown and keep you on your bike longer

Understanding Flexibility vs. Mobility

So, how do you improve your tensegrity (stability + mobility)? While most MTB riders are willing to train hard to improve their stability, many neglect mobility maintenance (and sorry, simply stretching more frequently won’t cut it.) To achieve the second half of the tensegrity equation, you first have to understand the difference between flexibility and mobility.

Flexibility refers to your muscle tissue having the appropriate length to achieve the range of motion needed for that function. If you wanted to improve your flexibility, you could do some long-duration stretching (30-second to two-minute holds with no bouncing) on a routine basis—and “routine” is the key word here.

Mobility, on the other hand, is how the tissues slide-and-glide upon the adjacent tissues, which are not only muscles, but could also be skin, fascia, bone, ligaments, nerves, etc. This distinction is why you can’t just stretch more often to improve mobility: it’s not just about your muscles. You need to add in some form of soft tissue mobilization into your recovery routine, such as professional myofascial release, specialized manual therapy joint work, active release technique (ART) and/or a home mobility program.

Three Ways to Maintain Soft Tissue Mobilization

As a physical therapist, I preach how important mobility maintenance is, however as a cyclist with a busy schedule, I sometimes struggle to add yet another item to my to-do list at the end of the day. Still, I make it a point to continually challenge myself to maintain my mobility routine to make sure my old injuries don’t start to catch up to me just yet. A good mobility maintenance routine looks a little like this:

  1. Daily foam roll routine: Spend time working out the tissues that are tight for five to 10 minutes daily, or until you feel about a 50% reduction in pain. Click here to view my specific Foam Rolling Routine for Mountain Bikers.
  2. Massage at least once or twice a month. I recommend a specific myofascial release from the experts at Dynamic Touch, or you can try ART with Lawrence Van Lingen at Rausch PT; he has some amazing fascially-specific techniques he’s perfected for elite cyclists across the globe.
  3. Biomechanical assessment (also known as a “tune up”) at least every six months. Make an appointment with your physical therapist at least twice a year for a tune-up, movement screen evaluation, and postural assessment. During this visit your PT can determine any new abnormal alignment patterns, soft tissue restrictions, or areas that you need to address to prevent future injuries.

Maintenance isn’t always convenient, but I personally make it a point to do it to ensure I get to join the riding group every weekend and race stronger at Over the Hump. The daily grind takes a big toll on our bodies and will cause imbalances, whether it’s from poor posture at your desk, lack of cross training or focusing too much on strength training. This is why it’s critical for all MTB riders to actively pursue some form of mobility maintenance routine to keep their bodies balanced and their seat on the trails.

Conclusion

All this talk about mobility comes down to helping us get less injuries, improve recovery time, improve your overall athleticism and generally help you feel less old. So be specific, be consistent, and respect mobility with cross friction-based foam rolling.

Feel free to stop by the Rehabulance during the second half of Over the Hump 2016, and I’ll show you some awesome foam rolling techniques to address your individual mobility issues.

Cheers, fellow riders.

-DH


Dustin-MTBDustin Hancock, DPT, PT
Rausch Physical Therapy & Sports Performance
dustin@rauschpt.net

Dustin is an adrenaline junkie with a passion for mountain biking and an outdoor-enthusiastic lifestyle. As a Doctor of Physical Therapy, his approach combines research-based knowledge and manual therapeutic treatment with Rausch PT’s cutting-edge equipment. He has experience treating extreme sport athletes of all levels, from XTERRA World Champions to challenged athletes with amputations, neuromuscular disorders, and spinal cord injuries.

Five Ways to Train Smarter This Offseason

Five Ways to Train Smarter This Offseason

By Sean Swopes, PT, DPT, CSCS

Rausch Physical Therapy & Sports Performance

While most people take the offseason to train for a better “next year,” Mountain Bike-PT Sean Swopes explains why you should spend some time out of the saddle and try a few other methods to improve your performance and overall health.

—

You survived racing through the dirt and heat, and now the Over the Hump 2016 season has come to an end. So, what next? For many of you, the end of OTH means it’s time to pump up those skinny tires and focus on road races, crits and TT’s. Before you get back to pounding those pedals, take some time away from tuning up your bike and spend some time tuning up your body.

While the subtle differences of road cycling and mountain biking offers great balance to your riding skill level, as the quickly changing terrain and variable cadence can help to enhance your riding technique, it’s also important to spend some time out of the saddle. As a physical therapist, I know that muscle imbalance/dominance are main contributors to pain and dysfunction, but as a mountain biker I also know that many of us will go to great lengths to enhance our power output, VO2 max, and velocity.

The offseason is a great time to train to improve your performance, but it’s also the perfect time to start focusing on ways to prevent the aches and pains that may be keeping you from reaching your potential. Here are five methods you can use to stay balanced this off-season.

1. Mix Things Up

A quick and easy method I like to use to offset this imbalance is to simply go for a run. Running is a great way to change the pace and the demands of those muscle that typically get overworked when cycling. Swimming also offers a great way to continue working on aerobic demand while also decreasing the load demands on your joints.

2. Get Rolling With Soft-Tissue Work

Ever feel your knees brushing the top tube during a down stroke? It’s a frequent technique used to stay in an aerodynamic position, but it can also create increased tightness of the liotibial (IT) band. In fact, it’s quite common for cyclists to develop IT Band Syndrome from repeated down stroke.

To combat this imbalance, my colleague Dustin Hancock, DPT has created a great foam rolling program to help improve flexibility and mobility of your tissues. Click here to check it out.

3. Strengthen Your Core

I went to a great workshop recently where we discussed how important it is to have core strength for successful cycling. I have been preaching this exact thing for years! We often think of our legs being our powerhouse, but how much power can you expect your legs produce without a stable base to explode from?

The primary drive for you pedal stroke is produced from the glutes, quadriceps and hamstrings. All of these muscles attach directly to the pelvis. Without good core balance and stability, your biomechanical leverage to utilize these muscle group is altered, and therefore you produce less force.

To improve your core and stability, try these exercises:

  1. Bird Dogs – Do these on a stable surface, or challenge yourself on an unstable surface. The key is to focus on your pelvis and prevent any rotation or tilting
  2. Planks – You know, that exercise we all love to do. Challenge yourself by starting with a static plank on your elbows and sides, then progress by involving leg movements.
  3. Swiss Ball Walkouts – Progress this exercise by incorporating knee tucks and pikes.

4. Work on Those Lungs

VO2 max is the maximum rate of oxygen consumption during vigorous activity. It’s often used to objectively measure an individual’s aerobic physical fitness and determine their endurance capacity during prolonged, submaximal exercise. The theory is: improve your VO2 max, improve your performance.

While the critical importance of VO2 max is debated, a 2012 article in the Journal of Strength and Conditioning Research concluded that VO2 max was a great determinant of mountain bike race performance, at least more so than for road races.

So, what can you do while training to improve your VO2 max? While research has shown that Hight Intensity Interval Training (HIIT) can lead to great benefits in cardiovascular gain, is HIIT really the only way to go? A 2010 article by International Journal of Sports Physiology and Performance reports that a 80/20 split in Low Intensity to High Intensity training program will create ideal physiological benefits, like V02 max.

And just remember, while it’s important to push you body to its limits to create physiological responses, this is often where injury occurs.

5. Go See a Physical Therapist

With weekly OTH races for the past three months, it’s likely you’ve developed a few aches and pains this summer. Unfortunately, many MTB racers (like most athletes) subscribe to the school of thought, “Just deal with the pain until the end of the season; it’ll get better when I stop racing.”

While I can’t force you to change your mindset, I can tell you that pain is often your body’s way of telling you that it’s undergoing an abnormal amount of stress. We often think that that one fall, that one crash, is what’s going to break our bodies. The truth is, most injuries are the result of overuse—repetitive stress over a prolonged period—and while our body does a great job of adapting to the stress we place on it, its ability to repair itself diminishes the more time we spend in stress/pain.

So, now that OTH 2016 season is finished, show your body you care and make an appointment with a physical therapist. At Rausch Physical Therapy & Sports Performance, your PT will perform a biomechanical assessment to determine any new abnormal alignment patterns, soft tissue restrictions, or areas that you need to address this offseason to repair your body and prevent future injuries.

Conclusion

Stop allowing pain to determine how your body moves. While you may think you can live with “a little” hip pain, you may not realize that pain in one region of your body can lead to compensatory movement in another.

Think of it this way: think of how your derailleur cable on your bike can begin to stretch. This affects how your bike can shift, but you tell yourself you can live with that. But that small sound you hear from your chain grinding against the cassette means you’re slowly wearing down your chain, until one day—it breaks.

The moral of the story here is to listen to your body’s signs that your internal drive train is breaking down, and get it fixed.


Sean Swopes | Rausch Physical TherapyAbout Sean Swopes, PT, DPT, CSCS

sean@rauschpt.net

Sean Swopes, DPT is the “Mountain Biking-PT” at Rausch Physical Therapy & Sports Performance. He is also a certified Strength and Conditioning Specialist. As a physical therapist, Sean’s goal is to help his patients understand their musculoskeletal impairments and work together to improve them.

Jon’s Youth Baseball Injury

Around the office, they call me “The Baseball Guy.” My years of clinical treatment of ballplayers at Rausch Physical Therapy and Sports Performance, coupled with my interest in biomechanical research, has motivated me to find new ways to reverse the alarming increase in youth baseball arm injuries. In fact, for the past two years I have been developing injury prevention programs for southern Orange County baseball leagues to help protect our youth’s elbows and shoulders.

And it looks like I am not the only one getting on base with this initiative. Major League Baseball and USA Baseball recently teamed up to launch their Pitch Smart program, which is designed to educate parents, coaches and young athletes about how to avoid overuse injuries. It includes information on pitching guidelines, injury risk factors, Tommy John surgery and more.


Did you know:

If you pitch more than 100 innings in a year, whether little league, club or showcase, it will increase your risk of injury by 3.5 times

If you pitch greater than 8 months in a year, it will increase risk of surgery by 5 times

The number one risk factor for injury

I have found that out of all the risk factors that can cause injury, the number one is pitching too much, both in a game and in any given year. New research is coming out every month about the correlation of throwing too much and arm injuries in little league athletes.

Kids should take off about 2-3 months of competitive pitching in a year and engage in other sports or active rest where they are still using their arms, just not in a pitching motion

As a healthcare professional, I believe that change needs to occur in the traditions and schedules of little league baseball across the nation. The Pitch Smart initiative proves to me—and hopefully to parents and coaches—how crucial injury awareness and prevention is. I want to take this information and use my skill to prevent, rehabilitate and treat the youth of little league baseball.

If you have any questions about throwing injury prevention or rehabilitation, please send me an email and I will be happy to answer them. For now, take care of those elbows and shoulders!

Sincerely, The Baseball Guy

Jonathan Meltzer, D.P.T. | jonathan@rauschpt.net


About the Author
Jonathan Meltzer graduated from the University of Redlands with a bachelor of arts in biology and a minor in physical education. Following graduation, Jonathan discovered his passion for physical therapy while working as a Physical Therapy Aide. After graduating top of his class from Loma Linda University in 2012 with a Doctorate in Physical Therapy, Jonathan began his career at Rausch Physical Therapy and Sports Performance. Jonathan’s goals are to identify limitations and treat his patients with the most recent and innovative techniques in order to maximize functional independence and obtain his patients’ individual goals.

Anthem Blue Cross To Limit Members’ PT Starting November 1


Are You a Patient with Anthem Blue Cross?

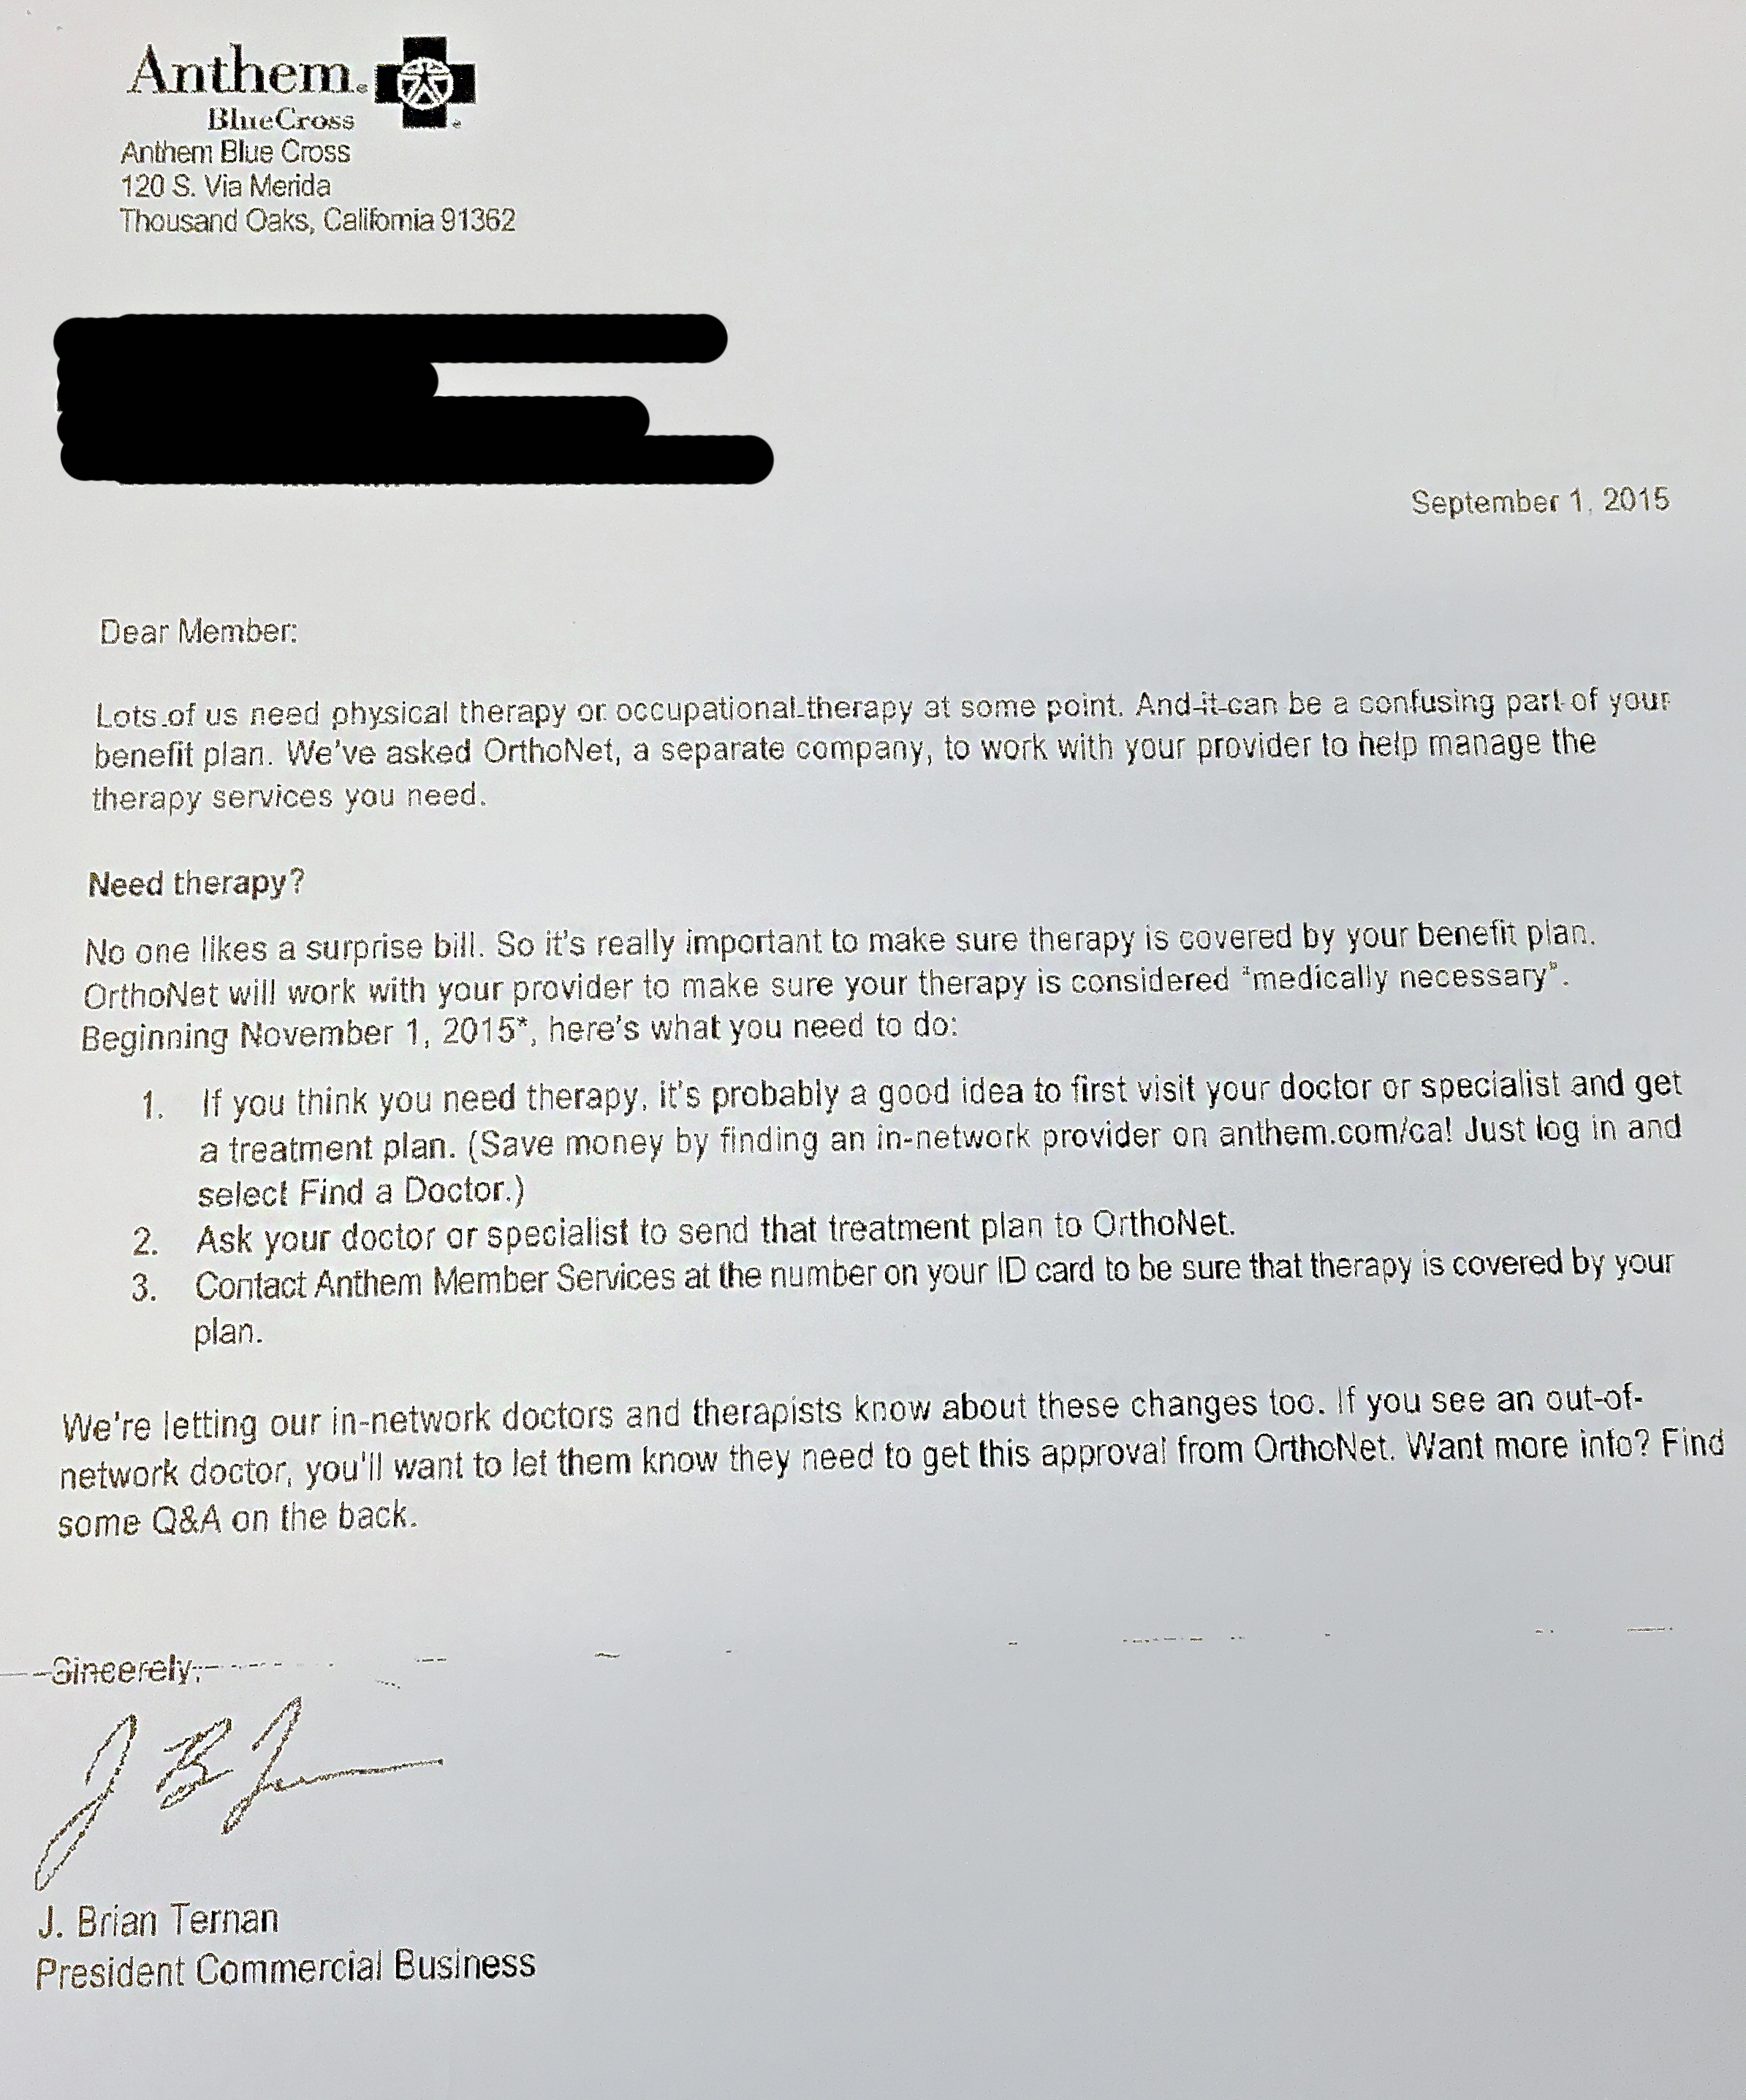
Do you use Anthem Blue Cross as your primary health insurance company? Have you received this letter in the mail?

AnthemLetter2015

Confused? Angry? You should be! Essentially, the people you pay so you can have access to medical care are telling you they’re going to start limiting your access to medical care. By hiring a third-party to decide if your physical therapy treatment is “medically necessary” (a legal term, not a medical one), Anthem Blue Cross (BC) is opening up new channels for being able to avoid paying for your medical care.

At Rausch Physical Therapy, we work hard to provide exceptional, quality care that is easily and affordably accessible, and it’s troubling that this practice of limiting your access to medical care has become the norm for medical care insurance companies.


How Rausch PT currently handles insurance companies/payment

Regardless of what that letter above implies, since the passage of the Direct Access bill in 2014 Californians have not needed a doctor’s referral/prescription before coming into a physical therapy clinic for treatment. You can come to Rausch Physical Therapy at any time for any injuries or impairments that prohibit your mobility, function, and/or quality of life. The issues only arise when it comes to figuring out who pays for this treatment.

Ever since it opened in 2006, Rausch PT has been on the leading edge of forward-thinking healthcare, and Direct Access made possible what owner Kevin Rausch had always envisioned: all people having an easy entry point onto the road to rehabilitation and recovery.

Currently, once our patients come in our door they have two options to pay for their medical treatment:

  1. Pay an out-of-pocket cash rate
  2. Have their insurance help cover the cost of their visit; once we submit their claim to and receive approval from their insurance company, the patient is only responsible for their copayment or deductible.

Whichever payment option you choose, everyone from our front office staff to your physical therapist to our billing department is dedicated to providing you with the best experience and highest quality of care possible.

How the introduction of OrthoNet affects you

Following the lead of other large health insurance companies, BC has decided to bring in a third-party management company, in this case OrthoNet, to handle the authorization of its physical therapy treatment claims. It’s OrthoNet’s job to scrutinize every claim request we submit on behalf of a patient to determine if said visit is—by OrthoNet’s definition—”medically necessary.” After we submit your claim, OrthoNet has two business days to gather all the necessary “clinical information” and either approve or deny your request. If they do approve your claim, OrthoNet will then tell you exactly how many visits it should take you to get better in and subsequently will only pay for.

Please note that this change does not affect BlueCard or Blue Cross Blue Shield members.

Why is this troublesome?

Let’s use the curious cases of Jenny and John as examples to illustrate the potential pitfalls of this increasingly-popular decision by medical care insurance companies to hire third parties to manage their physical therapy claims.

Jenny’s Case

What happens if your claim is denied?

[toggle title=”Click to read…”]Jenny loves to run, but she pushed herself a little too hard this triathlon season and now has knee pain that’s started to limit her ability to train. As an Anthem Blue Cross member, Jenny decides to take advantage of those 60 physical therapy visits she’s allotted per year and immediately makes an appointment at Rausch PT. During Jenny’s first appointment, the front desk sends a request to OrthoNet to get approval for payment for Jenny’s appointment. Jenny sees her PT, and after his initial, hands-on evaluation, he believes Jenny will be back to running pain-free after four or five visits.

Meanwhile, someone at OrthoNet is reviewing Jenny’s case and decides physical therapy treatment for her chronic knee injury is not medically necessary. She does not need surgery (yet) so they deny paying for treatment. They cover the cost of the initial visit, but Jenny now must decide if she’s going to pay cash rate to continue with her compelling treatment plan that will allow her to continue doing what she loves.[/toggle]

John’s Case

What happens if your claim is approved?

[toggle title=”Click to read…”]John is a senior in high school and has sprained his ankle playing basketball. John’s mom received the letter above, and per Anthem Blue Cross’ suggestion she makes an appointment for John to see an in-network doctor. Two days and $150 later, John comes in to Rausch PT with doctor’s approval in hand, ready to start getting better.

On his first visit, we send a request to OrthoNet to get approval for payment for John’s appointment. John sees his PT, and after her initial, hands-on evaluation, she tells John he should be 100% after four or five visits and back on the court before playoffs start in two months.

Meanwhile, someone at OrthoNet is reviewing John’s claim, and two days later they send a payment approval notification. However, OrthoNet has determined that John’s sprain isn’t that bad, so he should be able to start feeling better after a couple visits. BC will only help pay for two appointments to treat his ankle.

John and his PT work hard in those two visits, but he’s still only at about 60%. Inevitably, John is put in a difficult position: does he continue treatment by paying out of pocket so he can make it back in time for playoffs, or does he stop treatment and retire his jersey—or worse yet, try to play anyways and potentially cause lasting damage?[/toggle]

The takeaway

It’s unfortunate that even if your physical therapist—or even your doctor—understands your treatment as medically necessary, an outside company can still refuse to acknowledge it as so and require you pay for treatment on your own (on top of you still paying for health insurance.) It’s even more frustrating to us as a provider that we can be limited in the amount of treatment we can give people who come to us for help.

Our patients have and always will be top priority at Rausch Physical Therapy; our sole concern is getting you feeling better so you can get back to doing what you love. Our team of licensed physical therapists spent many years in school to receive their bachelor, master and doctorate degrees and licenses so they could diagnoses and relieve chronic pain and heal injuries to give someone a better quality of life. We don’t believe you should have to live with pain for any reason, especially if that reason is because an outside management company says treatment for your pain isn’t “medically necessary.”

What Rausch Physical Therapy is doing to help

  1. During the last week of October, our front desk staff will be contacting our Anthem Blue Cross patients who are already scheduled for treatment on or after November 1. Together, we’ll work to complete the additional paperwork required to request “prior authorization” so we can continue providing you with quality treatment through the end of the year.  Again, this change is effective November 1, 2015.
  2. At Rausch Physical Therapy, we believe that everyone should have easy, direct access to PT, a physical medicine and rehabilitation specialty that we see change lives every single day. To prepare for the potential influx of BC claim denials after November 1, we are currently working on rolling out new, innovative ways to give you, our valued patient, more payment options so you will never have to rely on referrals or allow your health insurance company to limit your health.


What can you, the patient, do to help?

  1. Raise a ruckus! Be proactive. Demand access to the care you pay for and deserve. Call the Anthem Blue Cross customer service number. Then email your friends, get on Facebook, Tweet, and share this.
  2. If your claim is denied for being “medically unnecessary… Fight back and appeal. According to the U.S. Government Accountability Office, you have a 50-50 chance of getting your appeal approved if it’s an issue of medical necessity. It may take a little longer, but if the amount of money is significant or the issue important enough to you, it is worth the time you take to make it right. Get the forms you need and fill them out and send them off. Rausch PT and/or your doctor can help by providing additional medical information to the request to show exactly why it is medically necessary. Don’t be intimidated by your insurance company; we’re here to help. Click here for the forms you need to file a complaint.

If you have any questions, please feel free to call our office at (949) 276-5401 and we’ll be happy to answer any concerns you may have to make this transition as easy as possible.

Rausch PT Gets You There

[one_half]

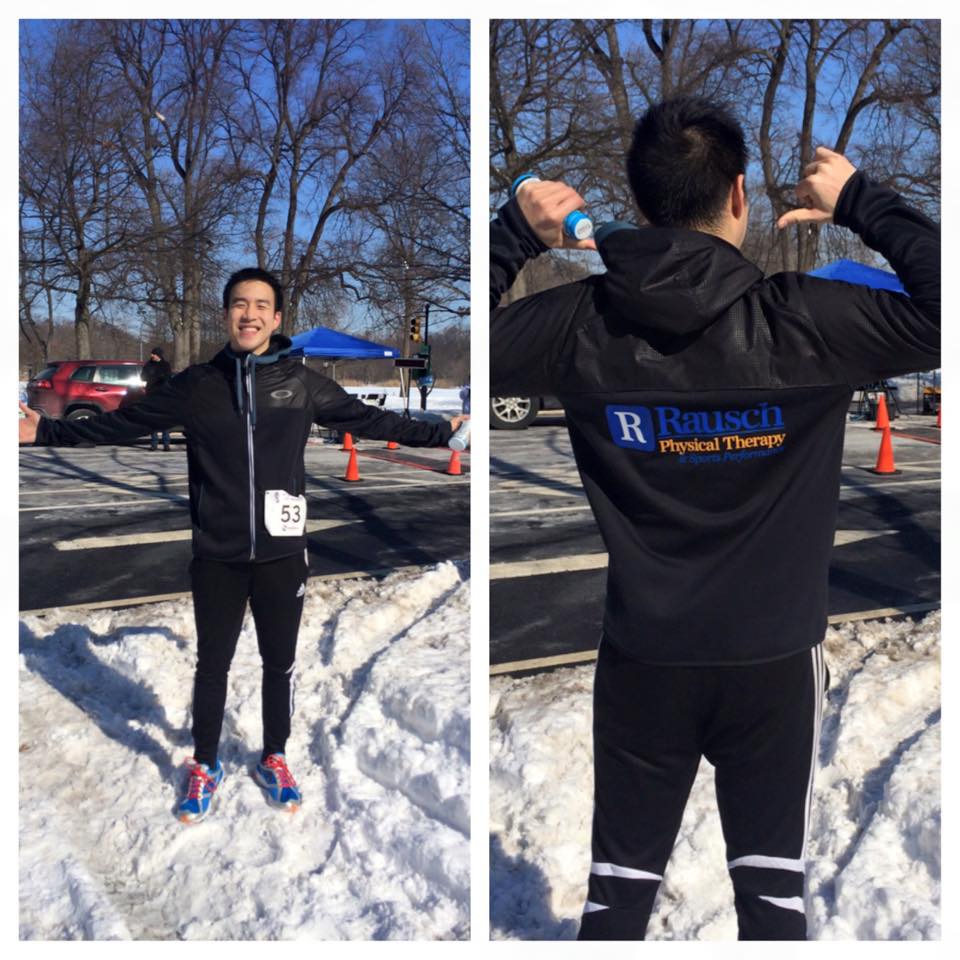
Justin: "Repping proper running mechanics and warmer weather all the way on the East Coast at the NYU Physical Therapy Annual 5k."
Justin: “Repping proper running mechanics and warmer weather all the way on the East Coast at the NYU Physical Therapy Annual 5k.”

[/one_half][one_half_last]

Kevin: "From the top at 11,053 ft to recovery from the surgery table... This team gets it DONE!"
Kevin: “From the top at 11,053 ft to recovery from the surgery table… This team gets it DONE!”

[/one_half_last]

As much as we love seeing our clients in the clinic, nothing brings us more joy than seeing them out and back to doing what they love. Whether your goal is returning to the golf course, racing your first 5k, or trying to qualify for Kona, we’re here to get you there!

Where has Rausch Physical Therapy & Sports Performance taken YOU? Share your Rausch PT #triumph photos on Facebook, Twitter and Instagram, and you could be featured on our page!

Don’t forget to tag #RauschPT #getyouthere

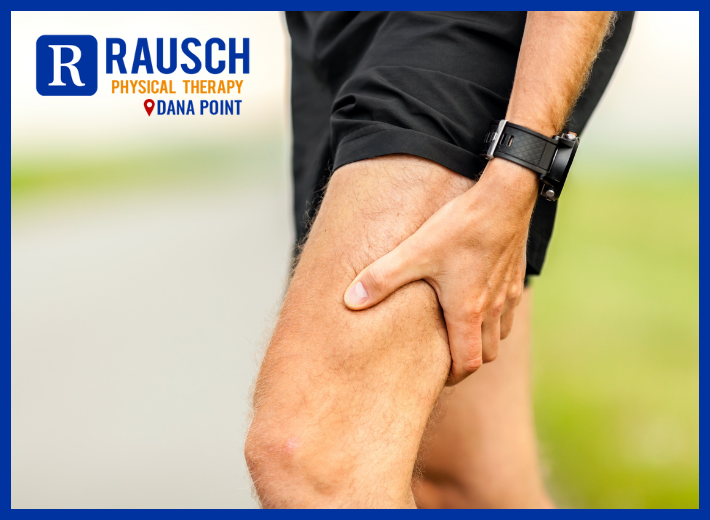
Everything About Muscle Pain

Muscle pain is extremely common and will affect nearly everyone at some point. Activities like heavy lifting workouts, lifestyle factors like excessive stress, and chronic conditions can cause or worsen it. Learn how to address this problem.

Everything You Need to Know About Muscle Pain

Don’t let muscle pain hold you back! Explore the benefits of PT and get back to enjoying your favorite activities pain-free! Contact us today at 949-276-5401. You can follow us on TikTok and Instagram for more tips.


Reference: [ https://www.health.com/muscle-pain-causes-7229891 ]

Calf Pain? Here’s What You Need to Know

Calf pain can strike suddenly, leaving you sidelined and wondering what happened. Whether it’s a sharp twinge or a dull ache, calf pain can disrupt your daily routine and leave you frustrated. Let’s turn that ouch into an “all clear” and get you moving pain-free! Questions? That’s why we are here! Give us a call and let’s get you seen. Relief is a mere phone call away!

Popped or Pulled Calf Muscles: What To Know

Say goodbye to calf pain for good! Explore the benefits of PT and get back to enjoying your favorite activities pain-free! Contact us today at 949-276-5401. You can follow us on TikTok and Instagram for more tips.


Reference: [ https://www.health.com/condition/chronic-pain/pulled-calf-muscle ]

Forearm Pain Relief

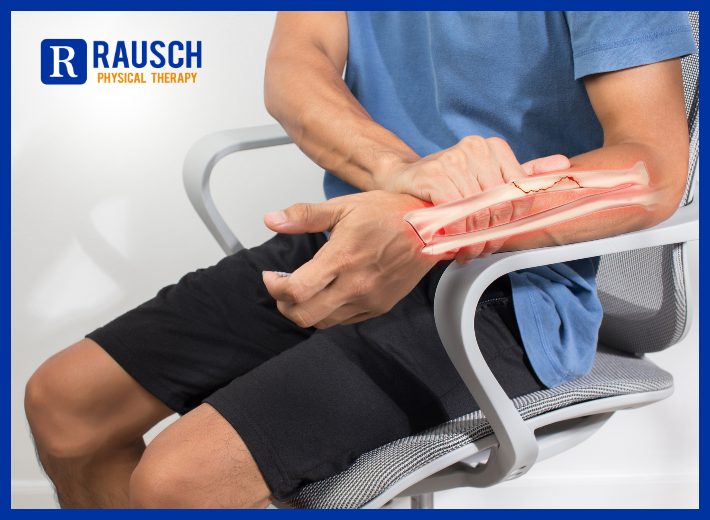
Forearm pain can be a constant companion, hindering everything from work tasks to your favorite hobbies. Here is all the information you need to understand your forearm pain and take charge. If you’d like a personalized look at what’s going on with your pain — we are here for that, along with a customized solution to make it go away! Don’t forget — you don’t have to live with pain! Sometimes we get used to it and think its a normal part of aging or injury — not so!

What To Know and Do About Forearm Pain

Need a personalized plan to address your specific forearm pain? Schedule a consultation with our licensed physical therapist and get started on your path to recovery! Call us today at 949-276-5401. For more tips, follow us on Instagram.


Reference: [ https://www.health.com/forearm-pain-8584583 ]

Say Goodbye to Hip Discomfort

Hip pain can be a real drag, putting a damper on your daily activities and leaving you feeling stiff and uncomfortable. It shouldn’t be ignored. Learn the tools you need to understand the causes of your pain and explore effective relief strategies. Questions? We are always here!

What Causes Hip Pain—and How Can You Relieve It?

Take control of your hip health! Learn how to manage discomfort and prevent it from returning with our PT experts. Contact us today at 949-276-5401. You can follow us on TikTok and Instagram for more inspiration and tips.


Reference: [ https://www.health.com/hip-pain-8426031 ]

A Beginner’s Weight Training Guide

Ready to unlock your inner strength and build a healthier you? Weight training isn’t just for bodybuilders anymore! Whether you’re a complete novice or someone curious about adding weights to your routine, here is a roadmap to success. If you have a pre-existing concern or want to know how to work this into your routine, we are here to guide you through and ensure you’re at your healthiest every step of the way!

A Beginner’s Guide to Weight Training

Some exercises, including bicep curls and squats, can support weight training at home or the gym. You can use free weights or your body weight with certain exercises to provide resistance.

Whether your goal is to build muscle mass or achieve a fitter, more toned body, lifting weights can help you get there.

Weight training, also known as resistance or strength training, builds lean, stronger muscles, strengthens your bones and joints, and can help keep your metabolism in a healthy state — meaning you’ll burn more calories even when you’re resting.

And the benefits of lifting weights aren’t just for young people. Weight training as we age can help fight the loss of muscle mass and mobility, as well as improve psychological well-being.

So even if you’ve never done any kind of weight training before — it’s never too late to start!

What’s more, you don’t even need to belong to a gym. You can simply use your body weight for many exercises or use free weights, resistance bands, or other home fitness equipment to get results.

This article will walk you through how to get started with weight training and provide suggested exercises and training advice for beginners.

What do you need to start weight training?

If you’ve never lifted weights before, consider starting out with the help of a certified personal trainer. They’ll be able to teach you the proper form for specific exercises and set up a strength training program tailored to your needs.

Many gyms or fitness centers offer introductory training sessions at little or no cost, or they have trainers available if you have questions. Additionally, there are many personal trainers who train clients online, through video platforms.

While most gyms have a combination of resistance machines and free weights, such as dumbbells and barbells, you can also get a comprehensive weight training workout at home with basic equipment.

A Beginner's Weight Training Guide 5Equipment options

You don’t necessarily need weights to build lean muscle mass and tone your body. As an example, for some strength training exercises, like pushups or lunges, you only need your body weight to provide resistance.

You can expand your at-home workout options with dumbbells. A beginner’s set of adjustable weight dumbbells starts at about $50, but the price increases as you add more weight.

Kettlebells, which are weighted balls with handles, are another popular option. Many kettlebell exercises work several muscle groups at once, which makes them effective for a full-body workout, especially if you’re short on time.

Resistance bands are also a helpful addition to your workout equipment. These color-coded elastic bands provide varying levels of resistance when pulled and stretched.

A set of resistance bands can be purchased for $10 to $60. Because they’re light and portable, you can take them with you when you travel.

What to know before you begin

Once you’re ready to get started with a weight training program, keep the following tips in mind.

Weight lifting tips for beginners

  • Warm up. Some aerobic activity, such as a 5-minute jog or brisk walk, will increase blood flow to your muscles and prime them for a good workout. Skipping rope or doing jumping jacks for a few minutes are also good warmup options.
  • Start with lighter weights. You want to start with a weight that you can lift 10 to 15 times with proper form. Begin with 1 or 2 sets of 10 to 15 repetitions, and slowly progress to 3 sets or more.
  • Gradually increase the weight. When you can easily do the recommended number of sets and reps, increase the weight by 5 to 10 percent. Check to make sure this is the right weight for you before doing a full workout.
  • Rest for at least 60 seconds in between sets. This helps prevent muscle fatigue, especially as you start out.
  • Limit your workout to no longer than 45 minutes. You can get the workout you need in this time frame. Longer sessions may not lead to better results and may increase your risk of burnout and muscle fatigue.
  • Gently stretch your muscles after your workout. Stretching can help boost your flexibility, ease muscle tension, and reduce your risk of injury.
  • Rest a day or two in between workouts. Resting gives your muscles time to recover and replenish energy stores before your next workout.

Exercises for beginners

You may be especially interested in building your biceps or toning your legs, but the best resistance training program works all the major muscle groups in your body.

In fact, overworking one muscle group at the expense of another could raise your risk of injury.

For a solid all-over workout, you may want to start off with the following exercises. Including these exercises in your weight lifting routine will work most of the large muscle groups in your body.

SETS AND REPS

Start off by doing 10 to 15 reps of each exercise. Aim for 1 to 2 sets to start. As you build strength, you can add extra sets, and also increase the weight.

  • What is a rep? A repetition (rep) is one complete exercise movement.
  • What is a set? A set is a certain number of reps. For instance, 10 to 15 reps make up 1 set.

Dumbbell single-arm rows

Targeted area: Your back and upper arm muscles.

How to do this exercise:

  1. Place your left knee on the end of a sturdy bench and place your left hand palm-down on the bench for balance.
  2. With your back parallel to the ground, reach down with your right hand and grab a dumbbell with your palm facing the bench.
  3. Slowly bring the dumbbell up to your chest. Squeeze your back and shoulder muscles and slowly straighten your arm to the starting position.
  4. Finish 1 set, then switch arms and do 1 set with your right knee and right hand on the bench.

Dumbbell shoulder press

Targeted area: Your shoulder muscles.

How to do this exercise:

  1. Sit or stand with a dumbbell in each hand, your palms facing forward, and your elbows out to your side at 90-degree angles.
  2. Without leaning back or arching your back, press the dumbbells up over your head until your arms are almost straight.
  3. Slowly return them to the starting position.

Dumbbell chest press

Targeted area: Your chest muscles.

How to do this exercise:

  1. Lie flat on a bench with a dumbbell in each hand and your palms facing forward.
  2. Slowly press the dumbbells upward until your arms are directly over the shoulders. Be careful not to lock your elbows.
  3. Slowly lower the dumbbells to the starting position. Your elbows should be a little lower than your shoulders.

Bicep curls

Targeted area: Your biceps (muscles in the front of your arms).

How to do this exercise:

  1. Sit or stand with a dumbbell in each hand in front of you, your elbows at your sides, and your palms facing up.
  2. Curl the dumbbells up toward your shoulders by bending your elbows but keeping them stationary at your sides.
  3. Reverse the curl to the starting position.

Triceps extensions

Targeted area: Your triceps (muscles in the back of your arms).

How to do this exercise:

  1. You can do this exercise sitting on a bench or standing with your feet about shoulder-width apart.
  2. Place both your hands around the dumbbell handle.
  3. Lift the dumbbell up over your head so that your arms are straight.
  4. Keeping your elbows by your ears, bend them to a 90-degree angle, lowering the dumbbell behind your head.
  5. Slowly straighten your arms so that the dumbbell is above your head again.

Resistance band pull apart

Targeted area: The muscles in your back, shoulders, and arms.

How to do this exercise:

  1. Stand with your arms stretched out in front of you at chest height.
  2. Hold a resistance band parallel to the ground and grasp it tightly with both hands.
  3. Keeping your arms straight, pull the band toward your chest by moving your arms outward, away from your body. Use your mid-back to initiate this movement.
  4. Keeping your spine straight, squeeze your shoulder blades together and “downward,” and then slowly return to the starting position.

Lunge

Targeted area: Your leg muscles, including your quadriceps, hamstrings, and calves, as well as your glutes (buttocks). If you include a dumbbell, you’ll work your biceps, too.

How to do this exercise:

  1. Stand tall with your feet shoulder-width apart (a dumbbell in each hand for the more advanced).
  2. Take a big step forward with your left leg so your heel touches down first.
  3. Lower your body so your left thigh is parallel to the floor.
  4. Pause for a second (curling the dumbbells up toward your chest and lowering them again to the starting position for the more advanced).
  5. Push off your heel and return to the starting position.
  6. Repeat, but lead with your right leg.

Squats

Targeted area: Your leg muscles, including your quadriceps, hamstrings, and calves.

How to do this exercise:

  1. Squats can be done with or without weights.
  2. Stand with your feet shoulder-width apart and slowly bend your knees, so your thighs are almost parallel to the floor.
  3. Slowly rise to your starting position.
  4. To add resistance, hold a dumbbell or kettlebell close to your chest with both hands.

Calf raises

How to do this exercise:

  1. Stand on the edge of a step with your feet parallel to each other.
  2. Slowly raise your heels a few inches above the step and hold for a few seconds.
  3. Slowly lower your heels below the edge of the step and hold for a few seconds. You should feel a stretch in your calves.
  4. You can add resistance by holding a light dumbbell in each hand down by your sides.

Plank

The plank works your entire body, but specifically targets your core. It also strengthens your arms, shoulders, back, glutes, and legs.

  1. Start on all fours, with your hands below your shoulders and your knees below your hips.
  2. Straighten your legs behind you, keeping your feet hip-width apart. Tighten your core.
  3. Hold for 10 to 30 seconds.
  4. As you get stronger, increase to holding it a minute or more

To make this exercise easier, place your knees on the floor.

Weight training schedule

If your goal is to mainly build strength, three weight training workouts a week will likely provide the results you need.

According to a 2019 studyTrusted Source, doing a weight training routine 3 times a week is as effective as more frequent workouts for strength building.

However, if you want to build up muscle mass, you’ll need to do more repetitions and more frequent workouts.

You can work all your muscle groups during a workout, doing 1 or 2 sets of each exercise to start, and working your way up to more sets or heavier weights as the exercises get easier.

Or, you can focus on certain muscle groups on specific days. For example:

Weekly weight training schedule

Monday: Chest, shoulders, triceps, and core

  • dumbbell chest press
  • dumbbell shoulder press
  • dumbbell triceps extension
  • plank

Wednesday: Back, biceps, and core

  • dumbbell single-arm rows
  • bicep curl
  • resistance band pull apart
  • plank

Friday: Legsand core

  • lunges
  • squats
  • calf raises
  • plank

As you become more comfortable with weight training, you can mix up the exercises you do for each muscle group. Be sure to add weight and more sets as you build up your strength.

A Beginner's Weight Training Guide 6Safety tips

It’s important to focus on safety when you start a weight training routine. Pay close attention to your body and resist the urge to push yourself too quickly.

To stay safe while weight training, remember to:

  • Wear proper clothing for weight lifting, like closed-toe shoes and weight lifting gloves if needed.
  • Perform each exercise slowly, paying attention to proper form.
  • Use a spotter to help you with heavier lifts, especially those that go above your head.
  • Stay hydrated throughout your workout.
  • Inhale before your lift and exhale during the lift. Never hold your breath when working out weights.
  • Stop your workout if you feel sharp or stabbing pain. If the pain doesn’t go away when you stop exercising, seek medical attention.

If you have a health condition, talk with your doctor about a weight training and exercise program that’s safe for you.

The bottom line

Weight training is also known as resistance or strength training. It involves moving parts of your body against some kind of resistance, like weights, resistance bands, weight machines, or even your own body weight.

Weight training is an excellent way to build muscle mass and make your muscles stronger. It can also keep your metabolism chugging, strengthen your bones and joints, improve your muscle tone, help you burn more calories, and keep you healthier as you age.

To make the most of your weight training routine, start with lighter weights until you master the proper form. Then increase the weight or resistance slowly to avoid injury. Be sure to work all your muscle groups for optimal strength and fitness.

Not sure where to start? Explore our qualified physical therapists who can help you embark on your weight training journey safely and effectively. Contact us today at 949-276-5401. For more tips, follow us on Instagram.


Reference: [ https://www.healthline.com/health/how-to-start-lifting-weights ]

5 Stretches to Soothe Your Stiff Neck

Is your head doing the bobblehead dance on top of your shoulders? Does turning left feel like an Olympic trial in flexibility? These five stretches are ready to help you untangle knots, melt away soreness, and restore your head to its rightful, pain-free perch.

How to Stretch Your Neck

If your neck is stiff or sore, you have lots of company. Neck pain is one of the most common types of pain among Americans. But as with any other part of your body, exercises and stretches can make the muscles in your neck stronger and more limber. Try these moves to loosen a tense neck, banish pain, and gain flexibility.

Bonus: A strong neck can help prevent problems with your shoulders, upper back, and arms, too.

If you already have pain in your neck or elsewhere, talk to your doctor before you start. You will feel some tension in your neck muscles when you stretch. But you shouldn’t have pain. If you do, stop right away.

This can be done while you’re seated or on your feet. Keep your moves slow and smooth.

  • Start with your head squarely over your shoulders and your back straight.
  • Lower your chin toward your chest and hold for 15-30 seconds. Relax, and slowly lift your head back up.
  • Tilt your chin up toward the ceiling and bring the base of your skull toward your back. Hold for 10 seconds, then return to the start position.
  • Repeat the set several times. Do it every day.

Do this while standing, with your feet hip-width apart and arms down by your sides.

  • Gently tilt your head toward your right shoulder and try to touch it with your ear. Stop when you feel the stretch. Don’t raise your shoulder.
  • Hold the stretch for 5-10 seconds, then return to the start position.
  • Repeat on your left side. You can do several sets and work your way up to 10 repetitions.
  • For extra stretch, put the hand on the same side of your tilted head on top of your head, and press lightly with your fingertips.

You can do this while seated or standing.

  • Keep your head squarely over your shoulders and your back straight.
  • Slowly turn your head to the right until you feel a stretch in the side of your neck and shoulder.
  • Hold the stretch for 15-30 seconds, and then slowly turn your head forward again.
  • Repeat on your left side. Do up to 10 sets.

This is best done standing up.

  • Raise your shoulders straight up and move them in a circle going forward. Do it 6 times.
  • Return to the start position, and make another 6 circles, this time going backward.

A Guide to Kneecap Concerns

The kneecap is the hardworking little hero of the leg joint, bearing the brunt of our every step and jump. If you’re currently navigating the world of knee woes, you’re not alone. Knee pain is a common complaint, affecting millions of people worldwide. But we are ready to help you decipher the messages your kneecap is sending.

What’s going on with my kneecap?

If your kneecap pops or slides to the outside of your knee, you’ll definitely know that something’s going on. Typically, that “something” is a partial or full dislocation, which means the kneecap, also known as the patella, has slipped partly or all the way out of its groove over the knee joint.

Dislocation can be caused by a sudden blow, such as taking a hard hit playing a contact sport like football or hockey, or by a chronic condition like a stretched ligament. Some people have a particular knee anatomy that makes it more common. In those cases, a dislocation could be caused by something as simple as normal walking or standing up from a chair. With chronic dislocation, it may feel as though your knee is buckling or giving way. There’s often no pattern or regular causes of the dislocations.

What happens when a kneecap dislocates

When the kneecap dislocates, it’s painful and the knee area may swell. Whether it happens from an acute or chronic situation, dislocation can damage the cartilage of the groove that the kneecap sits in or the cartilage underneath the kneecap.

Acute or chronic dislocation indicates you have a stretched or torn medial patellofemoral ligament, or MPFL, a tough band of tissue that connects to the inside of the kneecap and prevents it from sliding to the outside of the knee.

Treating acute dislocation

If the dislocation is caused by an acute injury, you may be able to ease the kneecap back into place, or you may need to go an emergency department where health care professionals can correct the dislocation and evaluate if there’s additional injury to your knee. Following the dislocation, you should see an orthopedic specialist.

An X-ray provides an overall view of the anatomy of the kneecap and knee joint. The orthopedic specialist can determine if there is damage to the groove the kneecap rests in, how high the kneecap sits above the joint and if the patellar tendon, which connects below the kneecap, is pulling to one side.

If this is the first time your kneecap has dislocated, the X-ray also can help determine if you’re at risk of it happening again. Your orthopedic specialist also may order an MRI to check if a piece of the cartilage has broken off.

Younger patients may need to undergo surgery to remove or fix a cartilage piece that has broken off and reconstruct the MPFL. Recovery following surgery typically involves wearing a brace, physical therapy and limited weight bearing to give the cartilage the best chance to heal. It may take up to six months before you’re able to fully return to sports.

For older patients, cartilage is less likely to heal, so surgery isn’t always recommended. However, if you’re experiencing a catching sensation in your knee, an orthopedic surgeon may decide to surgically remove the piece of cartilage. Rehabilitation will include limited weight bearing, using a brace and physical therapy.

Treating chronic dislocation

The first time your knee dislocates — unrelated to an injury — it may slide back into place on its own. However, you should see an orthopedic specialist who can evaluate if there has been any injury to the cartilage and determine your risk for dislocations happening again. If there isn’t any cartilage damage, the orthopedic specialist may order physical therapy to strengthen your hip and quadricep muscles. This can help overcome any stretch in the MPFL ligament and stabilize your kneecap, as well as decrease the risk of arthritis over time.

However, you eventually still may require surgery to reconstruct the MPFL, as well as other procedures to correct chronic dislocations. These include deepening the groove where the kneecap sits or moving the location where the patellar tendon connects.

Recovery from MPFL reconstruction may take several months before you’re able to return to normal activities and regain your range of motion. Overall recovery for more complex surgeries may take four to six months.

Preventing kneecap dislocations

The best way to lessen your chance of acute and chronic kneecap dislocations is to maintain overall leg, quadricep and hip strength. For chronic dislocations, learn what tends to cause them, such as twisting, and avoid those motions. A physical therapist also can teach you how to correct a kneecap dislocation on your own.

For athletes who have suffered an acute dislocation, prompt care, possible surgery and rehabilitation can get you back to playing again.