Rausch Physical Therapy Archives - Page 2 of 5 - Rausch Physical Therapy & Sports Performance

Blog

Five Ways to Train Smarter This Offseason

Five Ways to Train Smarter This Offseason

By Sean Swopes, PT, DPT, CSCS

Rausch Physical Therapy & Sports Performance

While most people take the offseason to train for a better “next year,” Mountain Bike-PT Sean Swopes explains why you should spend some time out of the saddle and try a few other methods to improve your performance and overall health.

You survived racing through the dirt and heat, and now the Over the Hump 2016 season has come to an end. So, what next? For many of you, the end of OTH means it’s time to pump up those skinny tires and focus on road races, crits and TT’s. Before you get back to pounding those pedals, take some time away from tuning up your bike and spend some time tuning up your body.

While the subtle differences of road cycling and mountain biking offers great balance to your riding skill level, as the quickly changing terrain and variable cadence can help to enhance your riding technique, it’s also important to spend some time out of the saddle. As a physical therapist, I know that muscle imbalance/dominance are main contributors to pain and dysfunction, but as a mountain biker I also know that many of us will go to great lengths to enhance our power output, VO2 max, and velocity.

The offseason is a great time to train to improve your performance, but it’s also the perfect time to start focusing on ways to prevent the aches and pains that may be keeping you from reaching your potential. Here are five methods you can use to stay balanced this off-season.

1. Mix Things Up

A quick and easy method I like to use to offset this imbalance is to simply go for a run. Running is a great way to change the pace and the demands of those muscle that typically get overworked when cycling. Swimming also offers a great way to continue working on aerobic demand while also decreasing the load demands on your joints.

2. Get Rolling With Soft-Tissue Work

Ever feel your knees brushing the top tube during a down stroke? It’s a frequent technique used to stay in an aerodynamic position, but it can also create increased tightness of the liotibial (IT) band. In fact, it’s quite common for cyclists to develop IT Band Syndrome from repeated down stroke.

To combat this imbalance, my colleague Dustin Hancock, DPT has created a great foam rolling program to help improve flexibility and mobility of your tissues. Click here to check it out.

3. Strengthen Your Core

I went to a great workshop recently where we discussed how important it is to have core strength for successful cycling. I have been preaching this exact thing for years! We often think of our legs being our powerhouse, but how much power can you expect your legs produce without a stable base to explode from?

The primary drive for you pedal stroke is produced from the glutes, quadriceps and hamstrings. All of these muscles attach directly to the pelvis. Without good core balance and stability, your biomechanical leverage to utilize these muscle group is altered, and therefore you produce less force.

To improve your core and stability, try these exercises:

  1. Bird Dogs – Do these on a stable surface, or challenge yourself on an unstable surface. The key is to focus on your pelvis and prevent any rotation or tilting
  2. Planks – You know, that exercise we all love to do. Challenge yourself by starting with a static plank on your elbows and sides, then progress by involving leg movements.
  3. Swiss Ball Walkouts – Progress this exercise by incorporating knee tucks and pikes.

4. Work on Those Lungs

VO2 max is the maximum rate of oxygen consumption during vigorous activity. It’s often used to objectively measure an individual’s aerobic physical fitness and determine their endurance capacity during prolonged, submaximal exercise. The theory is: improve your VO2 max, improve your performance.

While the critical importance of VO2 max is debated, a 2012 article in the Journal of Strength and Conditioning Research concluded that VO2 max was a great determinant of mountain bike race performance, at least more so than for road races.

So, what can you do while training to improve your VO2 max? While research has shown that Hight Intensity Interval Training (HIIT) can lead to great benefits in cardiovascular gain, is HIIT really the only way to go? A 2010 article by International Journal of Sports Physiology and Performance reports that a 80/20 split in Low Intensity to High Intensity training program will create ideal physiological benefits, like V02 max.

And just remember, while it’s important to push you body to its limits to create physiological responses, this is often where injury occurs.

5. Go See a Physical Therapist

With weekly OTH races for the past three months, it’s likely you’ve developed a few aches and pains this summer. Unfortunately, many MTB racers (like most athletes) subscribe to the school of thought, “Just deal with the pain until the end of the season; it’ll get better when I stop racing.”

While I can’t force you to change your mindset, I can tell you that pain is often your body’s way of telling you that it’s undergoing an abnormal amount of stress. We often think that that one fall, that one crash, is what’s going to break our bodies. The truth is, most injuries are the result of overuse—repetitive stress over a prolonged period—and while our body does a great job of adapting to the stress we place on it, its ability to repair itself diminishes the more time we spend in stress/pain.

So, now that OTH 2016 season is finished, show your body you care and make an appointment with a physical therapist. At Rausch Physical Therapy & Sports Performance, your PT will perform a biomechanical assessment to determine any new abnormal alignment patterns, soft tissue restrictions, or areas that you need to address this offseason to repair your body and prevent future injuries.

Conclusion

Stop allowing pain to determine how your body moves. While you may think you can live with “a little” hip pain, you may not realize that pain in one region of your body can lead to compensatory movement in another.

Think of it this way: think of how your derailleur cable on your bike can begin to stretch. This affects how your bike can shift, but you tell yourself you can live with that. But that small sound you hear from your chain grinding against the cassette means you’re slowly wearing down your chain, until one day—it breaks.

The moral of the story here is to listen to your body’s signs that your internal drive train is breaking down, and get it fixed.


Sean Swopes | Rausch Physical TherapyAbout Sean Swopes, PT, DPT, CSCS
sean@rauschpt.net

Sean Swopes, DPT is the “Mountain Biking-PT” at Rausch Physical Therapy & Sports Performance. He is also a certified Strength and Conditioning Specialist. As a physical therapist, Sean’s goal is to help his patients understand their musculoskeletal impairments and work together to improve them.

Jon’s Youth Baseball Injury

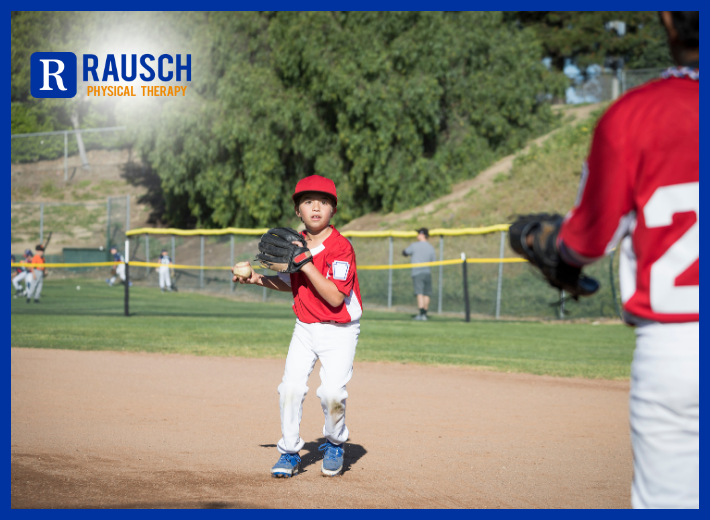
Around the office, they call me “The Baseball Guy.” My years of clinical treatment of ballplayers at Rausch Physical Therapy and Sports Performance, coupled with my interest in biomechanical research, has motivated me to find new ways to reverse the alarming increase in youth baseball arm injuries. In fact, for the past two years I have been developing injury prevention programs for southern Orange County baseball leagues to help protect our youth’s elbows and shoulders.

And it looks like I am not the only one getting on base with this initiative. Major League Baseball and USA Baseball recently teamed up to launch their Pitch Smart program, which is designed to educate parents, coaches and young athletes about how to avoid overuse injuries. It includes information on pitching guidelines, injury risk factors, Tommy John surgery and more.


Did you know:

If you pitch more than 100 innings in a year, whether little league, club or showcase, it will increase your risk of injury by 3.5 times

If you pitch greater than 8 months in a year, it will increase risk of surgery by 5 times

The number one risk factor for injury

I have found that out of all the risk factors that can cause injury, the number one is pitching too much, both in a game and in any given year. New research is coming out every month about the correlation of throwing too much and arm injuries in little league athletes.

Kids should take off about 2-3 months of competitive pitching in a year and engage in other sports or active rest where they are still using their arms, just not in a pitching motion

As a healthcare professional, I believe that change needs to occur in the traditions and schedules of little league baseball across the nation. The Pitch Smart initiative proves to me—and hopefully to parents and coaches—how crucial injury awareness and prevention is. I want to take this information and use my skill to prevent, rehabilitate and treat the youth of little league baseball.

If you have any questions about throwing injury prevention or rehabilitation, please send me an email and I will be happy to answer them. For now, take care of those elbows and shoulders!

Sincerely, The Baseball Guy

Jonathan Meltzer, D.P.T. | jonathan@rauschpt.net


About the Author
Jonathan Meltzer graduated from the University of Redlands with a bachelor of arts in biology and a minor in physical education. Following graduation, Jonathan discovered his passion for physical therapy while working as a Physical Therapy Aide. After graduating top of his class from Loma Linda University in 2012 with a Doctorate in Physical Therapy, Jonathan began his career at Rausch Physical Therapy and Sports Performance. Jonathan’s goals are to identify limitations and treat his patients with the most recent and innovative techniques in order to maximize functional independence and obtain his patients’ individual goals.

Common Workout Mistakes (and How to Fix Them!)

We’ve all been there: feeling defeated after a workout, wondering why the results aren’t matching the effort. Maybe you’re pushing too hard, neglecting certain muscle groups, or even falling victim to some fitness myths. The good news? You’re not alone! Here’s the thing: even the most dedicated gym rats make mistakes. Together, we can unpack the “why” behind these mistakes and, most importantly, share tips on how to fix them.

Exercising is one of the best things you can do for your health, and you deserve an enthusiastic pat on the back for any amount of physical activity you’re doing. But if you’re performing your exercises the wrong way, you could be hurting, not helping your body.

One of the biggest exercise errors is using improper technique. You risk back injury if you arch your back while doing planks or push-ups, and knee injury if you bend too deeply in a lunge or squat (see “Move of the month”).

Another mistake is doing the wrong exercise. For instance, running when you have severe back or knee arthritis puts too much pressure on the joint.

But those are just a few exercise no-nos. Consider the following, and see if you need to take steps to fix them.

Skipping the warm-up

You need to warm up your muscles so they’re more flexible before you put them to work, especially when you get older. “An older person has less flexible muscles and tendons. Muscles can tear easily because they have less water content, and they’re brittle and less elastic,” says Clare Safran-Norton, clinical supervisor of rehabilitation services at Harvard-affiliated Brigham and Women’s Hospital.

Fix it: Warm up your muscles before exercising with a few minutes of repetitive motion such as marching in place or doing arm circles. That gets blood, heat, and oxygen to the muscles and makes them amenable to change.

Being inconsistent

An occasional or weekend workout is less effective than more frequent activity, and cramming a week’s exercise into a single session increases the risk for injury.

Fix it: For most people, the weekly goal should be 150 minutes of moderate-intensity exercise (that gets your heart and lungs pumping) and strength training at least twice per week. That could consist of shorter aerobic workouts (at least 20 minutes) each day or longer workouts (at least 50 minutes) three times per week.

Lifting too much weight

Lifting too much weight — especially lifting too much too soon, if you’re just starting to get back into a routine — can lead to muscle tears.

Fix it: Use lighter weights and lift them more times. “Do two or three sets of 20 lifts using 2-pound weights instead of one set of five or 10 with a 5-pound weight,” Safran-Norton says.

Not resting muscle groups

Working the same muscle groups every day can cause injury. Muscles need at least 48 hours after a strength workout to recover and rebuild.

Fix it: Alternate which muscle groups you work from day to day, such as arms and shoulders on Tuesdays and Thursdays, but not Mondays or Wednesdays.

Improper hydration

Fluids help cushion your joints and stabilize blood pressure and heart rate. Exercising causes you to lose water and electrolytes (sodium, potassium) when you sweat, and it also causes lactic acid to build up in your muscles (which can lead to muscle cramps).

Fix it: Healthy people need six to eight cups of fluid per day, and more if they’re exercising. “Some people do well with water; others do well with a sports drink to replace electrolytes,” Safran-Norton says.

Poor posture

Exercising with slouched posture and rounded shoulders puts you at risk for back and shoulder injury (such as a rotator cuff tear).

Fix it: Keep your shoulders down and back, keep your back straight, and work with a physical therapist to correct poor posture.

Struggling with form and avoiding injuries? Let’s fix those pesky workout mistakes for good! Learn from them and work smarter with our expert PT guidance. Contact us today at 949-276-5401. For more tips, follow us on Instagram.


Reference: [https://www.health.harvard.edu/staying-healthy/stop-making-these-common-workout-mistakes]

Simple Strategies to Relieve Tight Muscles

Are you tired of dealing with persistent muscle tightness that’s been holding you back from enjoying life to the fullest? Tight muscles can be a real nuisance, affecting everything from your daily comfort to your overall well-being. Fortunately, there are simple yet effective ways to address this issue and regain your mobility. 

Feeling stiff? Achy? Can’t move quite like you used to?

You’ve likely got one – or more – tight muscles to blame. But what does it mean when muscles are tight?

Dr. Neal H. Patel, a family medicine specialist with Providence St. Joseph Hospital in Orange County, California, compares muscles to “rubber bands that have a certain level of natural stretch and elasticity. When someone says their muscles are tight, it means the muscles are similar to a stiff rubber band and not able to move as freely or be as elastic as they should be.”

Why Tight Muscles Happen

There are a variety of reasons why your muscles can feel tight, says Claire Such, a physical therapist in sports medicine at the Ohio State University Wexner Medical Center in Columbus. “In some cases, the muscle is at a shortened length compared to its ideal length,” she explains. This can result from being too sedentary or habitually being in the same position too often.

In other cases, “feelings of chronic muscle tightness can also be due to muscle weakness and fatigue,” Such says. This could be a sign that the muscle group needs to be strengthened.

“The body works on a simple principle of ‘if you don’t use it, you lose it,’” Patel adds. Therefore, if you don’t exercise or stretch much, that can reduce the natural movement and integrity of the muscle fibers and tendons, he says.

One of the biggest and most common culprits of tight muscles is sitting, typically while focusing on a computer or other gadget.

“When you sit, you keep your hip flexors in a constantly shortened, yet underload(ed) position,” explains kinesiologist and medical exercise specialist Dean Somerset, based in Alberta, Canada. After all, your hip flexors not only draw your knees up to your chest, they stabilize your spine and help keep it in place. As if tight hip flexors weren’t bad enough, all of their constant tension also draws the top of the pelvis forward, pulling your hamstrings tight and keeping you from being able to touch your toes.

Meanwhile, chances are that when you’re sitting, you’re also hunched over a keyboard, tablet or phone. “Ideal alignment is with the head directly over the spine,” Somerset explains. “When your head moves forward, your upper (trapezius) muscles have to work extremely hard to keep your head from basically falling off your shoulders.” The result: Those muscles become short and fatigued.

How to Release Chronically Tight Muscles

“If your muscles have tightened up, they’re not operating at 100% capacity,” says Costa Mesa, California-based certified personal trainer Kelly Collins, co-founder of SISSFiT, designed to help women lead healthier, fitter lives. “Therefore, loosening your muscles will not only relieve stress and reduce your risk of injury, but improve your overall functional performance and the results you get from those workouts.”

Such says that if you’re engaging in static stretching – that conventional kind of stretching that involves moving the muscle into its longest position without pain and holding it for 15 to 20 seconds – “it’s important to perform this after you are warm and are done with any exercise or activity you’re doing.” Being warmed up offers better results for both the stretching and your workout.

When your muscles are tight, sometimes your body’s neuromuscular control system gets a bit overprotective. This system includes an array of neurons and protective tissues that have to fire (or not fire) in a certain way for any given muscle to stretch to its full physiological capacity, Somerset explains.

So, to fully stretch a muscle, your neuromuscular system has to release its resistance to stretching that far. It does so by signaling your muscles not to worry and that it’s OK to stretch this far.

Exercise physiologists commonly use a stretching technique called “proprioceptive neuromuscular facilitation,” or PNF, to do this. While there are various ways to conduct PNF stretching, many experts believe the most effective version for combating excessive tightness, increasing muscle length and improving range of motion is the hold-relax with agonist contraction method. It’s a mouthful, but it’s easy enough to perform at home with some help from a friend or family member.

Here’s how to perform the stretch with the commonly tight hamstrings, but you can apply this same sort of stretch to any tight muscle. Perform two to four bouts of this stretch per day, either immediately following exercise or at the end of the day. It’s important to note that stretching should never provoke pain, so be mindful of not moving a joint so far that it causes pain.

Step 1:

Lie on your back on the floor, with one leg extended straight toward the ceiling. Have a partner hold your lifted leg firmly, with one hand on your heel and the other the thigh just above your knee.

Step 2:

Keeping your leg straight, have your partner press on your leg to move it toward your chest until you feel a mild stretch in your hamstrings. Have your partner hold this stretch for 10 seconds. Make sure to relax into the stretch.

Step 3:

With your partner still holding your leg firmly in the same stretched position, contract your hamstrings to push against their hands and “fight” the stretch for six seconds. With both of you working in opposite directions, your leg should not move.

Step 4:

Relax again into the stretch, this time using your quads to help “pull” your leg even closer to your chest and deepen the stretch. Hold for 30 seconds. You should be able to stretch the hamstrings farther than you could during Step 2.

Five Tips to Improve Your Stretching

Adding these strategies to your routine can help you get more out of every stretch:

Improve your core strength

Oftentimes, short, tight muscles are due to nothing more than a weak core, explains Los Angeles-based certified strength and conditioning specialist Holly Perkins, author of “Lift to Get Lean.” That’s because the core is in charge of stabilizing your spine and pelvis. So, when your core is weak – and thus your spine and pelvis get out of proper alignment – you’re bound to tighten some muscles.

Perkins recommends improving core strength through core stability exercises such as planks and “dead bugs.” Dead bugs are performed by lying on the floor on your back, engaging the core muscles and raising and lowering your arms above your head and legs with knees bent in an alternating pattern that looks something like a dead bug lying on its back.

Strengthen the muscle group

For other muscle groups beyond the core, strengthening can also help alleviate muscle tightness, Such says. When strengthening, it’s best to slowly ramp up your strength training rather than trying to do too much all at once.

“Strengthening that muscle group progressively over time will allow for more permanent elimination of those sensations and will lend more dynamic stability (making sure your body moves efficiently the way it was mechanically built) to the joint or joints it supports over time,” Such says.

Pair your stretching with foam rolling

Before diving into your favorite stretches, spend some time with a foam roller. While study results of foam rolling’s effectiveness and best application have been mixed, there is some evidence that it can be a helpful warmup activity to improve flexibility before exercise and it can also reduce muscle fatigue and soreness when used after exercise.

Collins recommends that, no matter your activity level, spend at least 10 minutes three times per week stretching and foam rolling.

Stay hydrated

“Because muscles retain water, especially after exercising, dehydration can also be a cause of muscle tightness,” Patel notes.

Make sure you’re taking in adequate levels of water; the U.S. National Academies of Sciences, Engineering and Medicine recommend consuming 15.5 cups (3.7 liters or 125 ounces) of fluid each day for men and 11.5 cups (2.7 liters or 91 ounces) of fluid per day for women. Roughly 20% of your fluid needs each day are typically met through foods you eat; the rest you should be drinking, and plain water is usually the more effective drink you can reach for.

Add pressure

In addition to stretching, Patel recommends getting a massage from a licensed professional, “ideally one that places deeper tissue pressure.” Massage guns like the Theragun or HyperIce can also help relax and break down tension in muscles, he says. These devices are widely used in professional sports to help athletes keep tightness at bay when not actively participating in the game.

Battling a Consequence of Aging

Patel notes that while tight muscles might seem concerning, they are not a serious medical issue.

Dr. Akash Bajaj, a longevity specialist and founder of concierge wellness practice Remedy Wellness & Anti Aging in Marina del Ray, California, says that experiencing tightness in the muscles is common. “As we grow older, we can expect to experience episodes of muscle tightening because of lack of use, injuries and depletion of certain vital minerals like magnesium.”

Magnesium is vital for keeping muscles loose and supple. “This is why we must pay as much attention to keeping ourselves youthful and treat our bodies well as early as possible,” Bajaj advises.

Moving as much as you can and incorporating stretching into your daily routine, just like you would brush and floss your teeth, can help keep your muscles supple and ready to move well into your golden years, Patel adds.

Get rid of those stubborn muscle tightness issues with Rausch PT. Our experienced physical therapy team is here to help you regain your mobility and enjoy the activities you love. Plus — we offer Rx Massage to support your health journey. Contact us today at 949-597-0007 and start your journey to better health and well-being. For more helpful tips and information, follow us on Instagram.


Reference: [https://health.usnews.com/wellness/fitness/articles/simple-ways-to-ease-tight-muscles]

Posture Perfection: Tips and Exercises

Maintaining good posture and its impact on our overall health and well-being is often underestimated. From sitting at a desk all day to hunching over our devices, poor posture has become a common modern-day affliction. Learn the crucial role your posture plays and strategies to improve your routine by reading the article below.

Good posture involves training your body to stand, walk, sit, and lie in positions where the least strain is placed on supporting muscles and ligaments during movement or weight-bearing activities.

If any of the following guidelines causes an increase of back pain or spreading of pain to the legs, do not continue the activity and seek the advice of a doctor or physical therapist.

The spinal curves

Your spine has natural curves that form an S-shape. Viewed from the side, the cervical and lumbar spines have a lordotic, or a slight inward curve, and the thoracic spine has a kyphotic, or gentle outward curve. The spine’s curves work like a coiled spring to absorb shock, maintain balance, and to facilitate the full range of motion throughout the spinal column (see Anatomy of the Spine).

These curves are maintained by two muscle groups, flexors and extensors. The flexor muscles are in the front and include the abdominal muscles. These muscles enable us to flex, or bend forward, and are important in lifting and controlling the arch in the lower back.

The extensor muscles are in the back. These muscles allow us to stand upright and lift objects. Working together these muscle groups act as guy wires to stabilize your spine.

What is good posture?

Posture is the position in which you hold your body upright against gravity while standing, sitting, or lying down.

Proper posture requirements:

  1. Good muscle flexibility
  2. Normal motion in the joints
  3. Strong postural muscles
  4. A balance of muscles on both sides of the spine
  5. Awareness of your own posture, plus awareness of proper posture which leads to conscious correction. With much practice, the correct posture for standing, sitting, and lying down (as described below and on the following page) will gradually replace your old posture.

Proper Sitting Posture

Shoulders over hips, feet flat on the floor, low back support provided, and chin aligned over the chest.

Proper Sitting Posture at Desk

Posture should start with shoulders over hips with good low back support. Details include: elbows flexed to 90 degrees, knees bent to 90 degrees, feet flat on floor or supported with stool/ phonebook (enough that there is a finger width gap between the knee and the chair). Computer monitor should be at eye level, head position should include ears aligned with shoulders. The computers mouse should be close enough that the elbow remains in a bent position. Finally, pen/phones should be kept within 14-16 inches of reach.

Sit to Stand

Place your feet so that toes and knees are in line. Bend forward so your nose is over your toes. Push up from the chair with a controlled motion. Use your hands as needed.

Tying Shoes

Place your foot on your opposite knee to keep from bending too far forward.

Proper Bending and Reaching Technique (Golfers Lift)

Please be aware that bending and lifting are contraindicated after lumbar fusion/kyphoplasty procedures. This technique is provided for the rare occasions when you absolutely require objects being picked up from the floor. Note that the subject has arranged herself in a position where she can use the leg as a lever arm to pull her body back up to its standing posture while maintaining a flat back.

Proper Sleeping Posture

When lying on your back a pillow support should be utilized under the knees. Remember a pillow should support the neck not the head.

Proper Sidelying Posture

Place the pillow support between the knees with another pillow support at the lumbar spine and a third pillow supporting the neck and head. The lumbar support pillow is only necessary if there is a gap between the bed and the waist.

Log Roll

With starting position lying on your back bend your knees.

Roll onto your side.

Keep your shoulders and hips together as a unit as you roll.

Place your top hand to the bed and push up while lowering your legs to the floor.

Slowly raise your body while lowering the legs to assume an upright position.

Getting In & Out of Car

Getting in the Car

  • When getting into the car, back up to the car seat until you feel the seat behind your legs.
  • Reach one hand behind you for the back of the seat while placing your other hand on the dashboard for balance.
  • Lower yourself slowly to the seat and bring your legs into the car one at a time.
  • Scoot your hips back until you are fully on the seat.

Getting out of the Car

  • Position the seat all the way back for maximum leg clearance.
  • Bring each leg out one at a time, turning your hips and shoulders with your body to avoid twisting at your spine.
  • Place one hand on the back of the seat and one hand on the door frame or dashboard.
  • Push up to a standing position; don’t pull.
  • Tip: Placing an empty plastic bag on the seat of the car will make sliding in and out of the car easier for you.

Preventing back pain and injury

Self care. Using correct posture and keeping your spine in alignment are the most important things you can do for your back. The lower back (lumbar curve) bears most of your weight, so proper alignment of this section can prevent injury to your vertebrae, discs, and other portions of your spine. If you have back pain, you may need to make adjustments to your daily standing, sitting, and sleeping habits and learn proper ways to lift and bend (see Self Care for Neck & Back Pain). Your workspace may need to be rearranged to keep your spine from slouching. Because extra pounds can make back pain worse, you should maintain a weight that is appropriate for your height and body frame.

Exercise. Regular exercise is important to prevent back pain and injury. A program of strengthening, stretching and aerobic exercises will improve your overall fitness level. Research has shown that people who are physically fit are more resistant to back injuries and pain, and recover quicker when they do have injuries, than those who are less physically fit (see Exercises: Back Stretches & Strengthening).

Ready to make positive changes in your posture and overall health? Our expert physical therapists are here to guide you. Schedule your appointment today at 949-597-0007. You can follow us on TikTok and Instagram for more inspiration and tips.


Reference: [https://mayfieldclinic.com/pe-posture.htm]

Step Ahead of Shin Splints

Are you an avid runner, dancer, or sports enthusiast who’s been dealing with the frustrating discomfort of shin splints? Don’t worry, you’re not alone. These pesky pains can put a real damper on your active lifestyle. But fear not – we’re here to offer some friendly guidance on how to tackle those shin splints head-on and get back to doing what you love. 

What are shin splints?

Shin splints refer to pain and tenderness along or just behind the large bone in the lower leg (the tibia).

What causes shin splints?

Shin splints most often happen after hard exercise, sports, or repetitive activity. This repetitive action can lead to inflammation of the muscles, tendons, and thin layer of tissue covering the shin bones, causing pain.

What are the symptoms of shin splints?

These are the most common symptoms of shin splints:

  • Pain felt on the front and outside of the shin. It’s first felt when the heel touches the ground during running. In time, pain becomes constant and the shin is painful to the touch.
  • Pain that starts on the inside of the lower leg above the ankle. Pain gets worse when standing on the toes or rolling the ankle inward. As the shin splint progresses, the pain will increase.

The symptoms of shin splints may look like other conditions or medical problems. Always talk with your healthcare provider for a diagnosis.

How are shin splints diagnosed?

Your healthcare provider can most often diagnose shin splints by reviewing your medical history and doing a physical exam. X-rays are often needed.

How are shin splints treated?

Your healthcare provider will figure out the best treatment based on:

  • How old you are
  • Your overall health and medical history
  • How sick you are
  • How well you can handle specific medicines, procedures, or therapies
  • How long the condition is expected to last
  • Your opinion or preference

The best course of treatment for shin splints is to stop any activity that’s causing the pain until the injury is healed. Other treatment may include:

  • Stretching exercises
  • Strengthening exercises
  • Cold packs
  • Medicine, such as ibuprofen
  • Running shoes with a stiff heel and special arch support

Can shin splints be prevented?

You may be able to prevent shin splints by wearing good fitting athletic shoes. Also, gradually increase the intensity, duration, and frequency of a new exercise routine. It may also help to switch between high impact activities and low impact activities such as swimming or cycling.

Say goodbye to those bothersome shin splints and welcome pain-free activities! Our team of skilled physical therapists is here to help you regain your stride. Contact us today at 949-597-0007 to schedule your consultation. For more helpful tips and information, follow us on Instagram.


Reference: [https://www.hopkinsmedicine.org/health/conditions-and-diseases/shin-splints]

Jumpstart Your Fitness

Embracing a fitness journey is all about taking steps towards a healthier and more active lifestyle. Plyometric exercises can invigorate your routine and enhance your overall fitness experience. These explosive movements, known for their dynamic and impactful nature, offer various benefits, from increased strength to improved agility. Learn all about this trend.

As a kid, I spent many Saturdays romping around my Florida neighborhood imitating Colonel Steve Austin, better known as The Six Million Dollar Man to avid TV watchers in the 1970s.

The popular show featured a bionic man — half human and half machine — who could jump from three-story buildings, leap over six-foot-high walls, and bolt into a full 60-mile-per-hour sprint. Naturally, these actions occurred in slow motion with an iconic vibrating electronic sound effect.

My own bionic moves involved jumping to pluck oranges from tree branches, hopping over anthills, and leaping across narrow ditches while humming that distinctive sound. I didn’t realize it, but this imitation game taught me the foundations of plyometrics — the popular training routine now used by top athletes to boost strength, power, and agility.

What are plyometrics?

Plyometric training involves short, intense bursts of activity that target fast-twitch muscle fibers in the lower body. These fibers help generate explosive power that increases speed and jumping height.

“Plyometrics are used by competitive athletes who rely on quick, powerful movements, like those in basketball, volleyball, baseball, tennis, and track and field,” says Thomas Newman, lead performance specialist with Harvard-affiliated Mass General Brigham Center for Sports Performance and Research. Plyometrics also can help improve coordination, agility, and flexibility, and offer an excellent heart-pumping workout.

Who can safely try plyometrics?

There are many kinds of plyometric exercises. Most people are familiar with gym plyometrics where people jump onto the top of boxes or over hurdles.

But these are advanced moves and should only be attempted with the assistance of a trainer once you have developed some skills and muscle strength.

Keep in mind that even the beginner plyometrics described in this post can be challenging. If you have had any joint issues, especially in your knees, back, or hips, or any trouble with balance, check with your doctor before doing any plyometric training.

How to maximize effort while minimizing risk of injury

  • Choose a surface with some give. A thick, firm mat (not a thin yoga mat); well-padded, carpeted wood floor; or grass or dirt outside are good choices that absorb some of the impact as you land. Do not jump on tile, concrete, or asphalt surfaces.
  • Aim for just a few inches off the floor to start. The higher you jump, the greater your impact on landing.
  • Bend your legs when you land. Don’t lock your knees.
  • Land softly, and avoid landing only on your heels or the balls of your feet.

Three simple plyometric exercises

Here are three beginner-level exercises to jump-start your plyometric training. (Humming the bionic man sound is optional.)

Side jumps

Stand tall with your feet together. Shift your weight onto your right foot and leap as far as possible to your left, landing with your left foot followed by your right one. Repeat, hopping to your right. That’s one rep.

  • You can hold your arms in front of you or let them swing naturally.
  • Try not to hunch or round your shoulders forward as you jump.
  • To make this exercise easier, hop a shorter distance to the side and stay closer to the floor.

Do five to 15 reps to complete one set. Do one to three sets, resting between each set.

Jump rope

Jumping rope is an effective plyometric exercise because it emphasizes short, quick ground contact time. It also measures the coordination and repeated jump height as you clear the rope.

  • Begin with two minutes of jumping rope, then increase the time or add extra sets.
  • Break it up into 10- to 30-second segments if two minutes is too difficult.
  • If your feet get tangled, pause until you regain your balance and then continue.

An easier option is to go through the motions of jumping rope but without the rope.

Forward hops

Stand tall with your feet together. Bend your knees and jump forward one to two feet. Turn your body around and jump back to the starting position to complete one rep.

  • Let your arms swing naturally during the hop.
  • To make this exercise easier, hop a shorter distance and stay closer to the floor.
  • If you want more of a challenge, hop farther and higher. As this becomes easier to do, try hopping over small hurdles. Begin with something like a stick and then increase the height, such as with books of various thicknesses.

Do five to 10 hops to complete one set. Do one to three sets, resting between each set.

Discover the transformative benefits of plyometric exercises and count on our expert physical therapy team to guide you on a journey of strength, agility, and explosive movement tailored to your unique needs and goals. Schedule your appointment today at 949-597-0007 and start your path to a stronger you. You can follow us on TikTok and Instagram for more inspiration and tips.


Reference: [https://www.health.harvard.edu/blog/plyometrics-three-explosive-exercises-even-beginners-can-try-202308022960]

How to Alleviate Morning Joint Stiffness

Are you tired of waking up feeling like a creaky robot? We’ve all been there! The struggle of dealing with morning stiffness is real, and it can seriously put a damper on your day. But we’ve got your back (and your knees, and your hips!) with some tips to help you say goodbye to those stiff joints and welcome a more vibrant morning routine. 

Rusty old hinges tend to get locked in place if they sit unused for an extended period of time. The same concept applies to your joints.

That’s why your first steps in the morning after hours in bed might seem a bit awkward. The same sensation hits after binge-watching TV shows from the couch or sitting in the car during a long road trip.

So, why do your joints stiffen up like the Tin Man after he’s caught in a downpour? And is there a point when that feeling is a sign of a bigger concern? Rheumatologist Ahmed Elghawy, DO, has your answers.

What causes morning stiffness?

Joints need lubrication to operate smoothly. That’s why you oil or grease a squeaky door hinge.

Your joints come with a natural lubricant known as synovial fluid. This viscous fluid fills the meeting space between bones. The slippery substance allows for smooth movement within your knees, elbows, and other joints.

The more you move around, the more this fluid circulates in your joints to keep everything gliding, says Dr. Elghawy.

But when you rest, that lubricant sits and thickens.

The next time you move around … well, let’s just say that those joints don’t immediately operate quite as efficiently as they did earlier. That resulting “stiff” feeling remains until the fluid thins and starts recirculating.

This phenomenon is sometimes called “morning gel” in reference to how synovial fluid stiffens like gelatin when allowed to rest.

Can ‘morning gel’ signal a joint issue?

Experiencing some joint stiffness after inactivity is natural at any age. But as you get older, the feeling may become more common and linger a little longer given decreases in your synovial fluid.

Still, that creakiness should disappear relatively quickly after you start moving around.

But if that joint stiffness is prolonged, it may signal:

  • Osteoarthritis is the common arthritis people may experience with age. “It tends to become more problematic as people get older,” notes Dr. Elghawy. “The effects can also be accelerated by injuries, too, such as from years of playing sports.”
  • Inflammatory arthritic conditions such as rheumatoid arthritis, psoriatic arthritis, and ankylosing spondylitis involve an overactive immune system.

Determining the cause of longer-lasting stiffness is important — particularly when it comes to autoimmune conditions, which require more specialized care and treatment.

“When joint stiffness lasts for an hour or more, we often suspect an autoimmune disorder,” says Dr. Elghawy. “When we’re talking about a younger person with long-lasting stiffness, that’s another signal that it’s potentially an autoimmune disorder that needs attention.”

If your morning gel is severe and there’s a question about whether it’s rooted in an autoimmune issue, healthcare providers may run blood tests or remove and examine joint fluid to check for inflammatory cells.

How to prevent stiff joints

The best advice here fits just about every health issue. “It’s so important to adopt a healthy lifestyle,” advises Dr. Elghawy. “You can ease many issues with your joints if you watch your weight, exercise regularly, eat a healthy diet, reduce stress and get proper rest.”

Motion is lotion, too, so staying active will help keep your joints lubricated and working efficiently. Physical therapy and targeted exercises can sometimes be used to reduce joint pain and stiffness.

Over-the-counter pain relievers can also sometimes help ease symptoms connected to osteoarthritis. For autoimmune disorders, prescription medications can be used to calm down inflammation.

“But lifestyle changes often make the biggest difference,” says Dr. Elghawy. “Start small and slowly build up to create good habits.”

Let’s reclaim your mobility together! Our expert team of physical therapists is here to help! Whether it’s targeted exercises, manual therapy, or personalized treatment plans, we’ve got the tools to get you moving with ease. Schedule your appointment today at 949-597-0007. For more inspiration and tips, you can follow us on TikTok and Instagram.


Reference: [https://health.clevelandclinic.org/waking-up-stiff-how-morning-gel-can-affect-your-joints-tips-for-relief/]

Get the VIP Treatment with Premium PT Experience

VIP cash visits bypass traditional insurance providing the patient with more opportunities to work in-depth with their physical therapist. For those who do not have insurance coverage for physical therapy treatments, or for those whose insurance may have run out, Premium PT Experience, our new cash-based program, allows you access to your PT. Cash visits are gaining popularity due to the numerous benefits it offers to both patients and physical therapists. From enhanced personal care, access to different modalities, and extended time with the PT, cash visits open the world of VIP physical therapy treatments.

1. Enhanced Personalized Care:

One of the primary advantages of cash physical therapy visits is the level of personalized attention patients receive. While insurance allows for access to your PT, it may restrict treatment once benefits run out. Cash PT visits allow patients to still receive treatment. Without the constraints imposed by insurance companies, therapists can spend more time with each patient, tailoring treatment plans to their specific needs and goals. This individualized approach often leads to better outcomes and faster recovery times. Some of these benefits include:

  • Specific treatment with extended time focusing on individualized needs
  • Building a closer relationship with your PT increasing trust and helping to expedite progress
  • Assessing individual biomechanics and adjusting therapy according to your needs/goals

2. Faster Access to Treatment:

Insurance-based physical therapy often involves time-consuming administrative processes, including pre-approvals and claim filings. By opting for cash-based visits, patients can bypass these delays and get immediate access to the treatment they need. This timely intervention can prevent conditions from worsening and reduce overall recovery time.

3. Focus on Preventive Care:

Utilizing cash physical therapy treatments allows for an emphasis on preventive care. Therapists can dedicate time to educating patients on injury prevention techniques and strategies for maintaining optimal physical health. This proactive approach can help patients avoid future injuries, reducing the need for extensive treatments down the line.

4. Freedom of Choice:

Choosing cash-based physical therapy grants patients the freedom to select their preferred therapist and clinic without being restricted by a network of providers dictated by insurance companies. This allows patients to find therapists who specialize in their specific condition or who use modalities such as cupping or scraping, depending on the needs of the patient.

5. Transparency in Pricing:

With cash-based physical therapy, patients know exactly what they’re paying for. There are no hidden costs, co-pays, or surprises in the form of denied claims. This transparency allows patients to make informed decisions about their healthcare and budget for their treatments accordingly.

Are you ready for the VIP treatment? With Premium PT Experience, our team can spend more individualized time working towards having you feel better and supporting you in reaching your goals. If you are interested in elevating your physical therapy treatment visit our socials or give us a call at 949.276.5401.

Foam Roller Exercises

Stretching and foam rolling are two powerful tools that can take your fitness journey to the next level. Learn to release muscle tension, improve range of motion, increase blood flow, and promote better recovery. Dive into our valuable insights and practical tips to maximize your fitness potential. If you’re still stuck, come on in and see us! We will give you a customized routine for your pains and show you exactly how to soothe and heal your body.  

FOAM ROLLING  WHAT IS IT EXACTLY?

Fascia is the muscular connective tissue of the body: It holds everything together and acts as an elastic shock absorber. Fascia training with a foam roller or a Blackroll, therefore, plays an important role after your full body workout. Sometimes, intense bodyweight training or a tough running session causes the fascia to dehydrate. As a result, the fascia loses its elasticity and binds down, making the body more prone to injury.

The best times to do foam roller exercises are shortly before your workout and right afterwards, although then it should be slower and longer. Focus on the following body parts:

1. THIGH

Numerous squats and burpees can really take a toll on your quads. You can reduce muscle stiffness by slowly rolling your anterior, medial, and posterior thigh muscles after your workout.

2. LOWER LEG

Your shins and calves also get a pretty good workout when you go running or do bodyweight training. Therefore, don’t forget to foam roll them, too.

3. BACK

Full body training requires strong back and core stability. One way to avoid back pain is to massage these muscles regularly with a fascia roller. But don’t overdo it – make sure to massage slowly and carefully. When it starts to hurt, that’s when you should stop.

ROLL YOURSELF FIT 

Everyone who does physical exercise knows that stretching helps prevent sore muscles — it allows your muscles to recover after an intense workout. All too frequently, however, this knowledge doesn’t make its way into practice. Our daily life is stressful, and there is seldom time for thorough stretching. Taking 5 or 10 minutes for foam roller exercises after the workout is easy to squeeze in and can be really helpful for recovery.

Get ready to optimize your workouts and unleash your body’s true capabilities. Don’t let muscle tightness or limited range of motion hold you back. Choose physical therapy, choose Rausch PT! Contact us today at 949-597-0007 to schedule your consultation. For more helpful tips and information, follow us on Instagram.


Reference: [https://www.runtastic.com/blog/en/stretching/]

Effective Strategies for Back Pain Relief

Are you tired of living with chronic back pain that limits your mobility and affects your quality of life? Surgery may not be the only solution. At Rausch PT, our dedicated team of physical therapists is committed to helping you find relief, regain functionality, and restore your overall well-being. Learn here seven ways to treat chronic back pain without surgery.

Back pain is considered chronic if it lasts three months or longer. It can come and go, often bringing temporary relief, followed by frustration. Dealing with chronic back pain can be especially trying if you don’t know the cause.

Back pain rehabilitation specialist Andrew Nava, M.D. , offers insights into common chronic back pain causes and nonsurgical treatment options—and advises not to give up hope.

Common Causes of Chronic Back Pain

Chronic back pain is usually age-related, but can also result from a prior injury. The most common causes include:

  • Arthritis of the spine —the gradual thinning of the cartilage inside the spine
  • Spinal stenosis —narrowing of the spinal canal that may lead to nerve pain
  • Disc problems, such as a herniated or bulging disc
  • Myofascial pain syndrome—unexplained muscle pain and tenderness

In some cases, it’s difficult to pinpoint the cause of chronic back pain. “If your doctor has exhausted all diagnostic options, it’s time to seek a second opinion from a back pain specialist,” recommends Nava. It’s important not to make rushed decisions or undergo extensive medical procedures until the origin of the pain is found. Not only may they not help; they could make the pain worse, warns Nava.

If the source of the pain is not known or can’t be treated, your best option may be to work with your doctor on reducing the flare-ups and making the pain manageable with nonsurgical treatments.

Nonsurgical Treatments for Chronic Back Pain

  1. Physical Therapy

    Exercise is the foundation of chronic back pain treatment. It’s one of the first treatments you should try under the guidance of your physician and spine physical therapist. However, the same set of exercises doesn’t work for everyone, says Nava. The exercises have to be tailored to your specific symptoms and condition. Maintaining the exercise routine at home is also a big part of success.

    Physical therapy for chronic back pain may include:

    • Retraining your posture
    • Testing the limits of pain tolerance
    • Stretching and flexibility exercises
    • Aerobic exercises
    • Core strengthening
  2. Mindfulness and Meditation

    Chronic back pain is straining both physically and emotionally. To manage the frustration, irritability, depression and other psychological aspects of dealing with chronic pain, you may get referred to a rehabilitation psychologist. This specialist may recommend meditation, yoga, tai chi and othercognitive and relaxation strategies to keep your mind from focusing on pain

  3. Diet

    Some diets are highly inflammatory, especially those high in trans fats, refined sugars and processed foods. Consult with your doctor to see if your diet could be contributing to your chronic back pain and how you could change it. Maintaining a healthy weight could also help lessen your back pain by reducing the pressure on your spine.

  4. Lifestyle Modifications

    When you have chronic pain, it’s important to accept your limitations and adapt. “Listen to your body and learn to pace yourself,” suggests Nava. Take a break when mowing the lawn, or make several trips when carrying groceries. Take note of the activities that worsen your pain and avoid them if possible. Not only could this help your back feel better, it could also prevent the underlying condition from advancing. Another important lifestyle change to try is giving up smoking. Nicotine is scientifically known to accentuate pain and delay healing.

  5. Injection-based Treatments

    Nerve blocks, epidural steroid injections, nerve ablations and other types of injection-based procedures are available for chronic back pain. They are used when the source of the pain is known and can sometimes help rule out certain causes if the treatment doesn’t work. Injections may stop or lessen pain for a certain period of time, but are not intended as long-term solutions and shouldn’t be used in isolation.

  6. Alternative Treatments

    Acupuncture, massage, biofeedback therapy, laser therapy, electrical nerve stimulation and other nonsurgical spine treatments can also make a difference for chronic back pain. Talk to your spine specialist about alternative treatments that could benefit you.

  7. Pharmacologic Treatments

    Analgesics, anti-inflammatory drugs, muscle relaxants and other medications can be used to help control chronic back pain. However, most come with unwanted side effects and are not intended for prolonged use.

    “Opioid medications generally shouldn’t be used as the first, the only or the long-term line of treatment for chronic back pain,” recommends Nava. Many of them are addictive and don’t address the underlying cause of your pain. Opioids should be prescribed only after a thorough exam by a specialist and if other drugs have failed to provide relief. If you find yourself relying on opioids to get through the day, it may be time to seek a second opinion.

Explore non-surgical treatment options for back pain. Our highly skilled physical therapists will assess your condition, develop a personalized treatment plan, and guide you through exercises that target the root causes of your pain. Contact us today at 949-597-0007 to schedule your consultation. And don’t forget to follow us on Instagram for more helpful tips and information on how to stay healthy and pain-free.


Reference: [https://www.hopkinsmedicine.org/health/conditions-and-diseases/back-pain/7-ways-to-treat-chronic-back-pain-without-surgery]

Unleash the Power of Your Elbows

Whether you’re an athlete, a fitness enthusiast, or someone recovering from an injury, understanding the intricate workings of the elbow can empower you to reach new heights of performance and recovery. In this article, we explore the marvels of the elbow joint, including its anatomy, function, and its impact on our overall physical health.

I recently saw a car vanity plate that read “LBODOC” (as in elbow doc). The driver — probably an orthopedic doctor or arthritis specialist — was clearly a fan of the elbow, an unassuming joint and a surprisingly central player in many daily tasks. I could relate: throughout my medical career, the elbow has been my favorite joint.

Here’s why we should give praise to elbows and do all we can to protect them.

What if we didn’t have elbows?

Let’s face it: the human experience would be quite different without elbows.

Imagine your arm without a joint that bends at the elbow. You’d be unable to easily feed yourself, put on makeup, shave your face, or brush your teeth. It’d be tough to get dressed or throw a ball without elbows. And, importantly, wiping yourself after using the bathroom would be nearly impossible.

Yet, when it comes to joints and joint disease, we hear little about elbows; hips and knees get most of the attention. So, let’s consider for a moment what the lowly elbow does and why it deserves more credit.

How do your elbows work?

Three bones come together at the elbow joint: the humerus, which is in the upper arm, and two long bones called the ulna and radius in the lower arm.

Your elbow has two main motions:

  • Flexing and straightening. Flexing your arm allows you to bring your hand toward your body (flexion), which you do when bringing food to your mouth or putting your hands on your hips. Straightening your arm (extension) allows such motions as putting your arm in a shirt sleeve or reaching your toes.
  • Turning up and down. You can also flip your palms from facing the ceiling (supination) to facing the floor (pronation). These motions are important for many common movements, such as turning a key or a doorknob.

Bumping your elbow: Why is it called the funny bone?

Probably for two reasons:

  • The humerus in the upper arm sounds just like the word humorous, meaning funny.
  • Bumping your elbow often puts pressure on the ulnar nerve, since it’s located between the bones of the joint. Pressure on this nerve can cause a funny tingling sensation that runs down your arm.

Elbow trouble: Four well-known problems — and a surprising fifth

Like so many overlooked and underappreciated things, most people think little about their elbows until something goes wrong. Here are some of the most common elbow problems:

  • Arthritis. Several types of arthritis can affect the elbow, including rheumatoid arthritis, psoriatic arthritis, and gout. Interestingly, the most common type of arthritis, osteoarthritis, doesn’t usually affect the elbow unless there’s been prior damage to the joint.
  • Bursitis. The bursa is a saclike structure that surrounds the tip of the elbow. Bursitis develops when it becomes swollen or inflamed, due to infection, gout, or bleeding.
  • Tendonitis. Tendon inflammation (tendonitis) may develop on the inside part of the elbow (called “golfer’s elbow”) or the outside (called “tennis elbow”). Despite these names, you don’t have to play any particular sport to develop elbow tendonitis.
  • Trauma. Everyday activities and athletic pursuits put the elbow at risk. A bike accident, falling off a skateboard, or just tripping on a curb and falling onto your arm can cause significant elbow injuries. These include ligament damage, broken bones, or bursitis.

And the surprising fifth problem? Cell phone-induced nerve irritation: holding your elbow bent for a long time can lead to “cell phone elbow” due to pressure on the ulnar nerve. This can cause numbness and pain down the arm. The solution? Put the phone down — or at least go hands-free.

How can you protect your elbows?

Considering all our elbows do for us, we need to do our best to protect them. That means:

  • Wear elbow protectors when engaging in activities likely to injure the elbows (like skateboarding or roller blading).
  • Learn proper technique for activities that can stress the elbow like racquet sports, baseball, weight training, or repetitive motions in carpentry and other types of work. For example, a trainer or coach can help you improve your tennis stroke to avoid overstressing the elbow joint and its tendons or ligaments.
  • Use appropriate equipment. For example, avoid using a tennis racquet that’s too heavy for you.
  • Train well. Strengthening forearm muscles and stretching can help avoid golfer’s elbow.

The bottom line

As the junction between hand and shoulder, our elbows play a pivotal role in everyday function. It’s high time we recognized them for what they do for us. Even if the elbow isn’t your favorite joint — as it is for me — perhaps it should be in your top five. After all, think of all the things you couldn’t do without them.

Ready to unlock the full potential of your elbow and transform your physical well-being? Don’t let elbow pain or limitations hinder your lifestyle. Take charge of your health with Rausch PT and experience the benefits of specialized PT care. Contact us today at 949-597-0007 to schedule a consultation and join our Instagram community @rauschpt. Follow us on TikTok for exclusive content.


Reference: [https://www.health.harvard.edu/blog/give-praise-to-the-elbow-a-bending-twisting-marvel-202305242938]